

The Pope came to Philly last weekend, and the whole city was on vacation (#Popecation). Highways, bridges, city streets, and most of the public transit system around here was shut down for three days. Anne’s school had a “cyber day” on Friday, and I was home from work. Although millions gathered to see the Pope and hear him speak downtown, we ultimately decided to go into full-on hibernation mode and work on our new apartment. There was a lot to be done!
In preparation for the Pope’s visit, Anne and I bought our first power tool: Ryobi Reconditioned 5.5-Amp 3/8 in. Corded Variable Speed Reversing Compact Clutch Driver. We know what approximately three of those words mean, but I now go by the nickname Ryobi-Wan Kenobi regardless. We were really excited about it because: 1) it came with a matching tool bag to store it in, and 2) we’ve wanted to put up picture ledges for a really long time. It never happened in our last apartment because our walls were practically cement, so hanging anything was always such a headache.
If you’ve been thinking about buying an electric drill/driver, but haven’t known what kind, style, or brand to get, look no further. The Ryobi we purchased from Home Depot was the perfect tool for our job, and we are really excited to continue using it for other projects we have in mind. It was incredibly affordable and easy to use.
DIY Picture Ledges
Materials:
- Ryobi drill/driver
- 2 IKEA picture ledges
- Stud Find app
- Level app
- Washi tape
- Tape measure
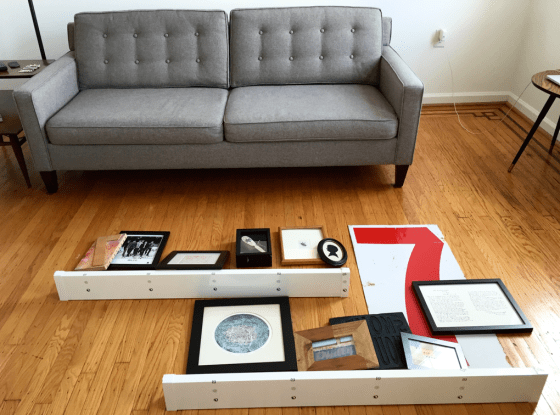
Step 1: Gather all of the items you are thinking about displaying on your ledges. On the floor, test out possible layouts, and determine the height you’d like between the ledges.
Step 2: Choose what wall the ledges will be hung on. Use the Stud Find app to locate all of the studs in that region, and use washi tape to mark the found studs. Using studs to anchor your ledges, rather than just patches of drywall, will make them more secure.

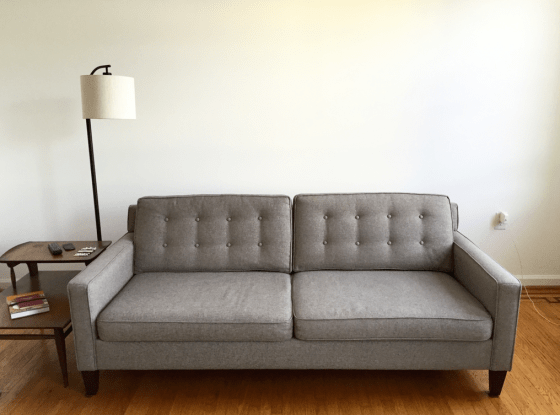
Step 3: Make sure your couch, lamp, and side table, etc. are in their usual spots. Mark the floor with washi tape to know where to put the furniture back later. With that complete, decide how high above the couch you want to hang the lower ledge. Note that it should be at least 8-10 inches higher than the back of the couch.
Step 4: Align the three holes in the bottom ledge with the marked studs in the wall. Use the Ryobi to drill in the middle screw. Then, use the Level app to make sure the ledge is level before driving in the second and third screws. (This step definitely calls for two people. Invite a friend over to help, or work together with your significant other or roommate.)

Step 5: Test the height of your items on the ledge. Add 4-6 inches of wall space above the tallest item to know how high to make the next ledge. Repeat Step 4.

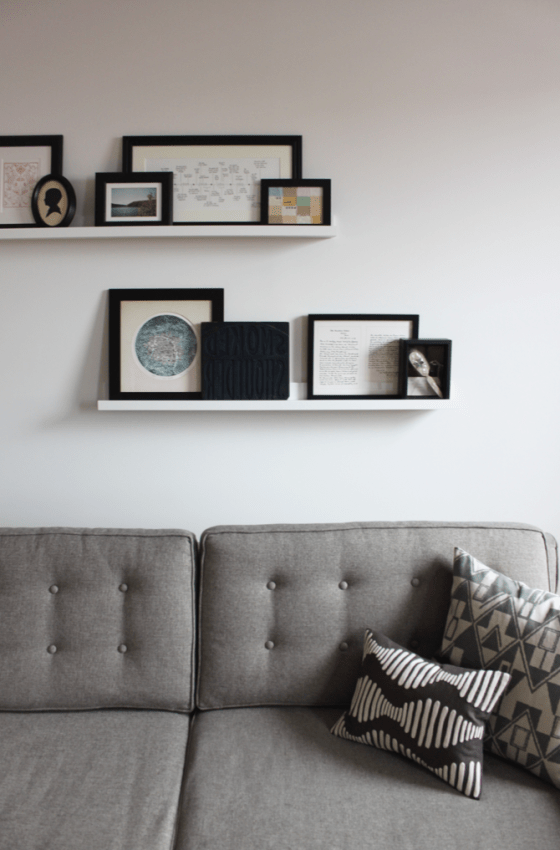
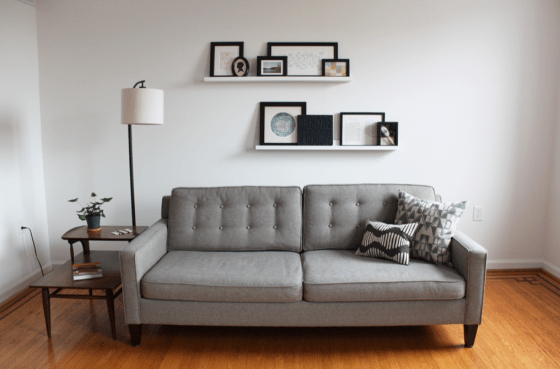
Step 6: Once both ledges are securely drilled into the studs, step back and congratulate yourself. You did it! It’s time to fill your ledges with frames and other mementos. Here are three tips Anne and I thought up to help create a beautiful display:
- Choose a color scheme. With so many items close together, things can start to look hairy pretty quickly. We decided on black, white, and blue (with a few small pops of color). Common colors will help everything look a bit more refined and cohesive.
- Choose frames with varying heights to add visual interest.
- Layer your frames. They are begging to be layered! Set one frame slightly over another to create a more chock-full look.


This project took us three hours from start to finish. Not bad, all things considered! It was our first project with Ryobi, and I honestly can’t wait for the next. The Stud Find app is also a lot of fun to use. We found ourselves checking for studs all over the apartment, just because it was so fun to hear the “ding” go off. What a thrill!
We’re excited to have installed something permanent in our apartment that will allow us the flexibility to alter our display. I like knowing that we can always add in new finds, or swap items out for different seasons. Installing these ledges was a big first step in settling in here, and I can’t wait to see how they will change over time.

Hi what type of anchors and screws did you use?
We used 2″ screws and plastic anchors to fit!
Pingback: 35+ Apartment Living Room Ideas To Inspire Your Design | Shutterfly
Pingback: 30+ Design Ideas for Bright and Colorful Living Room Lovers — Goodness Beauty
Pingback: 35+ Apartment Living Room Ideas To Inspire Your Design - Vandar.info