Today’s blog post comes to us from my friend and fellow crafter, Rebecca Landman. Rebecca and I met in college in upstate New York, and while she lives in California and I live in Chicago now, I’ve been following her crafting endeavors on social media for some time. She is a real inspiration, both because of the creativity in her work and because she isn’t afraid to tackle big projects that demand problem solving and patience. #creativethoughtmatters
Be sure to follow Rebecca on Instagram to see her latest macramé and natural dyeing creations. They are absolutely beautiful!
From Rebecca: Macramé found me via frustration. My partner Chris and I had just moved into a new apartment. I was desperate to decorate our barren living room with some sort of cozy, textured wall hanging. Weavings, macraméd pieces, whatever! I wasn’t being picky.
But Chris saw this move as my opportunity. He’d just watched me finish crocheting my third blanket. He’d seen me obsess over weavings and macraméd pieces for basically forever. He’d developed this unwavering confidence in my creativity. A confidence I’d never really been able to wrangle in myself before. So each time I’d lust all hot and bothered (hi there, frustration) after something on Etsy or at basically any LA boutique in my general vicinity, he’d lightly remind me that I was a designer. I was a maker. I could easily create something even more beautiful. Our perfect something.
Me? Me? I’m not sure. I don’t think so! But no, Chris knew so. He believed in me. His steady stream of confidence slowly started making its way into my mind. Hmm. Well, maybe I could at least try.
I took a beginner macramé class and then another class on natural dyeing. Soon, I was buying rope by the yard, spending hours each night searching the web for all sorts of different natural dyeing techniques, and following along with as many YouTube knot-tying tutorials as my little hands could bare. Rope burn is real, people. You have been warned.
But guess what? Chris was right. I could totally make that.
A year and a half later I’ve started an Etsy shop, created a few wall hanging patterns I love, and have scheduled macramé in as a regular part of my daily routine. The following pattern is one of my favorites I’ve been making thus far.
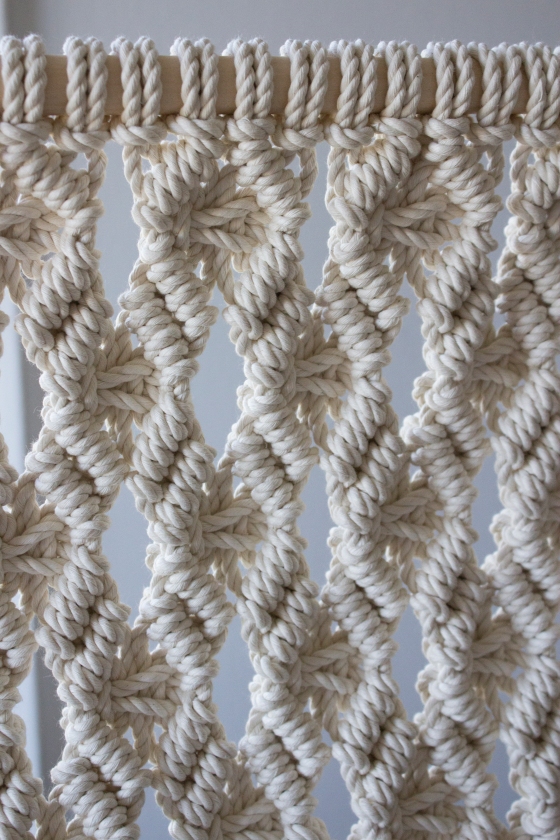
DIY Diamond Macramé Wall Hanging
Materials:
- 250 feet of 3/16″ organic cotton rope, available here
- 7/8” wooden dowel, at least 17″ long
- Masking tape
- Sand paper
- Hand saw
- Tape measure
- Scissors
- Clothing rack
- Two s-hooks
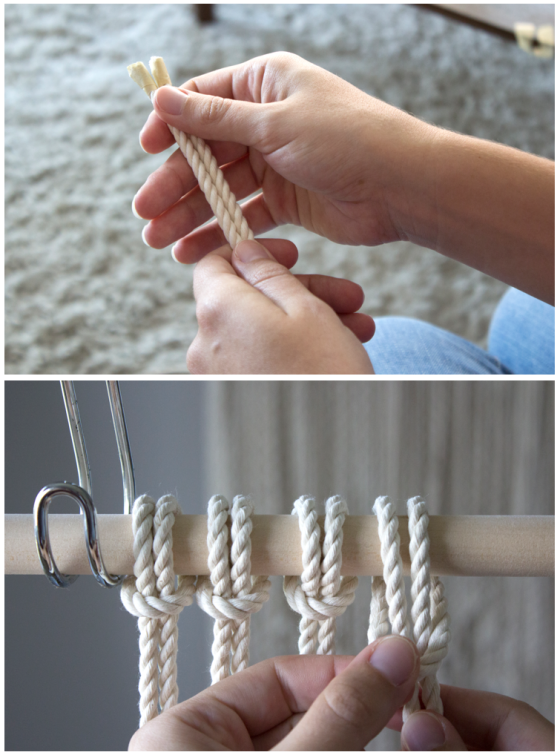
Step 1: Cut 20 pieces of rope, 150″ long each. Secure each loose end of rope with masking tape.
Step 2: Place the s-hooks on your clothing rack and your wooden dowel on the s-hooks.
Step 3: Cast each piece of rope onto your dowel by folding the rope in half, threading the looped fold over the dowel, pulling both ends of the folded rope through the loop, and pulling tight. Starting from the left-hand side of your dowel, label each of your working ropes by number on the masking tape. #1 will be your left-most rope and #40 your right-most rope.
*From this point on, think of each half piece of rope as its own entity — so each long, 150-inch piece of rope you halved and looped over the dowel is now two distinct pieces of working rope.*
Step 4: Pull the fourth rope from the left-hand side of your work diagonally to the left across the three ropes directly to its left. Take the piece of rope to its left (Rope 3) and place it over and around Rope 4. Pull it tight to make a knot, all the while holding Rope 4 at that diagonal. Repeat for a second knot with Rope 3.
Step 5: Repeat Step 4 with each of the two ropes to the left of Rope 3 (Ropes 2 & 1). Now you’ve tied your first row of diagonal clove hitch knots!
Step 6: Pull the fifth rope from the left-hand side of your work diagonally to the right across the three ropes directly to its right. Take the piece of rope to its right (Rope 6) and place it over and around Rope 5 (the opposite way you went in Step 4). Pull it tight to make a knot, all the while holding Rope 5 at that diagonal. Repeat for a second knot with Rope 6.
Step 7: Repeat Step 6 for each of the two ropes to the right of Rope 6 (Ropes 7 & 8), thus completing your second row of diagonal clove hitch knots.
Step 8: Leave your two outer ropes in the eight-rope set be (Ropes 4 & 5), and make a square knot tying Ropes 1 & 8 around Ropes 2, 3, 6, and 7. To do so, wrap Rope 1 around the front of your four central ropes while simultaneously wrapping Rope 8 around the back. Holding each rope loosely wrapped around the four central ropes, you’ll see that you created two loops on either side of the central ropes. Thread the end of Rope 1 through the right-hand loop front to back while threading Rope 8 through the left-hand loop back-to-front. Pull tight to secure. Now reverse it — thread Rope 1 back across the front of the four central ropes and Rope 8 back around the back. Thread through their respective loops, now in the opposite direction as the knot you just tied. Pull tight and your first square knot is complete!
Step 9: Finish off your diamond with a row of diagonal clove hitch knots along the bottom, again using Ropes 4 & 5 as your diagonal anchor ropes.
Step 10: Repeat Steps 4-9 for each of the four sets of four working ropes along your dowel.
Step 11: Tie a second line of diagonal clove hitch knots right underneath your knots from Step 9, using each diamond’s new outer ropes as your anchor ropes.
Step 12: Tie square knots like you did in Step 8 in between each new set of diagonal clove hitch knots.
Step 13: For the sides of your work — the ones where you can’t make a full diamond — you can create a half diamond. Leave the anchor rope from the previous set of diagonal clove hitch knots be, and you will have three working ropes. Take the two outer ropes of the three and tie a square knot around the single central rope. Line it with two lines of diagonal clove hitch knots just like the full diamonds.
Step 14: Continue tying these diagonal clove hitch/square knot diamonds until you’ve got five rows’ worth ending in a single row of diagonal clove hitch knots. Or keep going! Or stop earlier! You do you. I also like to finish my final row of diagonal clove hitch knots using one of my anchor ropes as a working rope and tying the two sides together. I do this in the same direction for each of my five diamonds.
Step 15: Once you’ve reached your happy tying conclusion, it’s time to trim and unravel. Cut your remaining rope into any shape you’d like. I chose a triangular shape, but you could also do a straight line, a zig zag, or something more organic.
Step 16: Use your fingers to unravel the strands of rope up until you reach the last knot you tied. Trim and shape the unraveled rope as necessary.
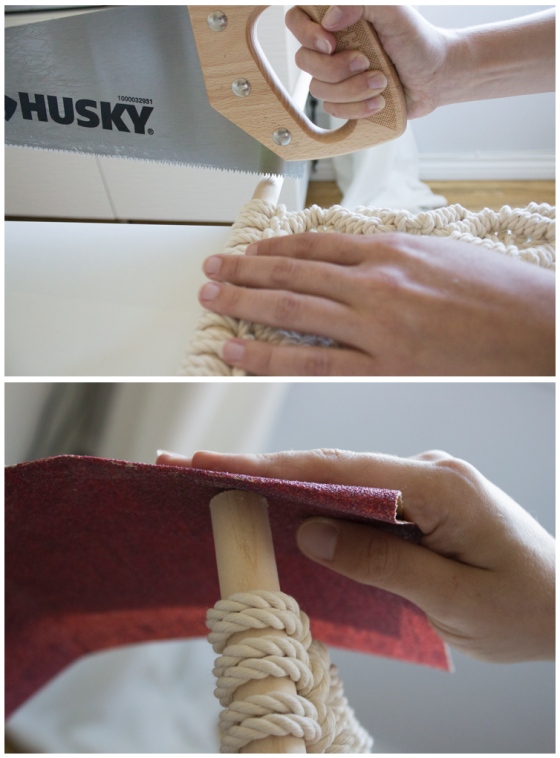
Step 17: Depending on how long your dowel is, if it needs a trim, now’s the time. Situate your final piece exactly how you’ll like it on the dowel, and trim down the sides with a hand saw.
Step 18: Sand the dowel edges for a nice clean finish.
Step 19: Hang on the wall and enjoy! You can either fashion a hanger out of some rope or thinner cord, or screw a few c-hooks into your wall and rest the dowel on those.
I never intentionally set out to create this pattern. I’d actually been stuck for weeks trying to work out a different design. No matter how hard I worked that different design, though — tied, untied, retied, tried this, tried that — it just wasn’t working (oh hey there, frustration. Missed you, girl). Suddenly, macramé wasn’t feeling fun. It was feeling daunting. I needed to put my impossible idea down for a second, quiet all this anxiety I was now feeling over honestly just a pile of rope, and let myself play.
Allowing myself space to play gave this diamond design its opportunity to emerge. Instead of forcing whatever farfetched idea wasn’t bending to my will, I let go and trusted that something easier would come. And it did! Not only have I gleaned this satisfying pattern from my play time, but I’ve also learned to be gentler with my process — with myself. Now, I leave myself more room to breathe, think, try and try again.
Please gift yourself this same luxury. You can do it. You can make that. I know you can.


If it’s not a challenge it’s no fun. Beautiful artwork. How do you remember all those knots?
Beautiful and creative!!!
Sent from my iPhone
>
Amazing, what a wonderful story! And really, really beautiful pieces!
Pingback: Links I Love from October | The Links Site
Pingback: 53 Christmas Stocking Stuffer Ideas
Pingback: 55 Bridesmaid Gift Ideas for Your Girl Squad | Sutterfly
Ok Im going to have a go at this wish me luck xx oh I cant wait to start
Thankyou so much for your detailed pattern xx
Pingback: 55 ý tưởng quà tặng phù dâu cho đội nữ của bạn – Nội thất Xe hơi