Macramé with Rebecca Landman

diamondstitch_27

Today’s blog post comes to us from my friend and fellow crafter, Rebecca Landman. Rebecca and I met in college in upstate New York, and while she lives in California and I live in Chicago now, I’ve been following her crafting endeavors on social media for some time. She is a real inspiration, both because of the creativity in her work and because she isn’t afraid to tackle big projects that demand problem solving and patience. #creativethoughtmatters

Be sure to follow Rebecca on Instagram to see her latest macramé and natural dyeing creations. They are absolutely beautiful!

diamondstitch_28

From Rebecca: Macramé found me via frustration. My partner Chris and I had just moved into a new apartment. I was desperate to decorate our barren living room with some sort of cozy, textured wall hanging. Weavings, macraméd pieces, whatever! I wasn’t being picky.

But Chris saw this move as my opportunity. He’d just watched me finish crocheting my third blanket. He’d seen me obsess over weavings and macraméd pieces for basically forever. He’d developed this unwavering confidence in my creativity. A confidence I’d never really been able to wrangle in myself before. So each time I’d lust all hot and bothered (hi there, frustration) after something on Etsy or at basically any LA boutique in my general vicinity, he’d lightly remind me that I was a designer. I was a maker. I could easily create something even more beautiful. Our perfect something.

Me? Me? I’m not sure. I don’t think so! But no, Chris knew so. He believed in me. His steady stream of confidence slowly started making its way into my mind. Hmm. Well, maybe I could at least try.

I took a beginner macramé class and then another class on natural dyeing. Soon, I was buying rope by the yard, spending hours each night searching the web for all sorts of different natural dyeing techniques, and following along with as many YouTube knot-tying tutorials as my little hands could bare. Rope burn is real, people. You have been warned.

But guess what? Chris was right. I could totally make that.

A year and a half later I’ve started an Etsy shop, created a few wall hanging patterns I love, and have scheduled macramé in as a regular part of my daily routine. The following pattern is one of my favorites I’ve been making thus far.

DIY Diamond Macramé Wall Hanging

diamondstitch_25

Materials:

  • 250 feet of 3/16″ organic cotton rope, available here
  • 7/8” wooden dowel, at least 17″ long
  • Masking tape
  • Sand paper
  • Hand saw
  • Tape measure
  • Scissors
  • Clothing rack
  • Two s-hooks

1:2

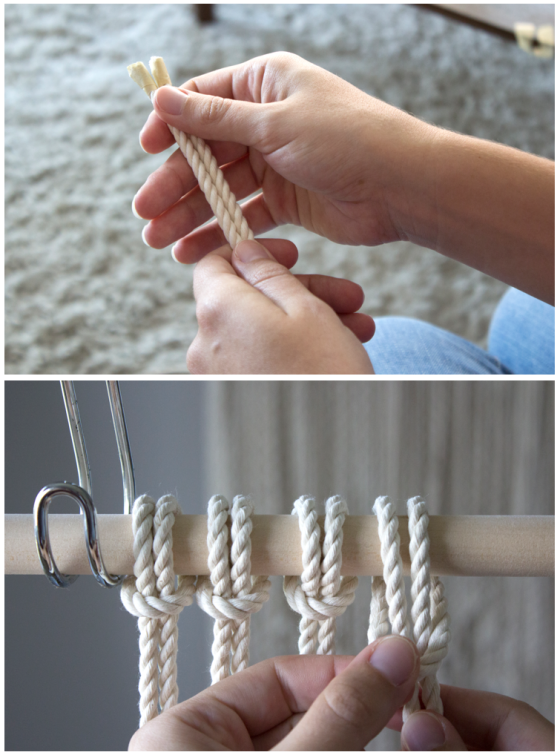
Step 1: Cut 20 pieces of rope, 150″ long each. Secure each loose end of rope with masking tape.

Step 2: Place the s-hooks on your clothing rack and your wooden dowel on the s-hooks.

Step 3: Cast each piece of rope onto your dowel by folding the rope in half, threading the looped fold over the dowel, pulling both ends of the folded rope through the loop, and pulling tight. Starting from the left-hand side of your dowel, label each of your working ropes by number on the masking tape. #1 will be your left-most rope and #40 your right-most rope.

*From this point on, think of each half piece of rope as its own entity — so each long, 150-inch piece of rope you halved and looped over the dowel is now two distinct pieces of working rope.*

3:4

Step 4: Pull the fourth rope from the left-hand side of your work diagonally to the left across the three ropes directly to its left. Take the piece of rope to its left (Rope 3) and place it over and around Rope 4. Pull it tight to make a knot, all the while holding Rope 4 at that diagonal. Repeat for a second knot with Rope 3.

Step 5: Repeat Step 4 with each of the two ropes to the left of Rope 3 (Ropes 2 & 1). Now you’ve tied your first row of diagonal clove hitch knots!

5:6

Step 6: Pull the fifth rope from the left-hand side of your work diagonally to the right across the three ropes directly to its right. Take the piece of rope to its right (Rope 6) and place it over and around Rope 5 (the opposite way you went in Step 4). Pull it tight to make a knot, all the while holding Rope 5 at that diagonal. Repeat for a second knot with Rope 6.

Step 7: Repeat Step 6 for each of the two ropes to the right of Rope 6 (Ropes 7 & 8), thus completing your second row of diagonal clove hitch knots.

7:8

Step 8: Leave your two outer ropes in the eight-rope set be (Ropes 4 & 5), and make a square knot tying Ropes 1 & 8 around Ropes 2, 3, 6, and 7. To do so, wrap Rope 1 around the front of your four central ropes while simultaneously wrapping Rope 8 around the back. Holding each rope loosely wrapped around the four central ropes, you’ll see that you created two loops on either side of the central ropes. Thread the end of Rope 1 through the right-hand loop front to back while threading Rope 8 through the left-hand loop back-to-front. Pull tight to secure. Now reverse it — thread Rope 1 back across the front of the four central ropes and Rope 8 back around the back. Thread through their respective loops, now in the opposite direction as the knot you just tied. Pull tight and your first square knot is complete!

9:10

Step 9: Finish off your diamond with a row of diagonal clove hitch knots along the bottom, again using Ropes 4 & 5 as your diagonal anchor ropes.

11:12

Step 10: Repeat Steps 4-9 for each of the four sets of four working ropes along your dowel.

13:14

Step 11: Tie a second line of diagonal clove hitch knots right underneath your knots from Step 9, using each diamond’s new outer ropes as your anchor ropes.

Step 12: Tie square knots like you did in Step 8 in between each new set of diagonal clove hitch knots.

15:16

Step 13: For the sides of your work — the ones where you can’t make a full diamond — you can create a half diamond. Leave the anchor rope from the previous set of diagonal clove hitch knots be, and you will have three working ropes. Take the two outer ropes of the three and tie a square knot around the single central rope. Line it with two lines of diagonal clove hitch knots just like the full diamonds.

17:1819:20

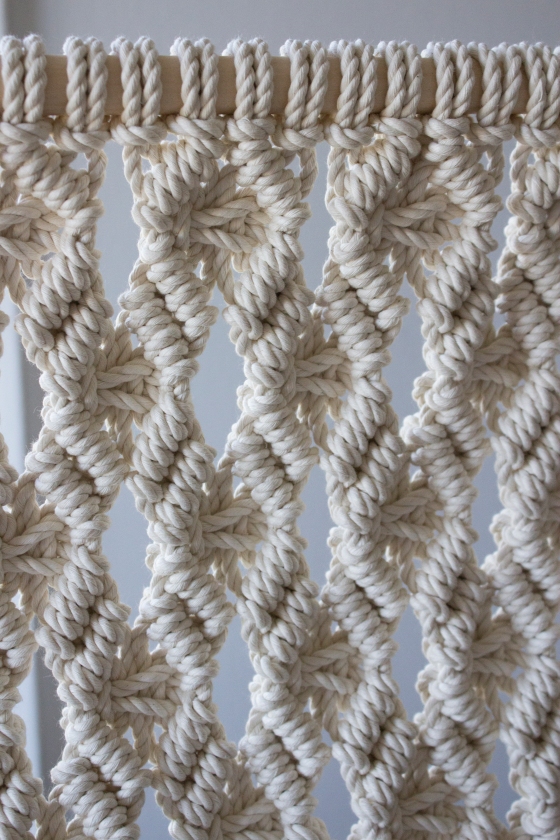
Step 14: Continue tying these diagonal clove hitch/square knot diamonds until you’ve got five rows’ worth ending in a single row of diagonal clove hitch knots. Or keep going! Or stop earlier! You do you. I also like to finish my final row of diagonal clove hitch knots using one of my anchor ropes as a working rope and tying the two sides together. I do this in the same direction for each of my five diamonds.

Step 15: Once you’ve reached your happy tying conclusion, it’s time to trim and unravel. Cut your remaining rope into any shape you’d like. I chose a triangular shape, but you could also do a straight line, a zig zag, or something more organic.

21:22

Step 16: Use your fingers to unravel the strands of rope up until you reach the last knot you tied. Trim and shape the unraveled rope as necessary.

23:24

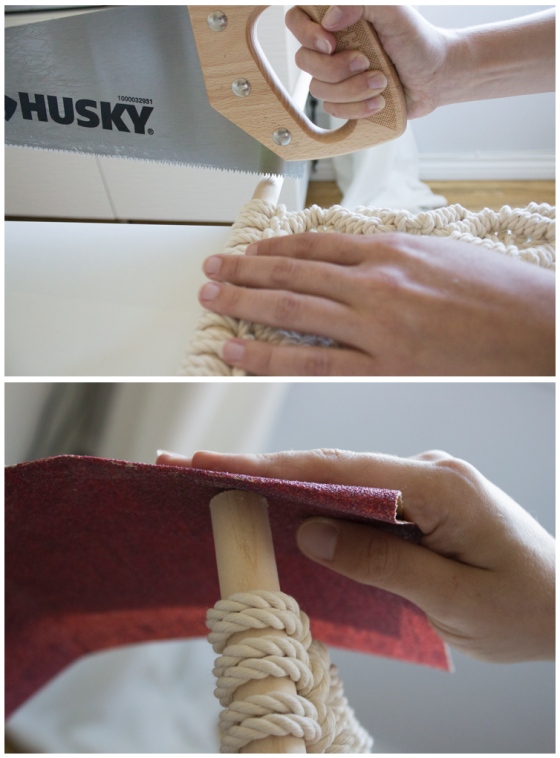
Step 17: Depending on how long your dowel is, if it needs a trim, now’s the time. Situate your final piece exactly how you’ll like it on the dowel, and trim down the sides with a hand saw.

Step 18: Sand the dowel edges for a nice clean finish.

Step 19: Hang on the wall and enjoy! You can either fashion a hanger out of some rope or thinner cord, or screw a few c-hooks into your wall and rest the dowel on those.

diamondstitch_26

I never intentionally set out to create this pattern. I’d actually been stuck for weeks trying to work out a different design. No matter how hard I worked that different design, though — tied, untied, retied, tried this, tried that — it just wasn’t working (oh hey there, frustration. Missed you, girl). Suddenly, macramé wasn’t feeling fun. It was feeling daunting. I needed to put my impossible idea down for a second, quiet all this anxiety I was now feeling over honestly just a pile of rope, and let myself play.

Allowing myself space to play gave this diamond design its opportunity to emerge. Instead of forcing whatever farfetched idea wasn’t bending to my will, I let go and trusted that something easier would come. And it did! Not only have I gleaned this satisfying pattern from my play time, but I’ve also learned to be gentler with my process — with myself. Now, I leave myself more room to breathe, think, try and try again.

Please gift yourself this same luxury. You can do it. You can make that. I know you can.

All photos taken by Rebecca Landman

5 Things to Make by Hand

It’s beginning to really feel like fall in Chicago, and it has me itching to dig into some cozy craft projects in the coming months. To me, cooler weather is optimal crafting time. We inevitably spend more time indoors in fall and winter, and I’ve got to do something to prevent myself from going to bed by 8 o’clock when the sun sets so early. (I’m dreading daylight savings.)

Today I thought I’d share a few projects that I’ve been eyeing online as ones I’d like to try. Maybe they’ll inspire you to make something with your hands, too! Enjoy 🙂

Cowl via Purl Soho

newsprint-cowl-600-11

When it comes to knitting, I don’t often stray too far from basic patterns. One of my goals is to branch out a bit more and try different techniques and styles. This cowl pattern from Purl Soho seems like a nice way to do that. It should be simple enough that I’ll have success, but will result in a pattern I’ve never tried before. Plus, I have the perfect two colors to try it with.

Orange Spiced Sugar Cookies via This Mess is Ours

orange_sugar_cookie-7-of-7

Nothing says fall/winter quite like citrus and spices. These cookies caught my eye as ones I’d like to bake. I ❤ cookies.

Homemade Seed Packets via Idlewife

DSC05624a

As Anne’s mom’s garden has come to an end for the season, I’ve found myself having this urge to save seeds from this year’s flowers. Being that our wedding flowers came from her garden in July, they have an extra special place in my heart. I’m especially excited for our hyacinth, strawberry corn, sunflower, and millet seeds. These seed packets are the perfect way to save them for next year!

Embroidered Alphabet Sampler via Purl Soho

learn-to-embroider-alphabet-600-4

I actually have this project waiting patiently in the wings for me. I received it as a Christmas gift last year and embarrassingly haven’t gotten to trying it yet. This sampler teaches you a wide variety of stitches, and being that I’ve never done embroidery before, this should be a good way to learn!

Mozzarella Sticks via Food52

1fc7aef5-78f8-497d-a687-2f663f7573ed--2017-0207_how-to-make-mozzarella-sticks_alpha-smoot_328

Food52 claims that these homemade mozzarella sticks are better than anything you will find in a grocery store (duh), pool, bowling alley, or roller rink. One tip I didn’t know? Freeze them before frying them to insure the cheese doesn’t ooze out from beneath the breading. I am certainly going to give these a try. If they work out as well as they say it does, you’ll most likely be able to hear me shrieking from wherever it is that you are.

It’s a good thing that Chicago’s winters are long. I’ve got a lot of projects to try in the next six months! How do you spend your free time in fall and winter? What are some things you’re hoping to try or get done while the days are shorter and the weather is cooler?

Lessons From My Houseplants

I often think about how much I learn from my houseplants. I learn how to take care of them and keep them alive, yes, but I also learn patience, the importance of routine and reliability, amongst other things. Tending to plants is a great exercise in mindfulness. Each time I water my houseplants I check to see if they could use fertilizer, pruning, more adequate drainage, etc. Is there something that is hindering their growth? Without the natural elements, houseplants rely on humans to keep them alive. I’ve learned a lot from growing plants over the past few years, and here are some takeaways I thought I’d share with you today.

Everything has its season.

Over the course of Scissors & Sage’s three years, I’ve tended to slow down or take a break from writing in summer months. Sometimes I feel guilty about this, that I’m neglecting the blog, or that the break will turn into something more permanent. I don’t want it to be a project I’ve forgotten about. I’ve learned, though, that everything has its season. No plant grows consistently through all four seasons. Its growth depends on other variables like temperature, sunlight, and watering patterns. We’re instructed to ease up on fertilizing plants during winter months–they don’t need as many nutrients as they do when they’re producing flowers or growing more quickly in summer. We’re meant to ebb and flow, to move at different paces throughout the changing seasons. It’s okay.

We each need a different set of optimal growing conditions to thrive.

Some plants like a lot of sun. Others would have burned leaves if placed in that much direct light. Some like high humidity, while others prefer a desert-like environment. Like plants, we all need different things in order to thrive. I’d prefer bright light and dry air, personally. Maybe somewhere near water. I feel my best when I have routine sleep, breakfast every morning, and time to unwind each night. I can survive without these things, sure, but I’m bound to get a metaphorical yellow leaf here or there if it keeps up for too long.

Change and growth happen every day.

…Even if we can’t see it. It’s really incredible to watch plants grow each and every day. I enjoy watching my plants turn toward the sun, perk up after being watered, and sprout new leaves and flowers. There are few things more satisfying than watching something grow that you’ve tended to. Even if you can’t see each change happening each day, you can notice the differences from week-to-week or month-to-month, and know that those little things add up to become something great.

Never underestimate the importance of vitamin D.

Need I say more?

How do you ebb and flow throughout the year? What optimal growing conditions do you need in order to thrive? How do you see change and growth happening every day/week/month/year?

Picking Favorites: Warm Weather iPhone Wallpapers

Pinterest 1

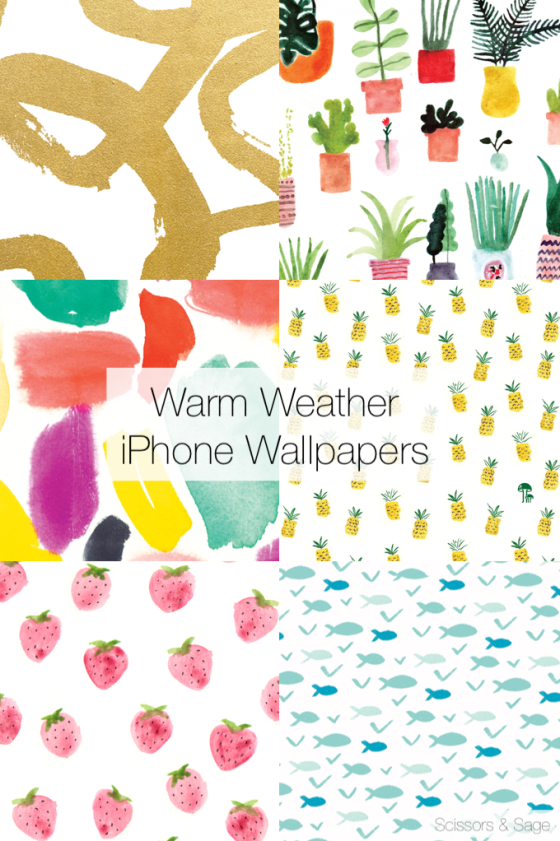
My iPhone wallpaper is not something I usually think about. I find one I like — typically an image that Apple provides — and keep it for a year or more without even batting an eyelash. There are more pressing matters to worry about, no? I started to think about my wallpaper, though, when West Elm posted an Instagram photo of two new free wallpapers they designed. They were so cute that I instantly downloaded them. Now I see cute little blue fish when I check the time on my lock screen! Anything to get me in the mindset of sun and warmth.

This inspired me to round up other wallpapers from across the Internet. I knew there had to be more fun ones out there. Below you’ll find all kinds of images to welcome the (finally) warmer weather and get you ready for beach/swimsuit/bbq/picnic season.

Do you have a favorite iPhone wallpaper? Which is your favorite here? Below you’ll find directions for setting up your new wallpaper.

Watercolor

Strokes from ban.do

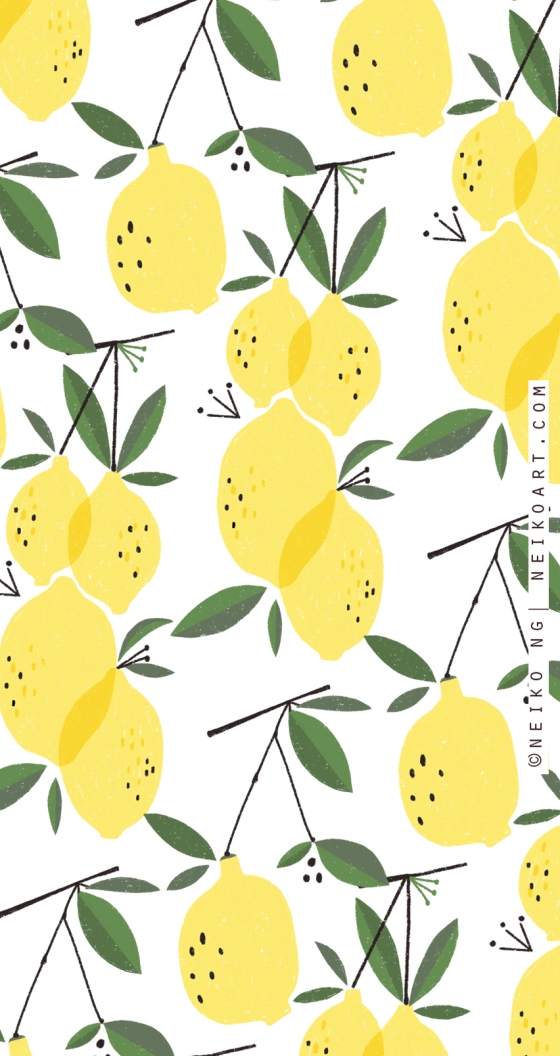
Lemons

Lemons from Neiko Ng

Mermaids Don't Cry

Mermaids from ban.do

Leaves

Leaves from Leah Goren

Pineapples

Pineapples from ModCloth

Clouds

Clouds from Yao Cheng

Watermelons

Watermelons from Wonder Forest

Watercolor Plants

Plants from ban.do

Watercolor Strokes

Watercolor from Lines Across

Swirls

Swirls from ban.do

Processed with VSCO with m5 preset

Flamingos from West Elm

Summer Fun

Summer Fun from ban.do

Processed with VSCO with m5 preset

Fish from West Elm

Strawberries

Strawberries from The Wonder Forest

Found a favorite? Here’s how it works.

If you’re reading this from your computer | Click on the image you’d like to use. Download it to your desktop, and then email or text it to your phone. Open the image on your phone, and save it to your camera roll. Open Settings > Wallpaper > Choose a New Wallpaper > Camera Roll. Select the image, move and scale it however you’d like, and make sure Still is highlighted (rather than Perspective). Click Set.

If you’re reading this from your phone/tablet | Click on the image you’d like to use. Press and hold and then click Save Image. Open Settings > Wallpaper > Choose a New Wallpaper > Camera Roll. Select the image, move and scale it however you’d like, and make sure Still is highlighted (rather than Perspective). Click Set.

Enjoy!

DIY Address Book

One of the things that is most vivid in my mind from childhood is the address book my parents kept in the kitchen drawer. The outside was covered in a patterned green paper, tattered around the edges from decades of use, and the inside was kind of hairy — business cards and scraps of paper with phone numbers written down were tucked between the already-full pages. Names and addresses had been written and rewritten as people moved or as someone got a cell phone for the first time.

Only now am I realizing how important it is to have a book like this, filled over years with friends and family we can reach out to. These days, it seems like community networks are growing smaller and smaller. This was not the case when I was growing up. Maybe it’s a symptom of being twenty-something.

But who has an address book these days? Everything is in “the cloud,” and I’m still trying to figure out what that means exactly. Information is scattered between apps and devices, and conveniently vanishes when I go looking for it. It is high time for our very first address book.

If there’s one thing you can find many of in our apartment, it’s blank notebooks. I can’t say why, exactly, but we just have this thing for notebooks. Obviously, I wasn’t about to go out and buy an address book when I’m sitting on gold. Time to DIY!

DIY Address Book

Materials:

  • Blank notebook with about 80 pages
  • Letter stickers
  • Colored paper
  • Double-sided tape
  • Scissors

Step 1: Stick each letter on different colors of paper. Cut out the colored paper so that there is a small border around the letter.

Step 2: Line up the alphabet along the edge of the notebook to decide on spacing. Use double-sided tape to adhere the colored paper to the inner edge of the notebook. (Note: It’s up to you how many pages each letter gets. I gave mine anywhere from 1-4 pages, depending on the letter.)

Step 3: Get creative with a title page!

That’s really all there is to it. It was a fun project, and one that we’ll be reaping the benefits of for a long time to come. Here’s to building community. Happy crafting!