Lessons From My Houseplants

I often think about how much I learn from my houseplants. I learn how to take care of them and keep them alive, yes, but I also learn patience, the importance of routine and reliability, amongst other things. Tending to plants is a great exercise in mindfulness. Each time I water my houseplants I check to see if they could use fertilizer, pruning, more adequate drainage, etc. Is there something that is hindering their growth? Without the natural elements, houseplants rely on humans to keep them alive. I’ve learned a lot from growing plants over the past few years, and here are some takeaways I thought I’d share with you today.

Everything has its season.

Over the course of Scissors & Sage’s three years, I’ve tended to slow down or take a break from writing in summer months. Sometimes I feel guilty about this, that I’m neglecting the blog, or that the break will turn into something more permanent. I don’t want it to be a project I’ve forgotten about. I’ve learned, though, that everything has its season. No plant grows consistently through all four seasons. Its growth depends on other variables like temperature, sunlight, and watering patterns. We’re instructed to ease up on fertilizing plants during winter months–they don’t need as many nutrients as they do when they’re producing flowers or growing more quickly in summer. We’re meant to ebb and flow, to move at different paces throughout the changing seasons. It’s okay.

We each need a different set of optimal growing conditions to thrive.

Some plants like a lot of sun. Others would have burned leaves if placed in that much direct light. Some like high humidity, while others prefer a desert-like environment. Like plants, we all need different things in order to thrive. I’d prefer bright light and dry air, personally. Maybe somewhere near water. I feel my best when I have routine sleep, breakfast every morning, and time to unwind each night. I can survive without these things, sure, but I’m bound to get a metaphorical yellow leaf here or there if it keeps up for too long.

Change and growth happen every day.

…Even if we can’t see it. It’s really incredible to watch plants grow each and every day. I enjoy watching my plants turn toward the sun, perk up after being watered, and sprout new leaves and flowers. There are few things more satisfying than watching something grow that you’ve tended to. Even if you can’t see each change happening each day, you can notice the differences from week-to-week or month-to-month, and know that those little things add up to become something great.

Never underestimate the importance of vitamin D.

Need I say more?

How do you ebb and flow throughout the year? What optimal growing conditions do you need in order to thrive? How do you see change and growth happening every day/week/month/year?

Our Trip to Arizona

If all you know of succulents and cacti is that they are easy, slow growing additions to a desk or a bedside, you are gravely unprepared for Arizona. Prickly pear, agave, and saguaro cacti line highways, grow wild in the desert, and are the foundation for many a home’s hardscaping. These, in combination with citrus trees and skyscraper-level palm trees, make for a vacation for the books.

Within an hour of arriving at Anne’s aunt and uncle’s house in Scottsdale, I nearly crashed my bike as I ogled the biggest barrel cactus I had ever seen. Little did I know this was just the beginning. Our trip was filled with time at the pool, delicious food, cool museums, Cubs spring training games, and a lot (A LOT) of plants. If you’re planning a trip to the Phoenix area, I cannot recommend the following enough. Some of these suggestions originally came from Sarah Rhodes (@arrowandapple) and Jayme Henderson (@hollyandflora). Thanks you two!

To-Dos in Arizona

Desert Botanical Garden | The Desert Botanical Garden is filled to the brim with native plants and wildlife, but it’s unlike any other botanical garden I’ve ever been to. Saguaro and organ pipe cacti reach 70 feet into the sky, and the agave will measure close to your wingspan. Be sure to carve out at least half a day here in order to walk all of the trails, eat at the relaxing restaurant, and browse the gift shop for plants. Oh, and don’t forget to go home with a few saguaro seeds from a volunteer. Mine are germinating, and if all goes well, they’ll grow 1-2 inches in the first year!

Phoenix Public Market | This open air market is definitely worth adding to your list. It’s open on Saturdays from 8a-1p, and is the perfect spot to meet local farmers, artisans, and bakers. One of our favorite booths was Radish, a fresh-pressed juice company with pretty amazing juice combinations.

Musical Instrument Museum | “Anyone with a love of music should be legally bound to make a pilgrimage to this museum, missing out on it would be a crime.” MIM hosts the largest collection of musical instruments in the world, and it is awe-inspiring to say the least. The exhibits are attainable for any visitor, and their headset technology allows you to hear all of the instruments they have on display. Is hearing them not enough, though? Visit the Experience Gallery for a chance to play a curated selection of instruments.

Changing Hands Bookstore | Do you like books? Do you like beer? Changing Hands is not only a bookstore, it’s home to First Draft Bar. Roam the aisles with a beer in hand, or sit and meet other bookworms over a drink. Changing Hands offers an excellent selection of new and used books. I almost lost Anne forever here.

Baseball games | Spring in Arizona wouldn’t be complete without a little baseball! The Cactus League is what brought Anne and her family down from Chicago in March. We went to a couple of Cubs games and enjoyed lounging on the outfield lawn.

To-Eats in Arizona

Vovomeena | Portuguese for “Grandma Meena,” this is a great place for breakfast or brunch. Cute decor, friendly staff, and good coffee.

Joyride Taco House | Just know that you probably won’t want to leave. Besides the jaw-droppingly good tacos, enjoy a prickly pear margarita on the patio and take in the hip and well-curated vibe. The veggie tacos were delicious.

FnB | The chef at FnB isn’t called the “veggie whisperer” for nothing. We ordered what felt like the better half of the menu and indulged in our dinner there for over two hours. Each plate had incredible depth and a unique combination of ingredients. We left asking ourselves, “Do you think they’d cater our wedding in rural Wisconsin?” It was that good.

Sweet Republic | Even if you think you don’t have enough room left for dessert, you’ll have enough room left for Sweet Republic. They’ve been featured in Bon Appetit, Food & Wine, and Time Magazine for good reason. I ordered the black sesame ice cream just to try something different, and was not disappointed. Their ice cream is all-natural, local, and homemade.

(Other spots that were recommended to us but our bellies were too full: Lux, Federal Pizza, St. Francis, Fame, Rollover Doughnuts, Nami, Ollie Vaughn’s Kitchen and Bakery, Short Leash Hot Dogs, Welcome Chicken and Donuts, Max’s Mukhaase, Angel’s Trumpet Ale House)

Clearly, a return trip is in order.


PS) Did you participate in the 30-Day “Reset” Challenge in March? How did it go? Leave a comment and share your experience–I’d love to hear what worked and didn’t work for you.

Houseplants 101

A customer recently came into terrain looking to purchase a few houseplants. She appeared sort of lost–a feeling I know everyone feels at times when shopping–so I approached her to ask if she needed any help. She said, “Do you ever read Apartment Therapy?” to which I replied “Yes, all the time!” She continued, “The rooms on that site are all so beautifully decorated, and I’ve noticed that every picture I’m drawn to has plants in it. I want to try and do that.” I jumped with joy as I showed her around the shade house, pointing out different kinds of plants to determine her interests. I mean, plants combined with interior decorating ideas?! Swoon.

That customer inspired me to write this post. I helped her understand the different kinds of indoor plants (trees vs. ferns vs. succulents, etc.), while also figuring out what kind of care she was willing to give her new plants. Below are some things to think about if you’re new to houseplants or want to learn more.

Questions to Consider

  1. How much time do you have to care for your plants?
  2. Do you travel often?
  3. Do you have pets? (If yes, click here.)
  4. What amount of light does your home get?

How to Create “That Apartment Therapy Look”

1. When browsing for new houseplants, it’s important to find plants of varying sizes. 4-inch pots are great, but don’t forget to look for plants that are 8-12 inches in diameter. Larger plants–that can sit on the floor, rather than a table or a bookshelf–add serious personality to a room. While these plants might be more expensive, they are a sure-fire way to achieve the Apartment Therapy look.

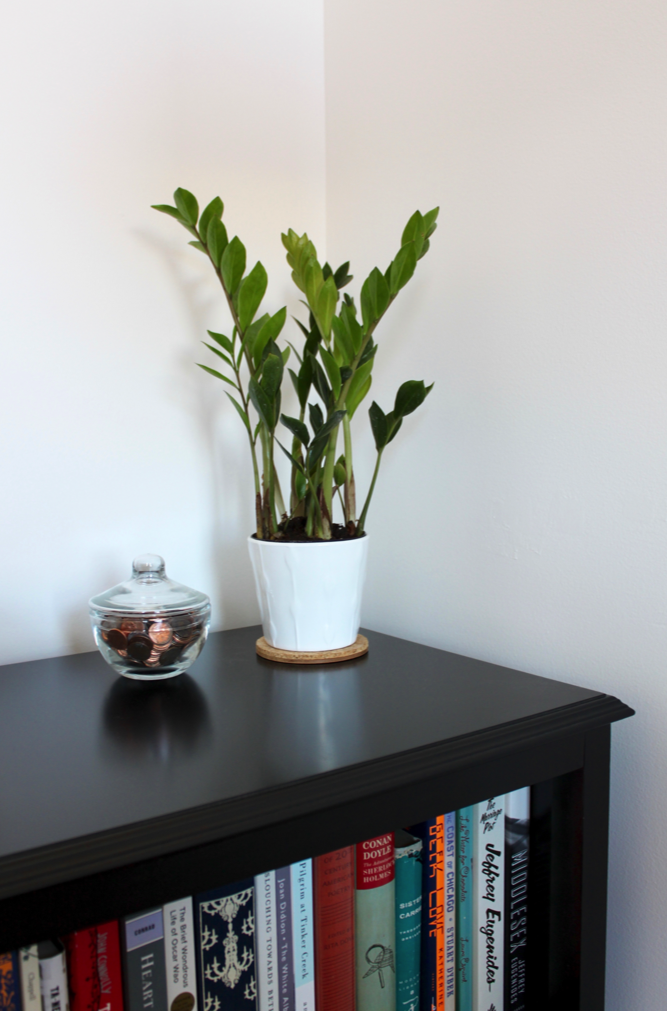
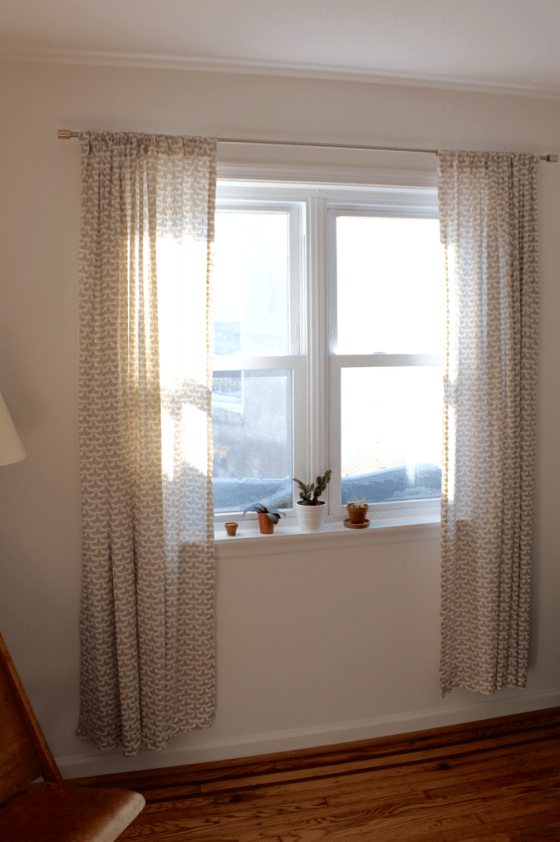
2. Acquiring plants of varying sizes will naturally lead to this next point: Place plants at differing heights in the room. For example, have plants on the floor, a coffee table, on top of a bookshelf, hanging down from the ceiling, or on a windowsill. This will make a difference in the room’s overall “feel.”

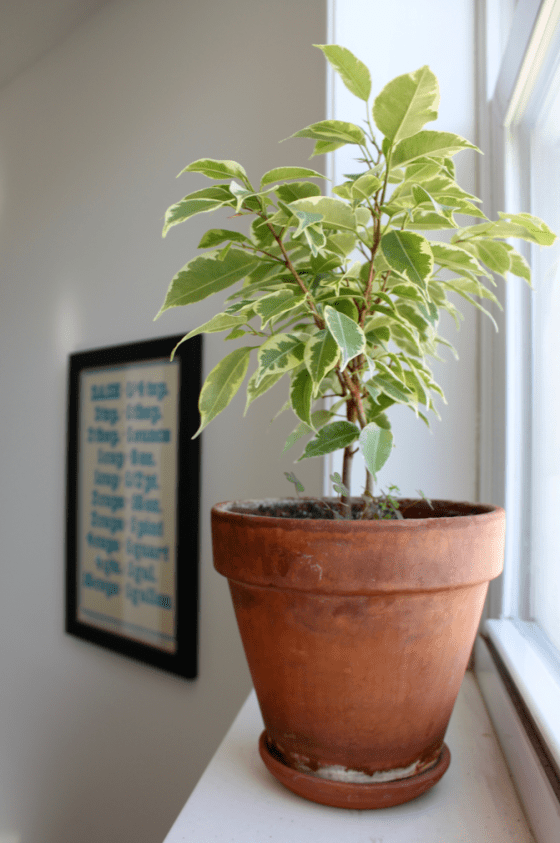
3. Don’t overlook the pot! Pot purchases should receive just as much attention as plants themselves. They do make a statement, after all. Find a pot that complements the plant, either in color or texture or both. Terra cotta is certainly a great option not only for its natural, organic look, but also because the porous ceramic allows the plant to breathe. If that’s not what you’re interested in, browse your local nursery, hardware store, or IKEA. They all have great options for pots in various sizes.

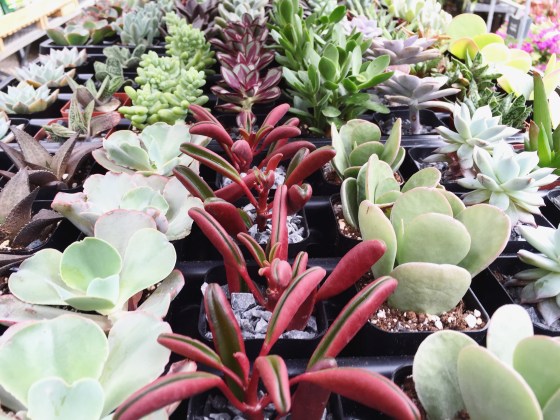
4. Speaking of texture, here’s my last tip: Choose plants that have contrasting textures, shapes, and colors. This can come in the form of different colored flowers (if your houseplant blooms) or varying leaf sizes or colors (hellooo, tropical plants!). Even if you want only green houseplants, there is an entire spectrum of leaf colors, ranging from neon to forest green. Choosing these different colors, shapes, and textures will add visual interest.

The Details: Lighting

Plants that do well in low light: dracaena, ferns, heartleaf philodendron, lucky bamboo, ponytail palm, pothos, prayer plant, orchids, sansevieria (mother-in-law’s tongue), spider plant, zamioculcas zamiifolia (zz plant)

Plants that do well in medium light: African violet, begonia, ferns, hoya, ivy, mother-in-law’s tongue, orchids, ponytail palm, pothos, split leaf philodendron, succulents, umbrella plant, watermelon peperomia, zz plant

Plants that do well in bright light: aloe, angel vine, citrus, ficus, mother-in-law’s tongue, norfolk pine, oxalis, ponytail palm, rubber tree, succulents, yucca

The Details: Plant Care

If you travel often, look for plants that only need to be watered 2-4 times a month. These might include aloe, ficus, jade, pothos, succulents, and zz plant.

Plants that need higher humidity: ferns, orchids, norfolk pine, citrus, and ficus. Any plant that is native to a tropical environment will require higher levels of humidity. Place a tray filled with water and pebbles beneath the pot, or use a spray bottle to mist the leaves each time you water to help the plant thrive.

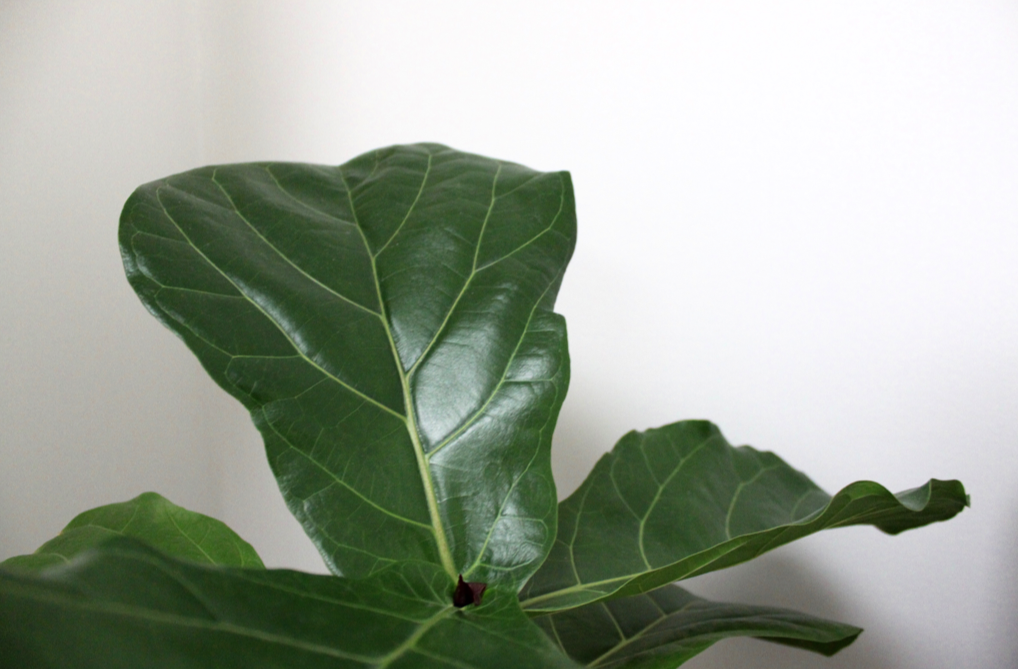
Regarding watering, I find it easiest to choose a day of the week and stick to it. I water my houseplants on Saturdays so that I have time to enjoy it and know that each plant is receiving care. Obvious exceptions to this would be succulents, zz plant, and fiddle leaf fig (which usually need to be watered less frequently), and angel vine (which needs watering every other day).

Have I convinced you to go out a find yourself some new houseplants? Or to rearrange the ones you already have? Anne and I have about 15 houseplants, and I am always on the lookout to acquire more. We have plants in every room, including the bathroom. Next up, I want to add a plant to our shower. I just need to decide if it will sit in a suctioning shower caddy or hang down from the ceiling…  Decisions, decisions. Plants bring such life into a room, and sometimes even purify the air! (Read NASA’s Guide to Air-Filtering Houseplants)

Do you have any tips or tricks to caring for your houseplants? Any other suggestions for getting “that Apartment Therapy look”? I will leave you now with one of my favorite poems. I like bringing these “wild things” into our home.

“The Peace of Wild Things” by Wendell Berry

When despair for the world grows in me 
and I wake in the night at the least sound 
in fear of what my life and my children’s lives may be, 
I go and lie down where the wood drake 
rests in his beauty on the water, and the great heron feeds. 
I come into the peace of wild things 
who do not tax their lives with forethought 
of grief. I come into the presence of still water. 
And I feel above me the day-blind stars 
waiting with their light. For a time 

I rest in the grace of the world, and am free.

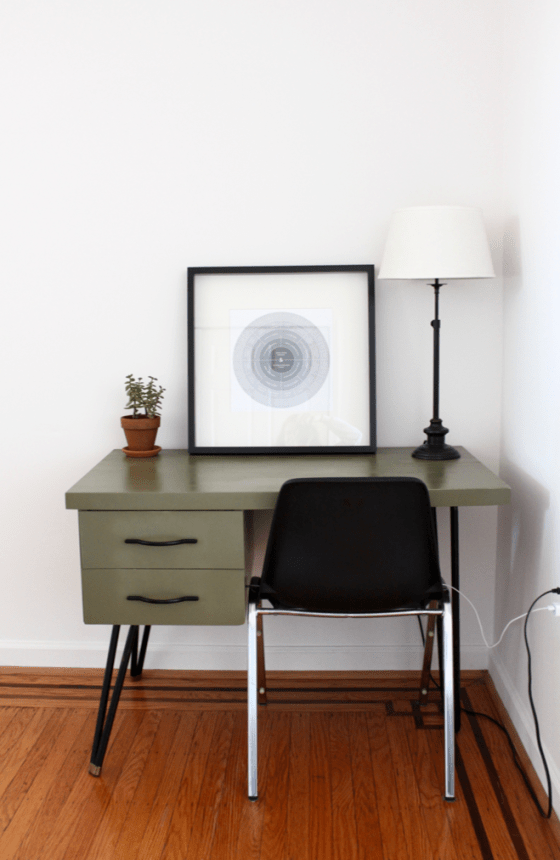
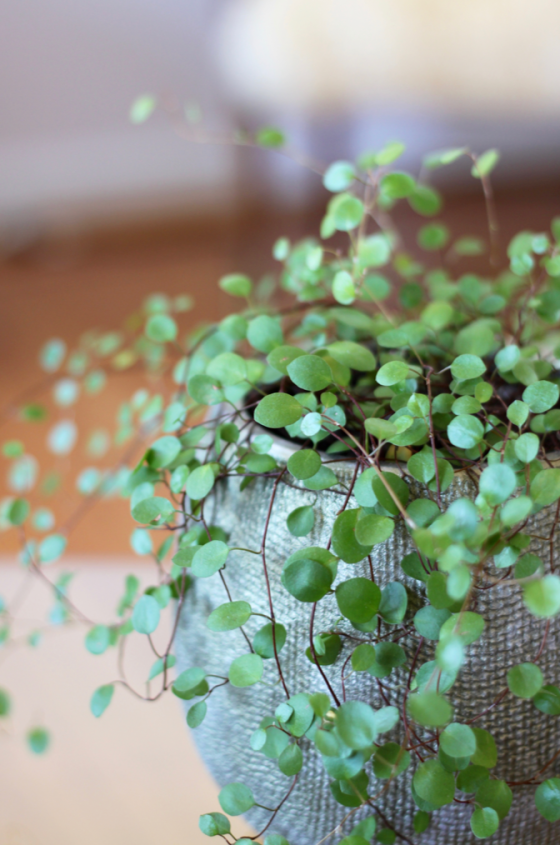
(Our houseplants, in the order that they appear: angel vine, zz plant, fiddle leaf fig, various succulents, mini orchid, ficus breeze, orchid, meyer lemon tree, jade)

DIY Gardening: Starting Seeds in Recycled Egg Cartons

Good news: Ellen Drews is joining us for another gardening tutorial! Last spring, Ellen shared her DIY container gardening technique (pictured below). Today, she’s going to teach us how to start our own seeds in egg cartons! Have you ever done something like this before? I can’t wait to give it a try!

Before we get to her wonderful post, I did want to take a second to let you all know that Anne and I leave for Greece tomorrow! (Follow me on Instagram to see some pictures of our trip.) We will be home in three weeks, and I’ll be back to blogging in late July with more projects, recipes, and some pictures from our trip. I’ve got an exciting collaboration and giveaway coming your way later this summer!

Without further ado, Ellen:

As a backyard vegetable gardener in Somerville, Massachusetts, I am always cooking up ways to feed my gardening addiction on a tight budget. I love finding ways to use recycled materials to grow my vegetables safely in the city. This year in my container garden, I decided to see the process from start to finish. I was going to start my own seeds in my own DIY greenhouses: egg cartons!

Starting seeds indoors is an important concept for vegetable gardening. There are some vegetables that prefer to grow right where they’re planted (i.e. cold-tolerant plants like spinach, or delicate root-crops like carrots). For these crops, I put seeds directly into my container garden as soon as the soil has thawed.

Other plants must be started indoors and then transplanted to the outdoor garden as seedlings, such as tomatoes, peppers, eggplant, and basil. These warm-season crops evolved in hot climates with longer growing seasons and so they have a long, leisurely lifespan. Where I live in New England, we can have frosts as late as Memorial Day, which would most likely kill a seedling before it had a chance to bear any fruit—the ultimate prize of the tomato plant. Starting tomato seedlings indoors as early as April allows you to get your plants going so they will reach fruiting maturity by midsummer.

Seedlings are available for purchase at farmers’ markets, grocery and hardware stores, and big-box stores like K-Mart. However, there are awesome benefits to starting from seeds:

  • Choose varieties! There are thousands of beautiful heirloom seeds out there and many cool ones are available through seed companies with the mission of saving these varieties (Seed Savers Exchange, Hudson Valley Seed Library, High Mowing Organic Seeds, and Baker Creek Heirloom Seeds are some of my favorites).
  • Save money on fancy organic seedlings and use the seeds you already have. I’m still using seeds that I bought or traded two years ago (with proper storage, seeds can last up to 5 years).
  • Avoid the pitfalls of buying cheaper, mass-distributed seedlings at stores like Home Depot and K-Mart. Devastating diseases can spread across the country via these discount seedlings. For example, in 2009, late blight on tomatoes spread across the east coast because many people bought tomato seedlings from K-Mart, Walmart, and Lowe’s—all of which carried a fungus originating in a handful of greenhouses in Alabama. (Read one article about it here.)

So, now that you’re convinced that starting your own seedlings at home is a good idea, I’ll show you how I started mine this year!

Starting Seeds in Recycled Egg Cartons

Materials:

  • Plastic or cardboard egg cartons, empty (avoid Styrofoam or heavily inked cartons)
  • Nail or awl
  • Organic potting soil or mix (Look for varieties that contain compost. You want your seeds to access as many nutrients in their little cells as possible.)
  • Seeds!
  • Spray bottle or watering can with a gentle sprinkle

Step 1: Using the nail or awl, punch three holes in the bottom of each egg cell to allow excess water to drain.

Step 2: Fill the egg carton cells with the potting soil. Use your fingers to gently press divots into each cell and re-fill the divots with more potting soil. You want to give your seeds as much material in each cell as possible without compacting the soil. For many weeks, the nutrients in the soil will be all they will get so you’ll want to fill ‘em up!

Step 3: Put 1-2 seeds in each cell, following the directions on the seed packet for how deep to put them (it will be under “seed depth”). Cover with a light topping of potting soil.

Step 4: Soak the cells with water using a spray bottle or a gentle sprinkle of water. You want water to drip out of the holes at the bottom of the egg carton to ensure that you have really soaked all the soil. BUT you also want to be careful that you don’t dislodge the seeds or compact the soil so it’s important to be gentle when watering!

Step 5: Place egg carton seed-trays indoors in a sunny window or under grow lights. Seeds should germinate in about a week! I also got fancy and used the lid of the egg carton to create a greenhouse effect over my seeds. The plastic roof kept moisture in and trapped some heat from the sun. I also punched holes in this “greenhouse” roof to keep things from getting way too humid in there.

Here’s what my tomatoes and tomatillos looked like after they grew up a bit! Now that it’s June, it’s a bit late for starting tomatoes, peppers, and eggplant like I did here, but it is a great time to start seeds for fall crops such as broccoli, cabbage, collard greens, chard, fennel and kale.

And here’s what my garden looks like today!

Leave a comment if you’ve found other ways to use recycled materials in your garden!

Note: All photos were taken by Ellen Drews.

DIY Self-Watering System for Houseplants

Happy Monday! Did anyone notice I was absent last week? The bad news is I had bronchitis for a few weeks there, but the good news is that I’m feeling better! Philly is in full-blown spring mode, and I can’t get enough of it. My parents visited me and Anne this weekend, and we had a great picnic at the Japanese Gardens in Fairmount Park. The cherry blossoms were out of control!

As the warmer weather begins to take us out of hibernation, it quickly becomes the season to travel more. Day trips, weekend excursions, and longer vacations. All of this traveling means that those houseplants you so carefully take care of are soon left to fend for themselves.

When Anne and I took our road trip through the south last spring, we devised a self-watering wicking system to keep our houseplants happy and healthy while we were away for a week. I pride myself on my level of care for our houseplants, but let me say this: our plants have never looked better than that week they were watering themselves.

Here’s why a self-watering wicking system works so well:

  1. By using a wicking system, the plants only absorb the amount of water that they need. They will never sit in an excess of water.
  2. Different plants require different amounts of water. With this setup, you can keep all of your plants hydrated with one system.
  3. You don’t need to do a damn thing! This system will water itself and leave your plants feeling great.

Oh, and another tip: If you’re new to houseplants, or aren’t sure how much to water them, use this system even when you’re home. You can reap the benefits of keeping houseplants, but your black thumb won’t get in the way!

Are you convinced? Do you want to use this system the next time you’re away from home? The setup process takes about 30 minutes, and should be done the day before you leave in order to minimize stress and confirm the system is working. I’ll walk you through the steps to making your own at home.

DIY Self-Watering System for Houseplants

Materials:

  • 100% cotton string
  • Scissors
  • Paper clips
  • Pasta pot
  • Short stool

Step 1: Gather your houseplants in a location near where they usually reside. Cut the cotton string into two-feet segments (cut as many as you have plants). If you do not have cotton string on hand, take an old 100% cotton t-shirt and cut it into long, thin strips.

Step 2: Tie a paper clip to one end of each piece of string.

Step 3: Fill a pasta pot with water, about 4 quarts. Place the pot on a stool to elevate the water above the level of the plants. (Gravity will work with you to pull the water down the string.) Gather the plants around the pot of water.

Step 4: Place the paper clip end of the string in the pasta pot. (The paper clips will ensure that the string stays in the water.) Take the other end of the string and, using your finger, bury it about one or two inches into the soil of each plant. Press firmly on the soil to hold the string in place.

Step 5: When you have placed the string into each plant, make sure that there are no “dips” in the string. The line of string from the pasta pot to the plant needs to be a fully downward slope. If the string dips below the planter, water will not travel back up the string and into the soil. To avoid this, gently pull the extra string into the pasta pot.

Wrong:

Right:

That is how to create your very own DIY self-watering wicking system! In about an hour, you will notice your plant beginning to receive water.

Depending on how long you are away, there will most likely be water still in the pasta pot when you return home. Gently disassemble the string from the plant, and go back to your usual houseplant routine in about ten minutes.

Or, don’t! There are other, more subtle ways to continue this system while you’re home. Keep your plants where you usually have them, and place smaller bowls of water–on a stack of books, say–near your plants. You can refill the water bowls and know that your plants are receiving just the right amount of water at all times.

Note: Our orchid and fiddle leaf fig are getting their own self-watering setups when Anne and I travel to Greece this summer. They are quite particular plants, so I will keep them right where they are elsewhere in our apartment.

Are you going anywhere this spring or summer? Tell me where you’re traveling in the comments!