Our Trip to Arizona

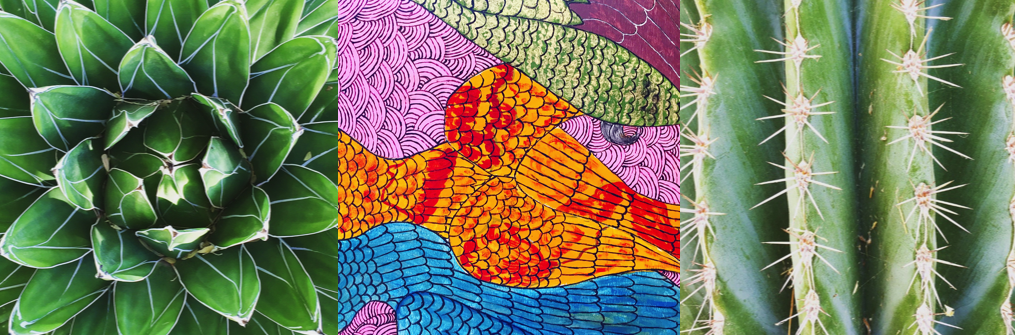
If all you know of succulents and cacti is that they are easy, slow growing additions to a desk or a bedside, you are gravely unprepared for Arizona. Prickly pear, agave, and saguaro cacti line highways, grow wild in the desert, and are the foundation for many a home’s hardscaping. These, in combination with citrus trees and skyscraper-level palm trees, make for a vacation for the books.

Within an hour of arriving at Anne’s aunt and uncle’s house in Scottsdale, I nearly crashed my bike as I ogled the biggest barrel cactus I had ever seen. Little did I know this was just the beginning. Our trip was filled with time at the pool, delicious food, cool museums, Cubs spring training games, and a lot (A LOT) of plants. If you’re planning a trip to the Phoenix area, I cannot recommend the following enough. Some of these suggestions originally came from Sarah Rhodes (@arrowandapple) and Jayme Henderson (@hollyandflora). Thanks you two!

To-Dos in Arizona

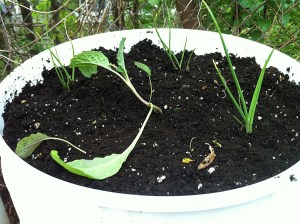
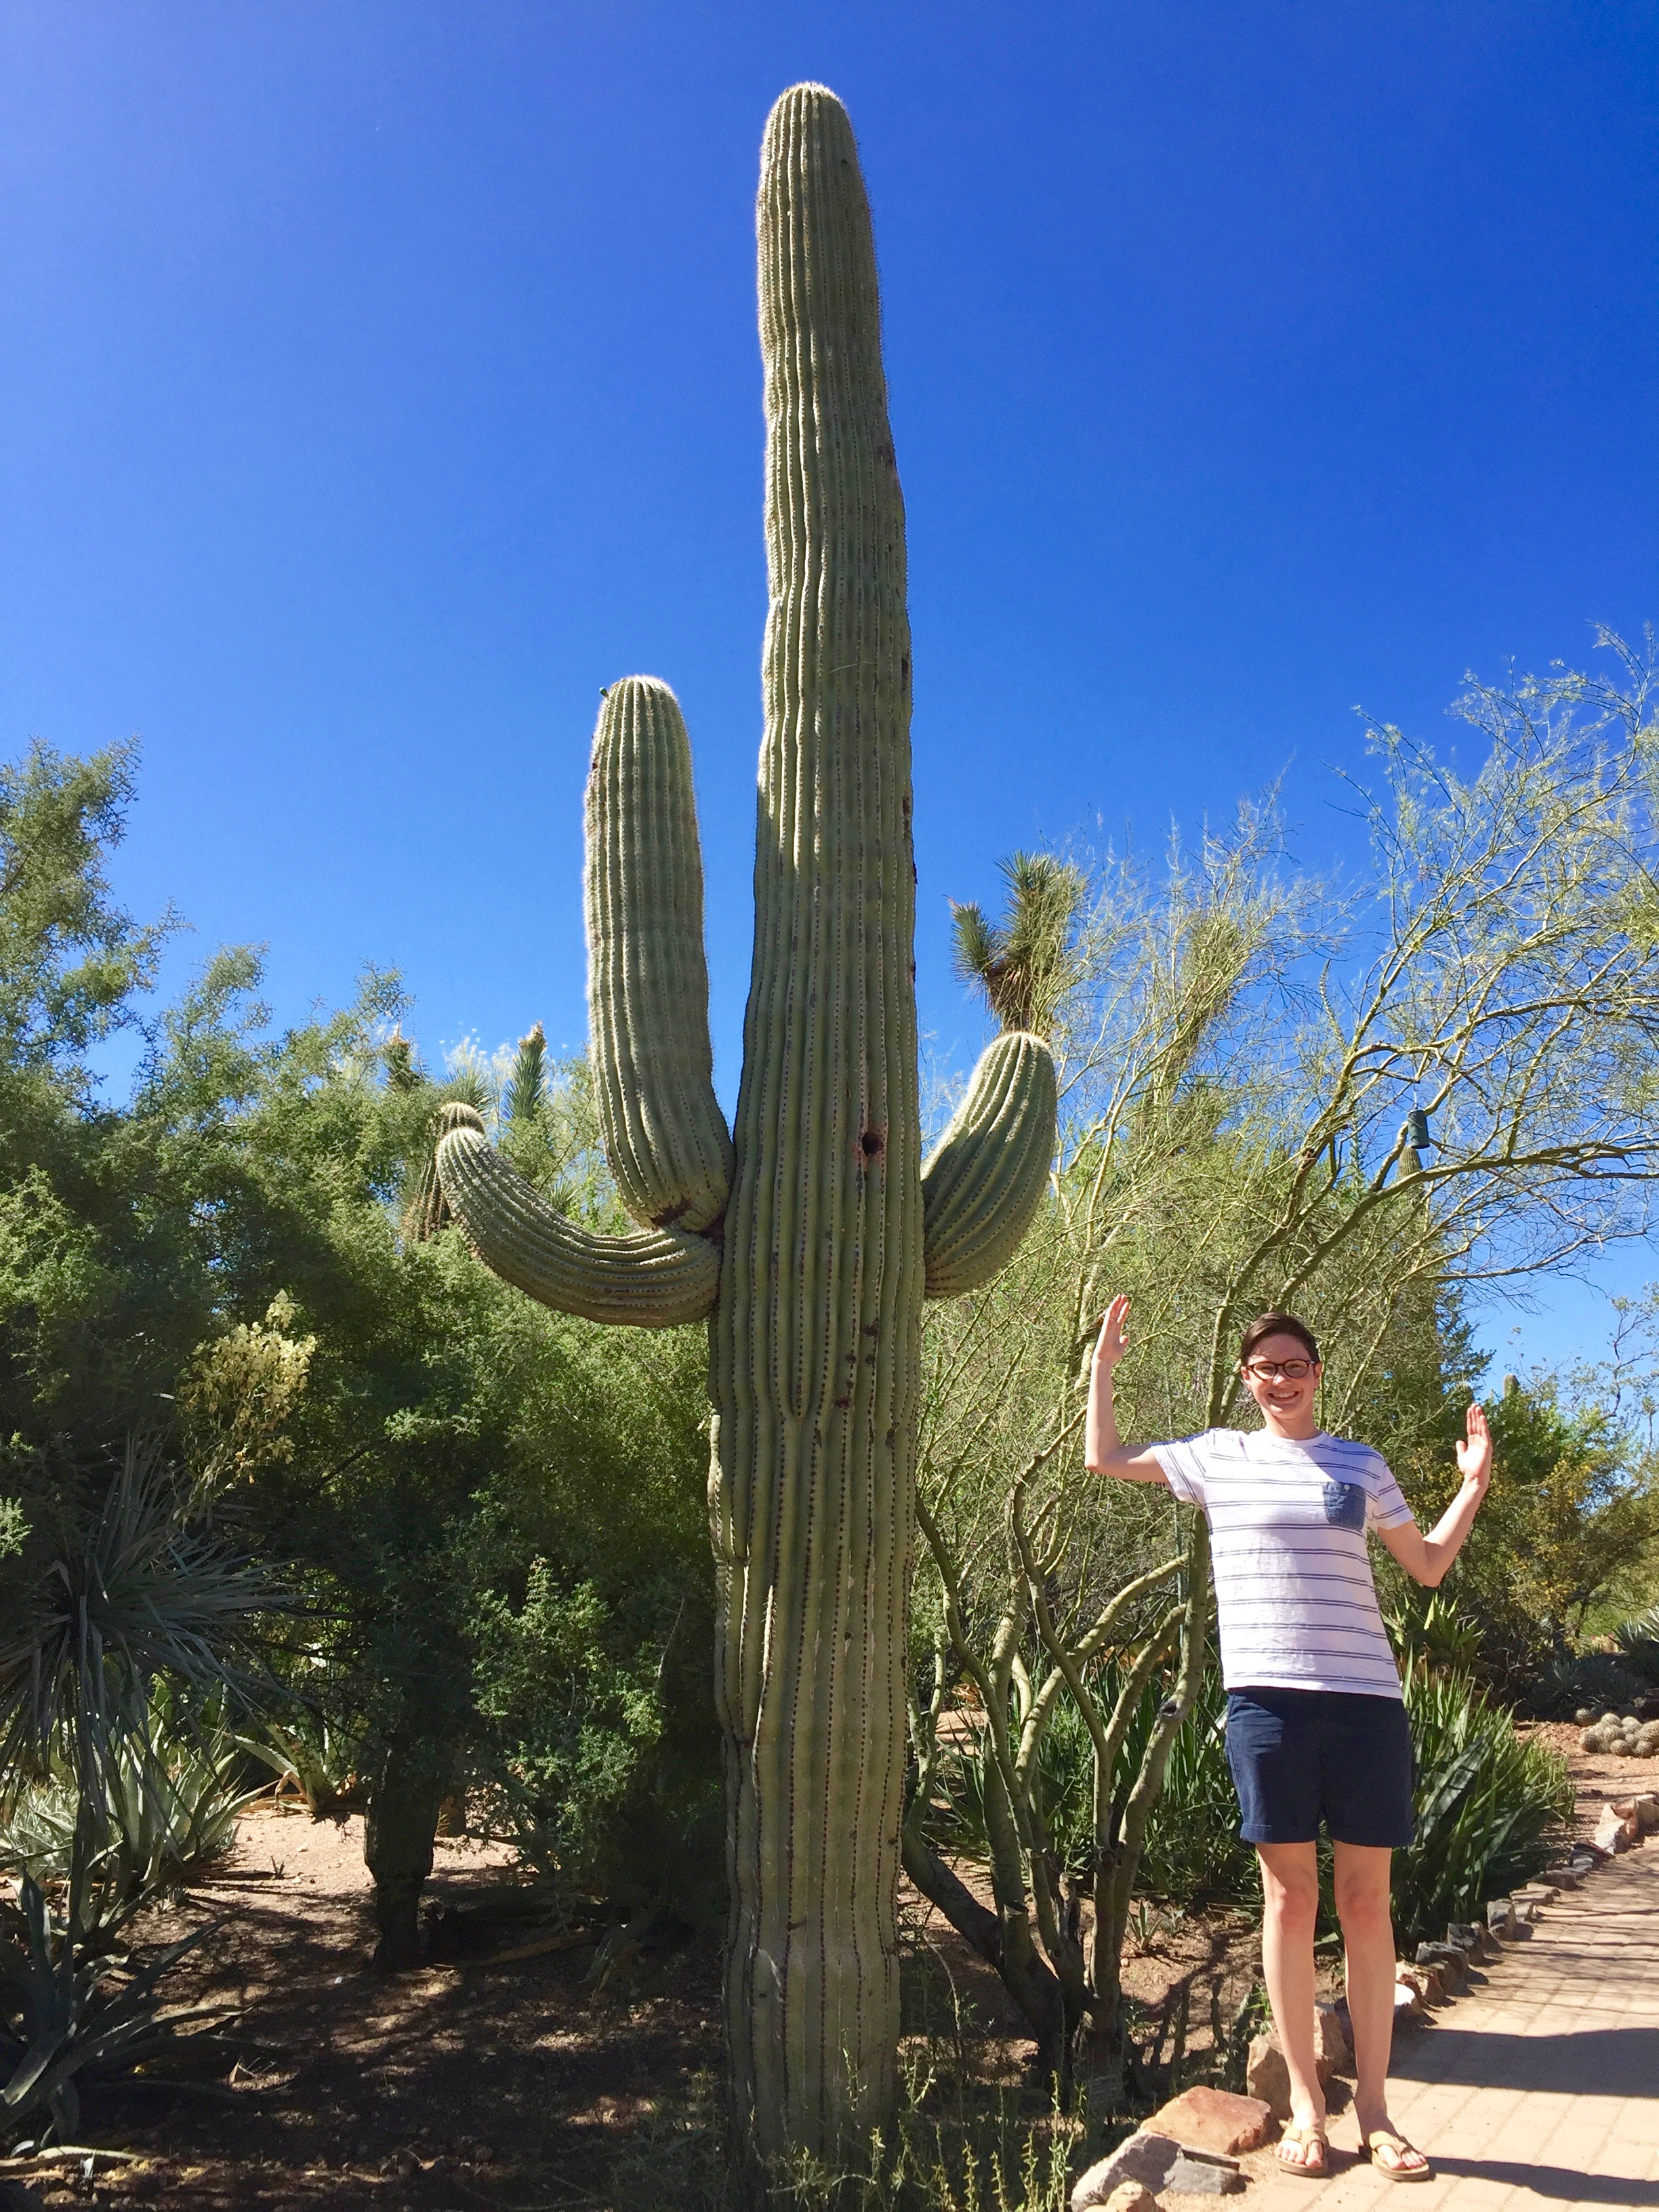
Desert Botanical Garden | The Desert Botanical Garden is filled to the brim with native plants and wildlife, but it’s unlike any other botanical garden I’ve ever been to. Saguaro and organ pipe cacti reach 70 feet into the sky, and the agave will measure close to your wingspan. Be sure to carve out at least half a day here in order to walk all of the trails, eat at the relaxing restaurant, and browse the gift shop for plants. Oh, and don’t forget to go home with a few saguaro seeds from a volunteer. Mine are germinating, and if all goes well, they’ll grow 1-2 inches in the first year!

Phoenix Public Market | This open air market is definitely worth adding to your list. It’s open on Saturdays from 8a-1p, and is the perfect spot to meet local farmers, artisans, and bakers. One of our favorite booths was Radish, a fresh-pressed juice company with pretty amazing juice combinations.

Musical Instrument Museum | “Anyone with a love of music should be legally bound to make a pilgrimage to this museum, missing out on it would be a crime.” MIM hosts the largest collection of musical instruments in the world, and it is awe-inspiring to say the least. The exhibits are attainable for any visitor, and their headset technology allows you to hear all of the instruments they have on display. Is hearing them not enough, though? Visit the Experience Gallery for a chance to play a curated selection of instruments.

Changing Hands Bookstore | Do you like books? Do you like beer? Changing Hands is not only a bookstore, it’s home to First Draft Bar. Roam the aisles with a beer in hand, or sit and meet other bookworms over a drink. Changing Hands offers an excellent selection of new and used books. I almost lost Anne forever here.

Baseball games | Spring in Arizona wouldn’t be complete without a little baseball! The Cactus League is what brought Anne and her family down from Chicago in March. We went to a couple of Cubs games and enjoyed lounging on the outfield lawn.

To-Eats in Arizona

Vovomeena | Portuguese for “Grandma Meena,” this is a great place for breakfast or brunch. Cute decor, friendly staff, and good coffee.

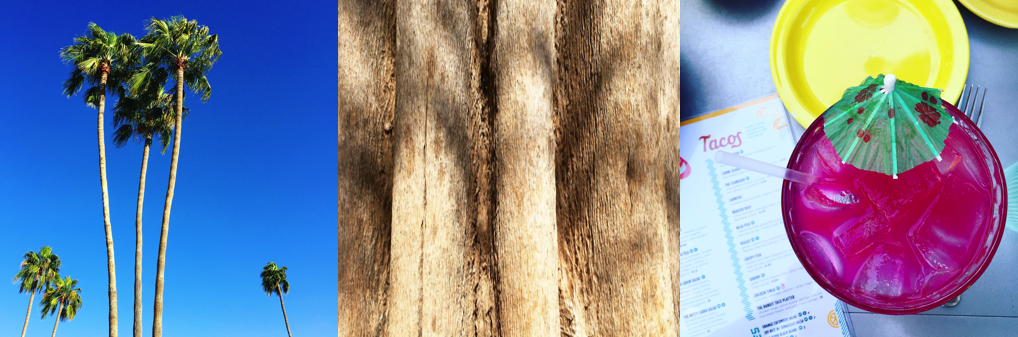
Joyride Taco House | Just know that you probably won’t want to leave. Besides the jaw-droppingly good tacos, enjoy a prickly pear margarita on the patio and take in the hip and well-curated vibe. The veggie tacos were delicious.

FnB | The chef at FnB isn’t called the “veggie whisperer” for nothing. We ordered what felt like the better half of the menu and indulged in our dinner there for over two hours. Each plate had incredible depth and a unique combination of ingredients. We left asking ourselves, “Do you think they’d cater our wedding in rural Wisconsin?” It was that good.

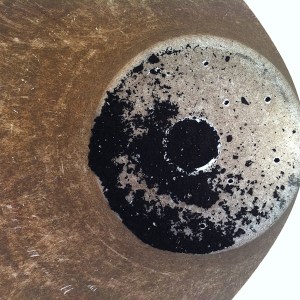
Sweet Republic | Even if you think you don’t have enough room left for dessert, you’ll have enough room left for Sweet Republic. They’ve been featured in Bon Appetit, Food & Wine, and Time Magazine for good reason. I ordered the black sesame ice cream just to try something different, and was not disappointed. Their ice cream is all-natural, local, and homemade.

(Other spots that were recommended to us but our bellies were too full: Lux, Federal Pizza, St. Francis, Fame, Rollover Doughnuts, Nami, Ollie Vaughn’s Kitchen and Bakery, Short Leash Hot Dogs, Welcome Chicken and Donuts, Max’s Mukhaase, Angel’s Trumpet Ale House)

Clearly, a return trip is in order.


PS) Did you participate in the 30-Day “Reset” Challenge in March? How did it go? Leave a comment and share your experience–I’d love to hear what worked and didn’t work for you.

Houseplants 101

A customer recently came into terrain looking to purchase a few houseplants. She appeared sort of lost–a feeling I know everyone feels at times when shopping–so I approached her to ask if she needed any help. She said, “Do you ever read Apartment Therapy?” to which I replied “Yes, all the time!” She continued, “The rooms on that site are all so beautifully decorated, and I’ve noticed that every picture I’m drawn to has plants in it. I want to try and do that.” I jumped with joy as I showed her around the shade house, pointing out different kinds of plants to determine her interests. I mean, plants combined with interior decorating ideas?! Swoon.

That customer inspired me to write this post. I helped her understand the different kinds of indoor plants (trees vs. ferns vs. succulents, etc.), while also figuring out what kind of care she was willing to give her new plants. Below are some things to think about if you’re new to houseplants or want to learn more.

Questions to Consider

  1. How much time do you have to care for your plants?
  2. Do you travel often?
  3. Do you have pets? (If yes, click here.)
  4. What amount of light does your home get?

How to Create “That Apartment Therapy Look”

1. When browsing for new houseplants, it’s important to find plants of varying sizes. 4-inch pots are great, but don’t forget to look for plants that are 8-12 inches in diameter. Larger plants–that can sit on the floor, rather than a table or a bookshelf–add serious personality to a room. While these plants might be more expensive, they are a sure-fire way to achieve the Apartment Therapy look.

2. Acquiring plants of varying sizes will naturally lead to this next point: Place plants at differing heights in the room. For example, have plants on the floor, a coffee table, on top of a bookshelf, hanging down from the ceiling, or on a windowsill. This will make a difference in the room’s overall “feel.”

3. Don’t overlook the pot! Pot purchases should receive just as much attention as plants themselves. They do make a statement, after all. Find a pot that complements the plant, either in color or texture or both. Terra cotta is certainly a great option not only for its natural, organic look, but also because the porous ceramic allows the plant to breathe. If that’s not what you’re interested in, browse your local nursery, hardware store, or IKEA. They all have great options for pots in various sizes.

4. Speaking of texture, here’s my last tip: Choose plants that have contrasting textures, shapes, and colors. This can come in the form of different colored flowers (if your houseplant blooms) or varying leaf sizes or colors (hellooo, tropical plants!). Even if you want only green houseplants, there is an entire spectrum of leaf colors, ranging from neon to forest green. Choosing these different colors, shapes, and textures will add visual interest.

The Details: Lighting

Plants that do well in low light: dracaena, ferns, heartleaf philodendron, lucky bamboo, ponytail palm, pothos, prayer plant, orchids, sansevieria (mother-in-law’s tongue), spider plant, zamioculcas zamiifolia (zz plant)

Plants that do well in medium light: African violet, begonia, ferns, hoya, ivy, mother-in-law’s tongue, orchids, ponytail palm, pothos, split leaf philodendron, succulents, umbrella plant, watermelon peperomia, zz plant

Plants that do well in bright light: aloe, angel vine, citrus, ficus, mother-in-law’s tongue, norfolk pine, oxalis, ponytail palm, rubber tree, succulents, yucca

The Details: Plant Care

If you travel often, look for plants that only need to be watered 2-4 times a month. These might include aloe, ficus, jade, pothos, succulents, and zz plant.

Plants that need higher humidity: ferns, orchids, norfolk pine, citrus, and ficus. Any plant that is native to a tropical environment will require higher levels of humidity. Place a tray filled with water and pebbles beneath the pot, or use a spray bottle to mist the leaves each time you water to help the plant thrive.

Regarding watering, I find it easiest to choose a day of the week and stick to it. I water my houseplants on Saturdays so that I have time to enjoy it and know that each plant is receiving care. Obvious exceptions to this would be succulents, zz plant, and fiddle leaf fig (which usually need to be watered less frequently), and angel vine (which needs watering every other day).

Have I convinced you to go out a find yourself some new houseplants? Or to rearrange the ones you already have? Anne and I have about 15 houseplants, and I am always on the lookout to acquire more. We have plants in every room, including the bathroom. Next up, I want to add a plant to our shower. I just need to decide if it will sit in a suctioning shower caddy or hang down from the ceiling…  Decisions, decisions. Plants bring such life into a room, and sometimes even purify the air! (Read NASA’s Guide to Air-Filtering Houseplants)

Do you have any tips or tricks to caring for your houseplants? Any other suggestions for getting “that Apartment Therapy look”? I will leave you now with one of my favorite poems. I like bringing these “wild things” into our home.

“The Peace of Wild Things” by Wendell Berry

When despair for the world grows in me 
and I wake in the night at the least sound 
in fear of what my life and my children’s lives may be, 
I go and lie down where the wood drake 
rests in his beauty on the water, and the great heron feeds. 
I come into the peace of wild things 
who do not tax their lives with forethought 
of grief. I come into the presence of still water. 
And I feel above me the day-blind stars 
waiting with their light. For a time 

I rest in the grace of the world, and am free.

(Our houseplants, in the order that they appear: angel vine, zz plant, fiddle leaf fig, various succulents, mini orchid, ficus breeze, orchid, meyer lemon tree, jade)

DIY Gardening: Starting Seeds in Recycled Egg Cartons

Good news: Ellen Drews is joining us for another gardening tutorial! Last spring, Ellen shared her DIY container gardening technique (pictured below). Today, she’s going to teach us how to start our own seeds in egg cartons! Have you ever done something like this before? I can’t wait to give it a try!

Before we get to her wonderful post, I did want to take a second to let you all know that Anne and I leave for Greece tomorrow! (Follow me on Instagram to see some pictures of our trip.) We will be home in three weeks, and I’ll be back to blogging in late July with more projects, recipes, and some pictures from our trip. I’ve got an exciting collaboration and giveaway coming your way later this summer!

Without further ado, Ellen:

As a backyard vegetable gardener in Somerville, Massachusetts, I am always cooking up ways to feed my gardening addiction on a tight budget. I love finding ways to use recycled materials to grow my vegetables safely in the city. This year in my container garden, I decided to see the process from start to finish. I was going to start my own seeds in my own DIY greenhouses: egg cartons!

Starting seeds indoors is an important concept for vegetable gardening. There are some vegetables that prefer to grow right where they’re planted (i.e. cold-tolerant plants like spinach, or delicate root-crops like carrots). For these crops, I put seeds directly into my container garden as soon as the soil has thawed.

Other plants must be started indoors and then transplanted to the outdoor garden as seedlings, such as tomatoes, peppers, eggplant, and basil. These warm-season crops evolved in hot climates with longer growing seasons and so they have a long, leisurely lifespan. Where I live in New England, we can have frosts as late as Memorial Day, which would most likely kill a seedling before it had a chance to bear any fruit—the ultimate prize of the tomato plant. Starting tomato seedlings indoors as early as April allows you to get your plants going so they will reach fruiting maturity by midsummer.

Seedlings are available for purchase at farmers’ markets, grocery and hardware stores, and big-box stores like K-Mart. However, there are awesome benefits to starting from seeds:

  • Choose varieties! There are thousands of beautiful heirloom seeds out there and many cool ones are available through seed companies with the mission of saving these varieties (Seed Savers Exchange, Hudson Valley Seed Library, High Mowing Organic Seeds, and Baker Creek Heirloom Seeds are some of my favorites).
  • Save money on fancy organic seedlings and use the seeds you already have. I’m still using seeds that I bought or traded two years ago (with proper storage, seeds can last up to 5 years).
  • Avoid the pitfalls of buying cheaper, mass-distributed seedlings at stores like Home Depot and K-Mart. Devastating diseases can spread across the country via these discount seedlings. For example, in 2009, late blight on tomatoes spread across the east coast because many people bought tomato seedlings from K-Mart, Walmart, and Lowe’s—all of which carried a fungus originating in a handful of greenhouses in Alabama. (Read one article about it here.)

So, now that you’re convinced that starting your own seedlings at home is a good idea, I’ll show you how I started mine this year!

Starting Seeds in Recycled Egg Cartons

Materials:

  • Plastic or cardboard egg cartons, empty (avoid Styrofoam or heavily inked cartons)
  • Nail or awl
  • Organic potting soil or mix (Look for varieties that contain compost. You want your seeds to access as many nutrients in their little cells as possible.)
  • Seeds!
  • Spray bottle or watering can with a gentle sprinkle

Step 1: Using the nail or awl, punch three holes in the bottom of each egg cell to allow excess water to drain.

Step 2: Fill the egg carton cells with the potting soil. Use your fingers to gently press divots into each cell and re-fill the divots with more potting soil. You want to give your seeds as much material in each cell as possible without compacting the soil. For many weeks, the nutrients in the soil will be all they will get so you’ll want to fill ‘em up!

Step 3: Put 1-2 seeds in each cell, following the directions on the seed packet for how deep to put them (it will be under “seed depth”). Cover with a light topping of potting soil.

Step 4: Soak the cells with water using a spray bottle or a gentle sprinkle of water. You want water to drip out of the holes at the bottom of the egg carton to ensure that you have really soaked all the soil. BUT you also want to be careful that you don’t dislodge the seeds or compact the soil so it’s important to be gentle when watering!

Step 5: Place egg carton seed-trays indoors in a sunny window or under grow lights. Seeds should germinate in about a week! I also got fancy and used the lid of the egg carton to create a greenhouse effect over my seeds. The plastic roof kept moisture in and trapped some heat from the sun. I also punched holes in this “greenhouse” roof to keep things from getting way too humid in there.

Here’s what my tomatoes and tomatillos looked like after they grew up a bit! Now that it’s June, it’s a bit late for starting tomatoes, peppers, and eggplant like I did here, but it is a great time to start seeds for fall crops such as broccoli, cabbage, collard greens, chard, fennel and kale.

And here’s what my garden looks like today!

Leave a comment if you’ve found other ways to use recycled materials in your garden!

Note: All photos were taken by Ellen Drews.

An Afternoon at Petit Jardin en Ville

Today I would like to share with you all Scissors & Sage’s very first small business profile.  I chose a small business that I am continuously drawn to: Petit Jardin en Ville.  This “little garden in the city” can be found tucked away in Philadelphia’s Old City neighborhood, and it instantly transports you to Paris.  Claudia Roux, Parisian florist and garden designer, is the owner of this magical storefront.  She offers her floral design services for weddings, special events, parties, restaurants, and hotels, as well as her garden services for your every garden need year-round.

When I contacted Claudia to see if she would be interested in having her small business profiled on Scissors & Sage, she was delighted.  I couldn’t wait to head over to Petit Jardin for an afternoon.  From the minute you walk in, your senses are fed.  Beautiful flowers, found objects, gardening tools, and whimsical French music fill the space.  Claudia, with the help of her French-born husband, Vincent, assist customers both in and out of the shop.  (I have personally received two flower deliveries at my front door from Vincent — what a happy sight!)

Claudia sat down with me and spoke of her journey to Petit Jardin en Ville, and below are some segments from our conversation.  At the end of my visit, Claudia, Vincent, and I clinked apple tart slices to celebrate Petit Jardin.  This shop, first opened in May 2014, has quickly won the way to my heart.  I am excited to share Claudia’s story with you all today.  Be sure to check out Petit Jardin en Ville online (Official Website | Twitter | Instagram | Facebook) or stop by in person!

From Claudia: After I met my husband, and right before we got married, I moved to France.  We were living in Paris.  I had always been artistic and had worked with florals, but I really didn’t find my path until I moved there.  Flowers are part of the culture in France, so I started to take horticultural classes.  I worked very closely with my teacher, Catherine Muller, who was the protégé of Christian Tutora.  I studied with Catherine for the five years that I lived in Paris.  I still continue to take classes with her now.  Her aesthetic is very similar to mine.  It’s a very garden-y kind of style that I like a lot.  France is a mixture of old and new, which really brings an interesting aesthetic.  It’s where I gained my understanding of combining both of those.


My husband and I spent a lot of time in different regions in France [collecting found items].  For example, in Bordeaux, you can find old metal grape pickers with leather straps that you would throw the grapes in as you picked.  A lot of the areas we go to are in the countryside.  We find a lot of farm pieces, which really appeal to my aesthetic, too.  We like to go and find things that others haven’t found yet.  We do bring some city-type things such as a parking sign and original advertisements from the 1940s.  Of course, I choose many things that I can put flowers in, like bottles and glasses, to evoke a feeling of a relaxed, carefree atmosphere that you find in the countryside where people spend so much time outside.


Philadelphia as a whole has changed over the years.  When we were looking at spaces, we kept coming back to Old City.  We wanted to be part of a neighborhood, and to emulate the spaces you would find in Paris.  Those spaces tend to be small and have a very special kind of dark feeling.  The flowers bring the light to the inside.  You know, I came from the suburbs where everything is big.  When we moved to Paris, there were so many things that I left behind that I realized I didn’t need.  You can live so beautifully and simply by just editing what you already have.  It enabled me to see a different way of life, and I love small spaces now.


Blogs are really important for people like me to get feelings from.  I look for interesting blogs that have a little bit of my aesthetic but also bring something different.  If you’re doing different kinds of projects, it’s always super interesting to me.  I love everything that you can do with your hands.  The more you do, and the more you create, the more people will see.


If you have a really great idea, go with it.  Don’t second-guess yourself; don’t hesitate.  If you really like it, and if you can spend the time with it, it shows to other people and they will like it.  In retrospect, I would have tried to start earlier and not be so afraid to start something new.


Container Gardening With: Ellen Drews

Today’s blog post comes from a dear friend, Ellen Drews.  Ellen is a banjo-playing, bug-loving, and plant-praising kind of gal.  She has recently moved to the Boston area, and has hit the ground running managing several community gardens.  From Ellen:

As a resident of densely-populated Somerville, Massachusetts, and a manager of three community gardens in Lowell, I have been putting a lot of brain power towards the challenge of growing delicious, seasonal vegetables in places with contaminated soil—or no soil at all! In my opinion, no one should have to pass up the fun and tasty rewards of vegetable gardening just for lack of workable land. So why not grow food above the land—in containers! Well, that’s what I did in the parking area behind my apartment. And my landlord keeps telling me he can’t wait until “we” are reaping the bounty.   I guess he’s expecting me to share.

farm

Container gardening offers many benefits: soil in containers warms up earlier in the spring, so you can plant those heat-loving tomatoes, peppers, and basil a bit earlier than you could in the ground. Containers can be put in locations with ideal sun exposure. And containers offer less territory for weeds and pests to take up residence—often resulting in healthier plants.

There are also a couple of limitations that container gardening brings that are important to be aware of:

  1. Vegetables grown in containers cannot spread their roots very far to find the perfect mix of nutrients in the surrounding soil. Everything they need must be present right there in that compact space. Therefore, it’s necessary to fertilize your containers a few times during the growing season with yummy compost or organic fertilizers.
  2. Soil in containers dries out easily, especially if the container has the proper drainage it needs to avoid root fungus. Dry soil is of no use to a growing plant—the plant requires water to exchange nutrients at the roots. What’s more, if a young vegetable seedling goes through the stresses of repeated “droughts” or under-watering, it will never reach its full potential!

But some of us have day jobs—so how can we keep our containers at the perfect, constant moisture level without running outside to water them every few hours? Easy! Build self-watering containers.

Self-watering containers are somewhat misnamed. They don’t water themselves infinitely—you will still have to go out and water your plants every couple days to every day on hot, dry days. However, wicking action will draw water through the soil from a reservoir below and will reduce major moisture fluctuations in the container. Your job is to make sure that the reservoir always has some water in it, and the container will do the rest! You can buy self-watering planters, but DIY containers are easy to make and much cheaper.

Self-Watering Container Garden

Materials:

  • 2 five-gallon food-grade plastic buckets (available at hardware stores, or for free at many restaurants!)
  • 4-6” piece of PVC pipe or PVC fence post
  • Drill and drill bits (1/4” bits work best – anything on the larger side is good for making drainage holes)
  • X-acto knife or sharp clippers
  • Sharpie marker
  • Organic potting soil (if it contains compost, great! If not, get some granular fertilizer like PRO-GRO to mix in for nutrients. I used Coast of Maine organic container soil.)
  • Seeds or seedlings of your favorite veggies (look for varieties like “compact” or “bush”)

What to do:

  1. Start with one bucket—this one will be nested inside the other, and will hold the soil and your plants. Turn it over and use the drill to cut out a big circle in the bottom of the bucket. You may need to use the X-acto knife or clippers to fully punch out this circle.
  2. Then, drill about a dozen “air holes” randomly throughout the bottom of the bucket. These holes will allow air to penetrate the soil and will drain excess water into the reservoir bucket below.

PVC spacer

  1. The piece of PVC pipe or fence post will serve as a “spacer” between the two buckets, holding them apart and also forming the “wick” part of the container where garden soil comes in contact with the water in the reservoir. Drill several holes throughout the PVC spacer, making sure that about 4-5 of the holes are within a 1/4” from the bottom edge of the spacer. This way, it will be able to draw water, even if the reservoir level is fairly low.
  2. Position the spacer in the middle of the second (hole-free) bucket and nest the other bucket on top of the spacer. Mark where the bottom edge of the inner bucket reaches with a Sharpie on the outer bucket. Drill out a hole that meets the edge of the inner bucket about 2” across and 1” tall. This will be your access point for re-filling the reservoir and for checking the water level with a finger!

sharpie mark

  1. Remove the inner bucket and fill the PVC spacer with potting soil. Pack it gently to remove any large air pockets, but don’t compress the soil too tightly. The spaces between the soil particles will allow water to wick through the spacer and up into the soil of the inner container.

inside bucket

  1. Nest the inner bucket over the spacer so that the circular hole in the bottom lines up with the PVC spacer. Fill the inner bucket with potting soil.   The soil inside the bucket should be making direct contact with the soil in the spacer, so that it forms a continuous wick throughout the bucket. Fill to within an inch of the top rim of the bucket—you want your plants to have as much soil as possible in the limited space so don’t skimp out on filling up the bucket.

finsihed containers

  1. Water the soil until it starts to drain into the reservoir below, then fill the reservoir using the side access hole in the bottom bucket. Now you are ready to tuck in some seeds or some seedlings and watch them grow!

kale scallions

I’m growing kale and scallions in one self-watering container, and I’ll put a tomato plant into the other container, now that we’ve passed the last frost date for Boston.   I’ve also got beets, arugula, lettuce, and nasturtiums growing in other found containers like a milk crate and a Coca Cola rack. What else can you turn into a container for gardening?  -Ellen (with a slug)

200178_10200213471923016_350974881_n

Note: All photos were taken by Ellen Drews.