Sourdough Dinner Rolls

“Love doesn’t just sit there, like a stone, it has to be made, like bread; remade all the time, made new.”

Friends, it has been nearly seven months since I’ve shared a post on Scissors & Sage. So much has happened since “Snow Day Sugar Cookies” back in February! Here are some life updates on my end:

I got my first ever Devacurl haircut. That, paired with Ouidad products, has made my hair curlier than ever without the frizz. I’ve never loved my hair more.

Anne and I started a little pop-up shop business called Looseleaf Books + Plants. We’ve had two pop-ups so far and had a whole lot of fun.

We moved to Chicago. Talk about a whirlwind! Philly treated us so well, and we were certainly sad to say goodbye for now. We are so excited about this new chapter in Chicago, though, and can’t wait to see where life takes us here.

WE GOT MARRIED! July 29, 2017 in Platteville, Wisconsin. The cows were mooing, the birds were chirping, and the sun was shining. It was a day I will never forget, filled with beautiful people, delicious food, and amazing music. I can’t wait to share more about it in the weeks and months to come.

What’s new in your lives? How did you enjoy the warmer months?

Today, I thought I’d share a recipe I’m trying for the first time. The week before our wedding this summer, Anne and I embarked on making our very own sourdough starter. We decided to make it as a symbol of our love: two ingredients, water and flour, coming together to make something greater than themselves, while also getting better with age. We call it our “wedding bread” and hope to make loaves and share it with loved ones for decades to come.

I celebrated my 27th birthday on Tuesday on our one-month wedding anniversary. My parents mailed me a very cool Romertopf clay bread baker to make all of our breads in! This is my first time using it and I’m pretty excited to see how these dinner rolls turn out (I’m writing this prematurely as I wait for the dough to rise). I altered this recipe from King Arthur Flour slightly, and have shared my adaptation below.

IMG_4018IMG_4020IMG_4024

It feels good to be back on Scissors & Sage, and I can’t wait to share more of our lives as we settle into this new city, new home, and new routine.

Sourdough Dinner Rolls (adapted from King Arthur Flour)

Prep time: 20 minutes | Inactive time: 3 hours | Bake time: 50 minutes | Yields: 16 rolls

Ingredients:

  • 1/2 cup sourdough starter
  • 1 cup lukewarm milk
  • 2 1/2 heaping cups all-purpose flour
  • 1 1/2 tsp salt
  • 2 tbsp sugar
  • 6 tbsp unsalted butter, at room temperature
  • 1 1/2 tsp instant yeast

Combine all of the ingredients in the bowl of a stand mixer with the dough attachment. Add more flour if needed to reach a soft, smooth texture.

Place dough in a large greased bowl. Cover and let sit for 90 minutes at warm room temperature. Slightly grease your bread baker while the dough is rising.

Once the dough is doubled in size, divide the dough into 16 pieces on a lightly greased work surface. Shape into balls, and place them in the baker so that they are not touching one another. Cover and let rise for an additional 90 minutes. The rolls should be puffy and touching.

Place the baker in the oven and then turn the heat on to 400°F. (Note: Always place a clay baker in a cool oven to avoid cracking.) Bake for 45 minutes, and then bake for an additional five minutes without the lid on, or until golden brown. Remove and let cool on a wooden board for 15 minutes before transferring the rolls to a cooling rack. Enjoy immediately or store in beeswax bread wrap.

From Scissors & Sage

Snow Day Sugar Cookies

If there’s one thing to know about me it’s that I love learning. I’m a visual learner so, in the age of the Internet, YouTube has become my best friend. It’s amazing, really, how many different kinds of things you can learn on YouTube these days. There are so many passionate people out there making videos about things they care about! Here are some actual snippets of my YouTube search history:

  • “How to add a color knitting”
  • “How to use the Uber app”
  • “How to braid a weeping fig”
  • “How to cut a tree slab”
  • “Replant phalaenopsis orchid”
  • “Royal icing flood consistency”

This last one led me down my latest rabbit hole. Anne’s mom shared the most delicious sugar cookie recipe from her friend a few years ago, and Anne and I like to experiment with making different shaped cookies and decorations. I found one YouTube channel by Julia M. Usher, a well-regarded baker with a specialty in making cookies, that offered a wealth of knowledge on the subject. Since Valentine’s Day is one of my favorite holidays, I thought I’d give royal icing a try with these sugar cookie hearts.

img_1767

First things first: Make Laura Kutill’s sugar cookies! I hope I meet her someday to thank her in person for this incredible recipe.

Laura Kutill's Delicious Sugar Cookies

Prep time: 15 minutes | Bake time: 10 minutes per batch | Yields: 6-7 dozen cookies

Ingredients:

  • 3 3/4 cups flour
  • 2 tsp baking powder
  • 1/4 tsp salt
  • 2 sticks unsalted butter, softened
  • 1 2/3 cups sugar
  • 2 large eggs
  • 2 tsp vanilla

Mix flour, baking powder, and salt. Set aside.

Cream the butter and sugar in a stand mixer until light. Add eggs, one at a time. Add vanilla. Add half of the dry ingredients and incorporate. Add remaining.

Cut dough into thirds and wrap in plastic wrap. Refrigerate for 2+ hours.

Preheat oven to 350°F. Roll the dough 3/16″ thick on a floured surface. Cut out the cookies and place on a lined cookie sheet. Bake for 9-10 minutes until the edges begin to turn a light golden brown. Cool on baking sheet for 3 minutes before transferring to a wire rack to cool completely.

From Scissors & Sage

Seven Steps to Flawless Rolled Cookies (via Julia M. Usher)

  1. Work with cold dough.
  2. Lightly flour work surface.
  3. Use a good, heavy rolling pin.
  4. Rotate dough while rolling.
  5. Roll dough relatively thin, 3/16″.
  6. Transfer cutouts with an offset spatula.
  7. Rotate for even browning.

Julia also shared her recipe for royal icing, as well as how to change the consistency for outlining, top-coating, and flooding cookies. Below are her clues to making excellent icing.

Royal Icing & Consistency Alterations (via Julia M. Usher)

Icing “Glue”

  • 2 lbs powdered sugar
  • 1/2 tsp cream of tartar
  • 5 large egg whites

Using the beater attachment, combine powdered sugar and cream of tartar in the bowl of a stand mixer. Add in egg whites and mix at low speed. Scrape down sides before increasing to high speed for 1-2 minutes. Icing will go from a gray to white in color due to increased air circulation in icing.

If desired, flavor the icing (i.e. incorporate 1 tsp of vanilla or lemon extract).

Makes 4 cups icing, which is enough to cover several dozen cookies.

Note: Color the icing once the “glue” is distributed into smaller bowls.

Outlining Consistency

For 1 cup of “glue,” add 1/2 to 3/4 tsp water. Mix gently. The icing should fall in globs off of the spoon.

Top Coating Consistency

For 1 cup of “glue,” add 1 1/2 to 2 1/2 tsps water. Mix gently. The icing should flow slowly off of the spoon and create tracks in the icing that disappear after 15 seconds.

Note: Use this icing for covering cookies without outlining first.

Flooding Consistency

For 1 cup of “glue,” add 2 to 3 tsps water. Mix very gently so as not to create air bubbles. Tap down bowl on counter to help. The icing should run off the spoon a bit faster than top coat, and tracks in icing should disappear in 10 seconds.

Note: If icing is too watered down, sift powdered sugar into the mixture.

From Scissors & Sage

All in all, I’m really glad that I tried making royal icing. It certainly took a long time to get through all 90 cookies I made, but the end result was worth it. Now I get to share my cookies with friends and family this weekend!

PS) I decided to try making Julia’s parchment pastry cones rather than use the canvas pastry bag we have. She walks you through the steps to make these simple bags, and I have to say it was very worth it. You get to just throw the bags away when you’re done rather than clean out the canvas.

DIY 2017 Planner

Earlier in January I decided to make a planner to keep track of our appointments, activities, and work schedules for the new year. We used a beautiful Rifle Paper Co. wall calendar in our kitchen last year that worked really well for us. Rather than go buy a new one for 2017, though, I decided to get a little thrifty and use materials we already had. I can never pass up a good crafting challenge.

We didn’t have the right kind of paper for another wall calendar in the kitchen, so I decided to go with a planner-style project. I found this small binder we had in with our crafting things, and it had unused paper and plastic sleeves inside. Jackpot!

Since Anne and I both love the aesthetic of what Anna Bond creates for Rifle Paper Co., I chose to cut out each month’s painted font from our 2016 calendar to use in our new planner. I mounted each one onto a piece of colored paper using double-sided tape, and then mounted that onto a piece of graph paper to fill the entire plastic sleeve.

Each section/month has five pieces of paper behind it: The first page says, “Monthly Notes,” where we’ve been writing things like monthly goals and things we’d like to accomplish this month. The next four pages have a weekly calendar view from Monday to Sunday. (Yes, I wrote this out 52 times. It was worth it!) I’m so happy with how that layout worked out.

The other fun thing that our new planner has is a space for our meal planning sheets. We slide them in the back of each month’s plastic sleeve, and take them out when we’re deciding what to cook/bake every weekend. We did this style of meal planning last year and we had a lot of success with it. We ended up making so many different kinds of foods, and now we use last year’s notes to help guide us this year:

We have been loving using our new planner. It’s so easy to keep track of all the things we have going on, and it keeps us organized in a lot of different ways: meal planning, monthly goals, daily activities, birthdays, holidays, you name it. The best part is that we still keep it in the kitchen. It sits happily next to our favorite cookbooks and our beloved recipe box — which is also Rifle Paper Co.!

Are you keeping a wall calendar or planner this year? What kinds of things do you keep track of?

So long, 2016!

Happy New Year, everyone!

As 2016 is coming to an end, I thought I’d share a bit about my year with you. It was kind of a funny year for Scissors & Sage. I found that I didn’t have a chance to write many blog posts on the things that Anne and I were crafting, baking, and doing together. A lot of my creative energy has been going toward planning for our wedding (July 2017!), preparing for the holidays at terrain, and making homemade Christmas gifts for our loved ones.

There are countless reasons why 2016 wasn’t the greatest year ever. You all have your own reasons; I won’t rehash them here. But yesterday I found out that I did not get a job that I had been hoping for for several months. It would have been a perfect next step in my music therapy career. I am disappointed and disheartened to say the least, but I am glad to be able to leave this in 2016. I am excited to see what new opportunities are ahead in the new year.

There was also a lot of love in 2016. Anne and I were able to connect with many friends and family this year, and it left me feeling very whole. We traveled to Arizona to see some of Anne’s family and go to Cubs spring training. We witnessed my cousins graduate from college and my sister from her master’s program. Anne and I went lazy river tubing and felt like kids again. We brought my parents to Chicago and Wisconsin for the first time to meet Anne’s extended family and to spend time wedding planning together. My sister got married and I gained a brother. I spent a night singing with my closest college acapella friends. The Cubs won the World Series. My family had its first-ever holiday book club (we read Another Brooklyn by Jacqueline Woodson), and it was a huge success.

I am so excited to ring in the new year tonight. There is a lot on the horizon for 2017, and I can’t wait to embrace it all.

janWe played in the snow in January. [Philadelphia, PA]

febI got fancy for Valentine’s Day in February. [Philadelphia, PA]

marI tried a prickly pear margarita in March. [Phoenix, AZ]

aprI got in bed a little early in April. [Philadelphia, PA]

mayWe made a quiche in May. [Philadelphia, PA]

junI almost stole a dog named Luna in June. [Arcadia Beach, OR]

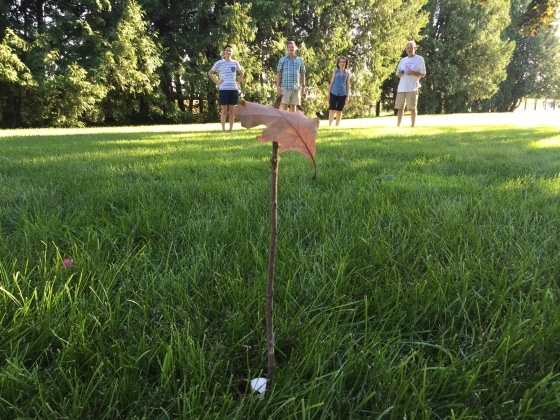
julWe played bocce in July. [Platteville, WI]

augWe picnicked in August. [Platteville, WI]

sepMy sister got married in September. [Amity, OR]

octWe stamped envelopes in October. [Philadelphia, PA]

novThe Cubs won the World Series in November. [Chicago, IL]

decWe got festive in December. [Glen Mills, PA – We Laugh We Love Photography]

Peanut Butter Butterfinger Cookies

Happy Hallows’ Eve! As Anne and I prepare to watch the ever-important Chicago Cubs game tonight, I thought I’d share the recipe for some cookies we made this weekend. They are from The Salty Marshmallow and are the perfect Halloween-themed treat. It’s not too late to make some yourself. Maybe as you cheer on the Cubs?!

The secret to these cookies is that they include Butterfinger baking bits. Think chocolate candy-meets-homemade-baked-good. Yup. You’re welcome!

If you have trick-or-treat candy lingering into the week, you could crush anything and mix it into this delicate and chewy peanut butter cookie dough. Kit Kats, Snickers, Reese’s cups, M&Ms… The list goes on.

Peanut Butter Butterfinger Cookies (from The Salty Marshmallow)

Active time: 15 minutes | Bake time: 10 minutes | Yields: 60 cookies

Ingredients:

  • 2½ cups all-purpose flour
  • 1½ tsp baking powder
  • 1 tsp baking soda
  • ½ tsp salt
  • ½ cup granulated sugar
  • ½ cup brown sugar
  • 1 cup butter, softened
  • 1 cup creamy peanut butter
  • 1 egg
  • 1 tsp vanilla
  • 2 cups Butterfinger baking bits

Preheat oven to 375°F. Line two baking sheets with parchment paper and set aside.

Whisk together flour, baking powder, baking soda, and salt. In an electric mixer, beat butter and peanut butter until fluffy. Add egg and beat until incorporated. Beat in sugars and vanilla. While the mixer is running, slowly add in the dry ingredients. Mix until incorporated. Stir in Butterfinger baking bits.

Use a spring-loaded scooper to create tablespoon-sized balls of dough. Drop onto prepared baking sheets. Press down slightly with the back of a spoon to flatten.

Bake for 10 minutes, or until bottoms are a light golden brown. Remove even if cookies do not appear completely baked. Let cool for a few minutes before transferring to a wire rack.

From Scissors & Sage

Happy Halloween!