Sourdough Dinner Rolls

“Love doesn’t just sit there, like a stone, it has to be made, like bread; remade all the time, made new.”

Friends, it has been nearly seven months since I’ve shared a post on Scissors & Sage. So much has happened since “Snow Day Sugar Cookies” back in February! Here are some life updates on my end:

I got my first ever Devacurl haircut. That, paired with Ouidad products, has made my hair curlier than ever without the frizz. I’ve never loved my hair more.

Anne and I started a little pop-up shop business called Looseleaf Books + Plants. We’ve had two pop-ups so far and had a whole lot of fun.

We moved to Chicago. Talk about a whirlwind! Philly treated us so well, and we were certainly sad to say goodbye for now. We are so excited about this new chapter in Chicago, though, and can’t wait to see where life takes us here.

WE GOT MARRIED! July 29, 2017 in Platteville, Wisconsin. The cows were mooing, the birds were chirping, and the sun was shining. It was a day I will never forget, filled with beautiful people, delicious food, and amazing music. I can’t wait to share more about it in the weeks and months to come.

What’s new in your lives? How did you enjoy the warmer months?

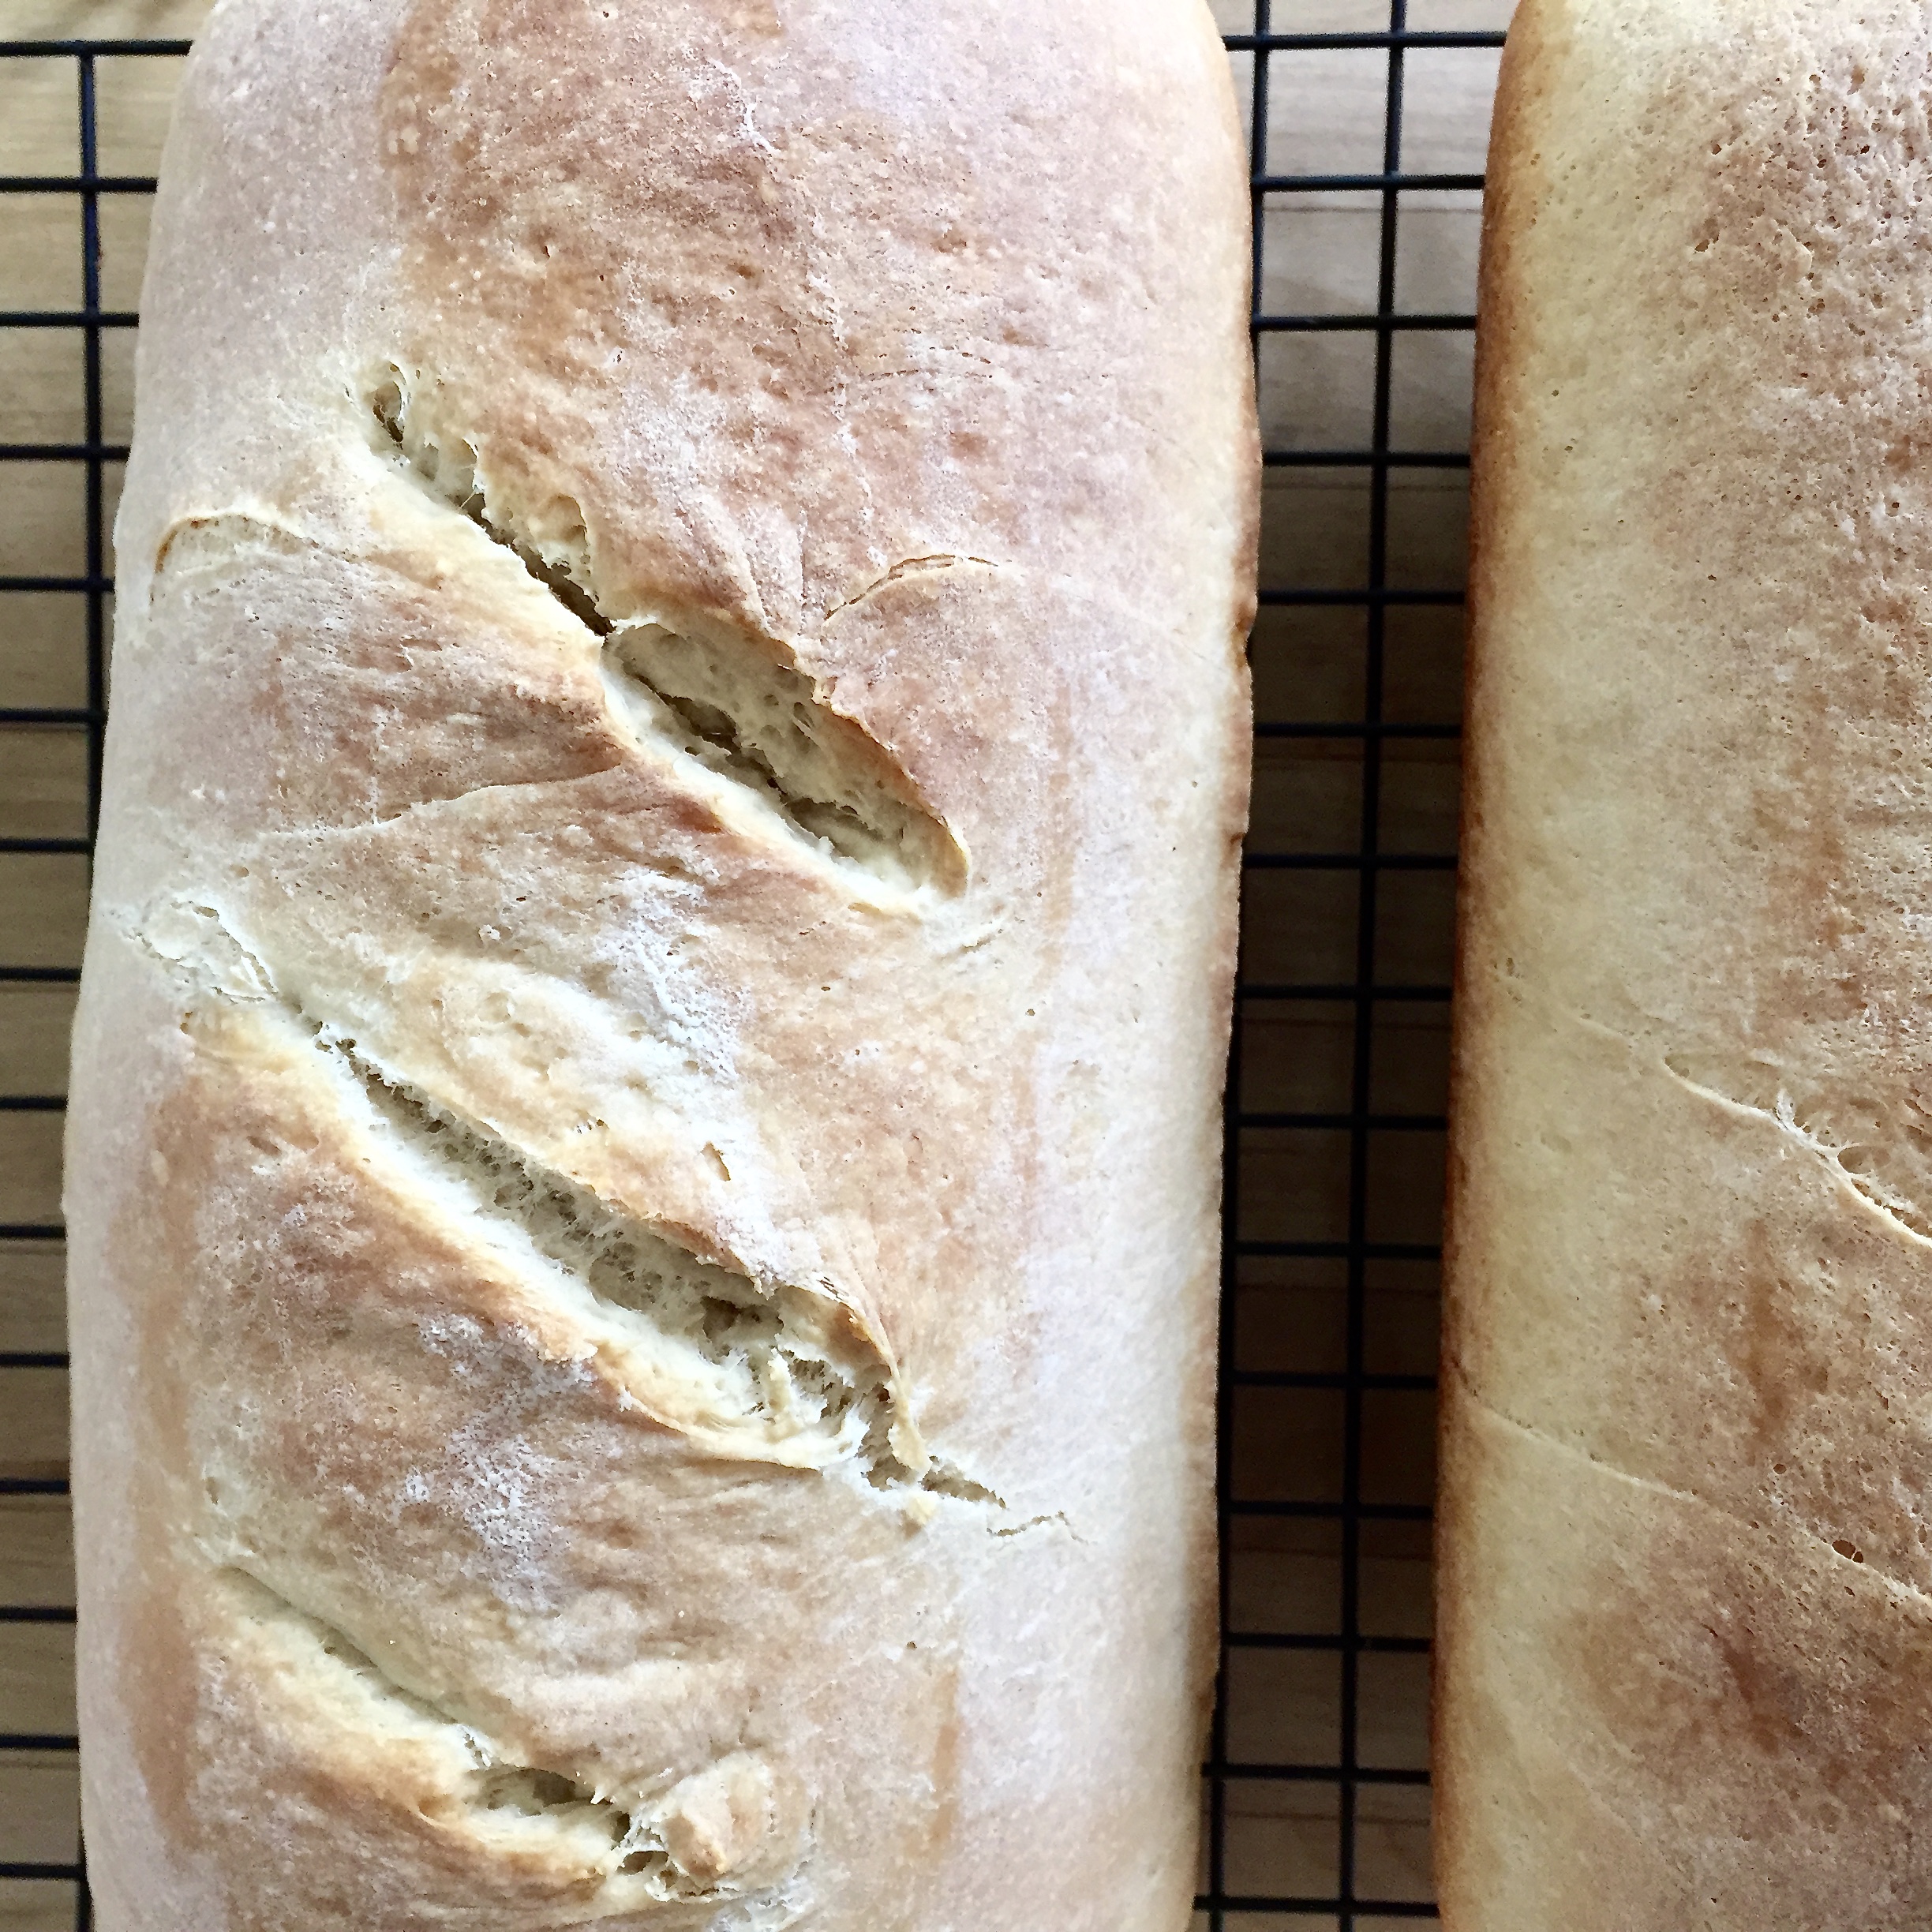
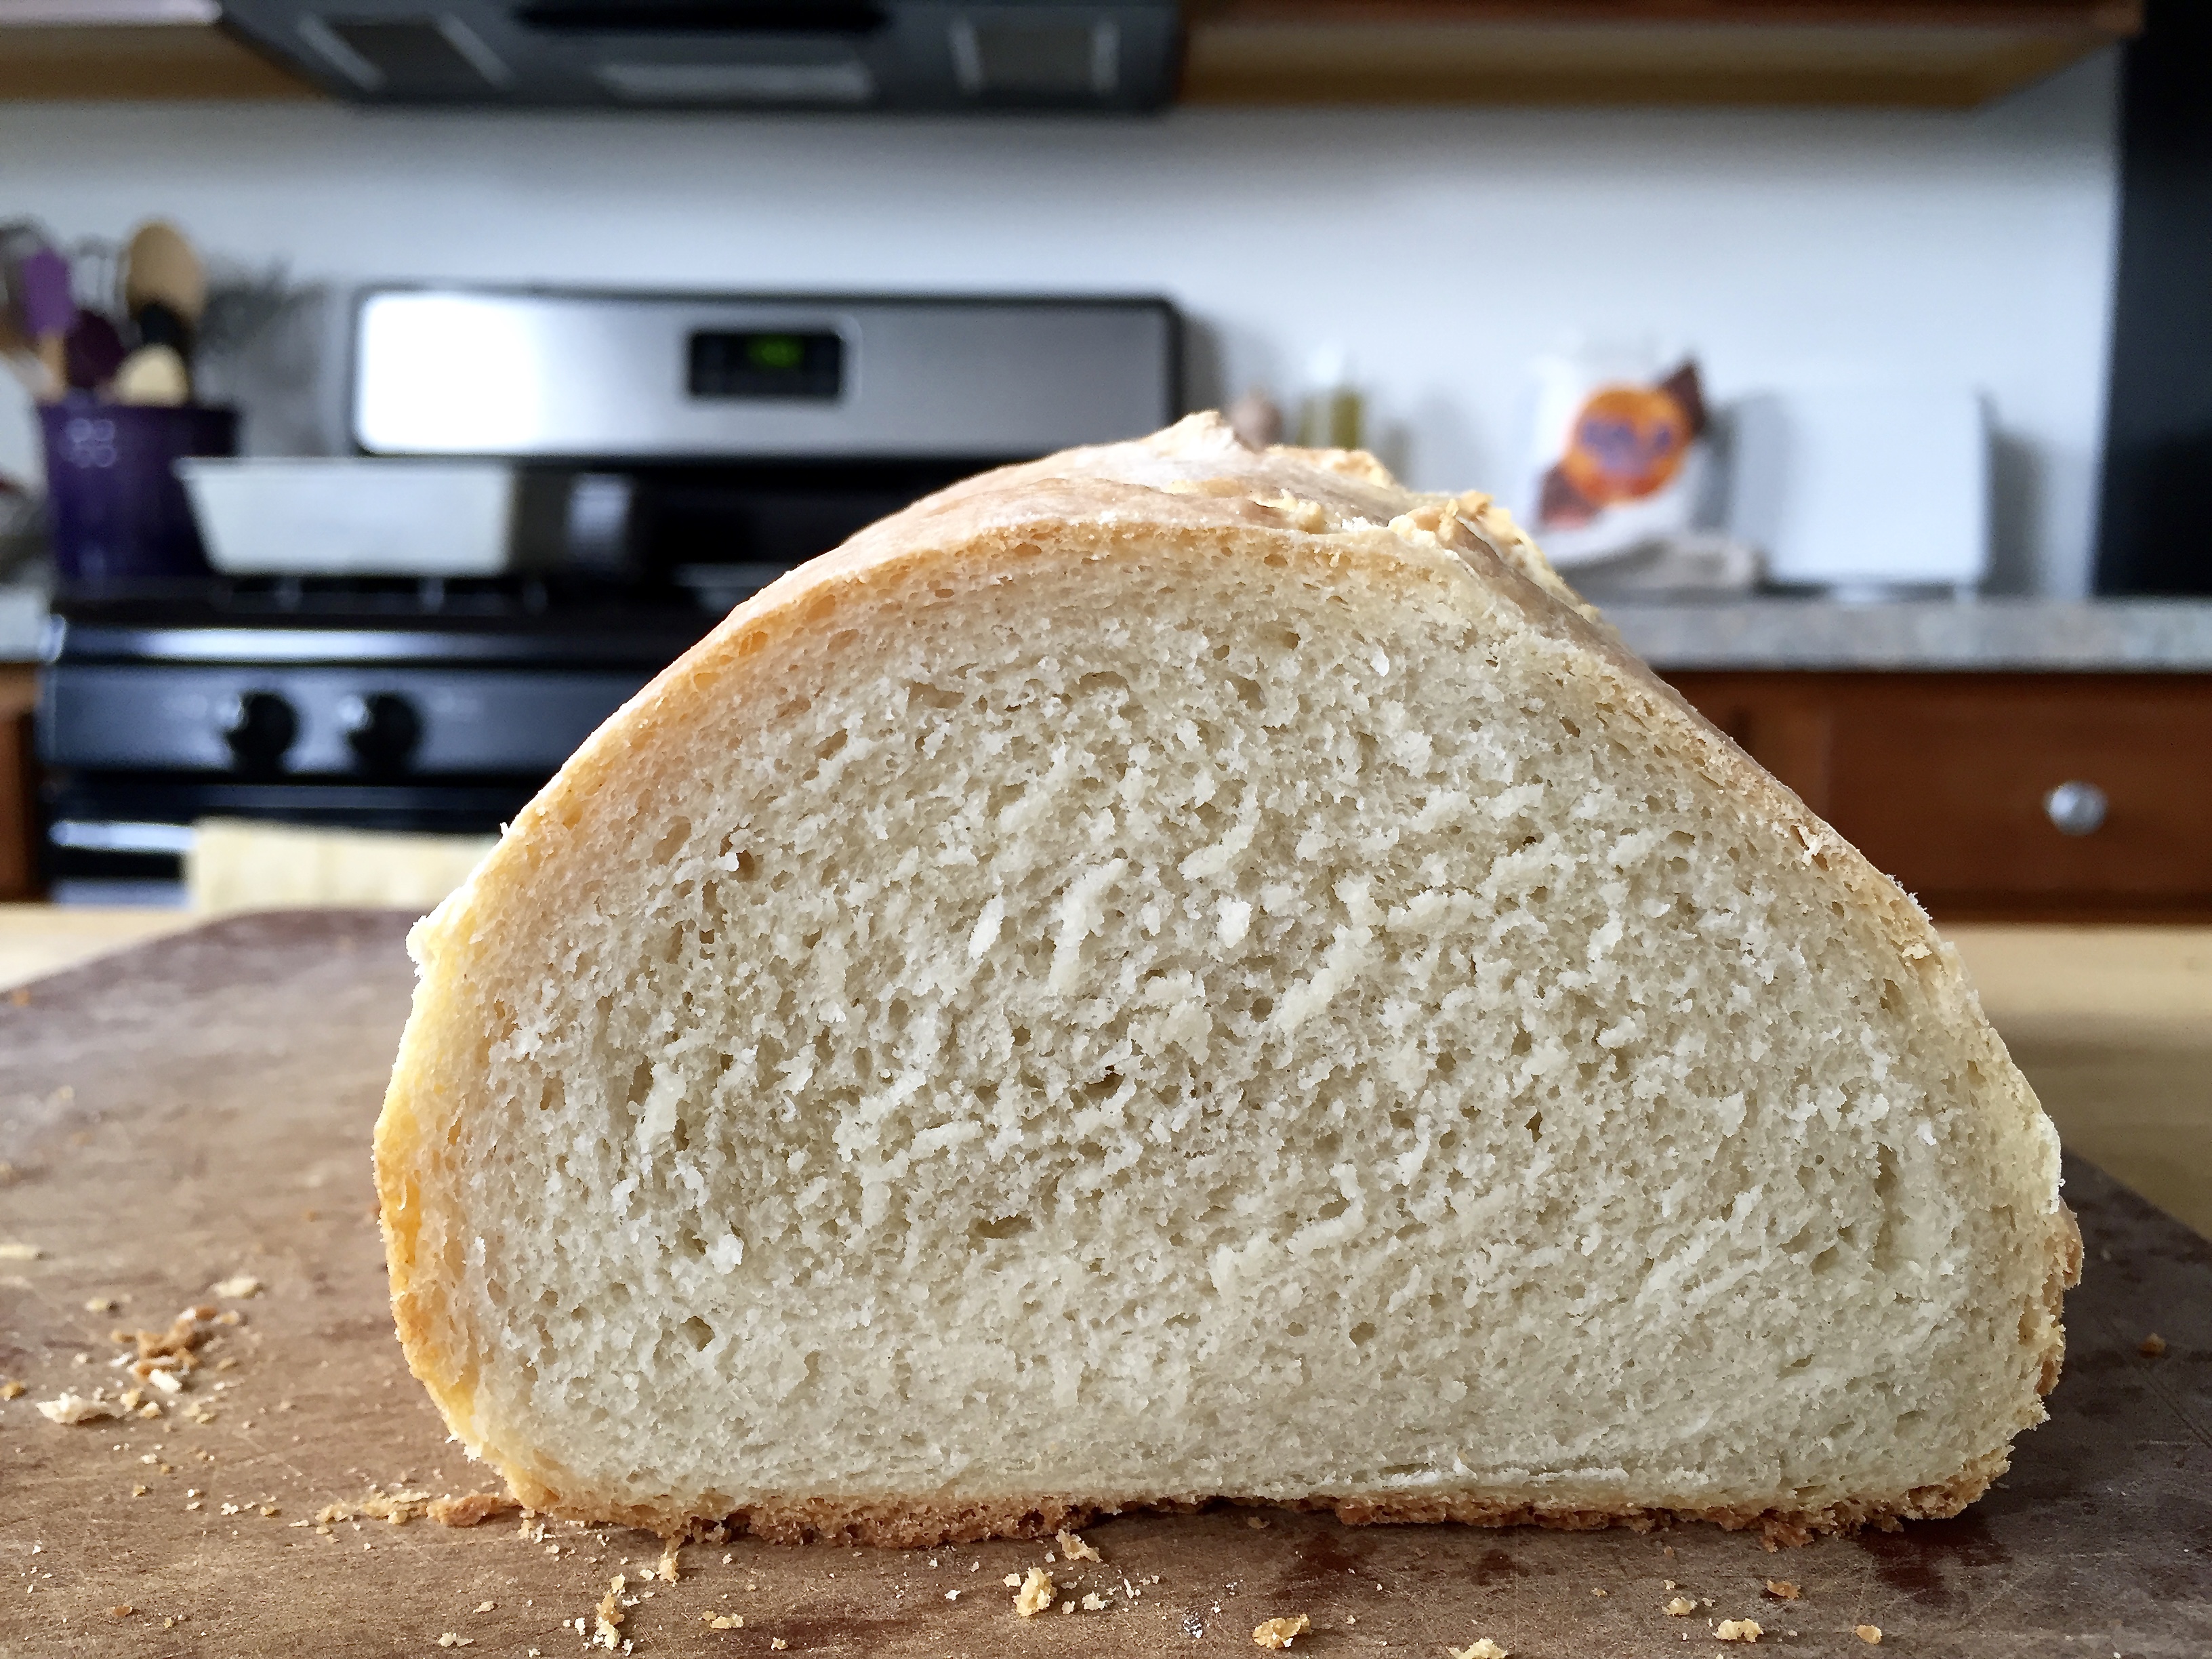
Today, I thought I’d share a recipe I’m trying for the first time. The week before our wedding this summer, Anne and I embarked on making our very own sourdough starter. We decided to make it as a symbol of our love: two ingredients, water and flour, coming together to make something greater than themselves, while also getting better with age. We call it our “wedding bread” and hope to make loaves and share it with loved ones for decades to come.

I celebrated my 27th birthday on Tuesday on our one-month wedding anniversary. My parents mailed me a very cool Romertopf clay bread baker to make all of our breads in! This is my first time using it and I’m pretty excited to see how these dinner rolls turn out (I’m writing this prematurely as I wait for the dough to rise). I altered this recipe from King Arthur Flour slightly, and have shared my adaptation below.

IMG_4018IMG_4020IMG_4024

It feels good to be back on Scissors & Sage, and I can’t wait to share more of our lives as we settle into this new city, new home, and new routine.

Sourdough Dinner Rolls (adapted from King Arthur Flour)

Prep time: 20 minutes | Inactive time: 3 hours | Bake time: 50 minutes | Yields: 16 rolls

Ingredients:

  • 1/2 cup sourdough starter
  • 1 cup lukewarm milk
  • 2 1/2 heaping cups all-purpose flour
  • 1 1/2 tsp salt
  • 2 tbsp sugar
  • 6 tbsp unsalted butter, at room temperature
  • 1 1/2 tsp instant yeast

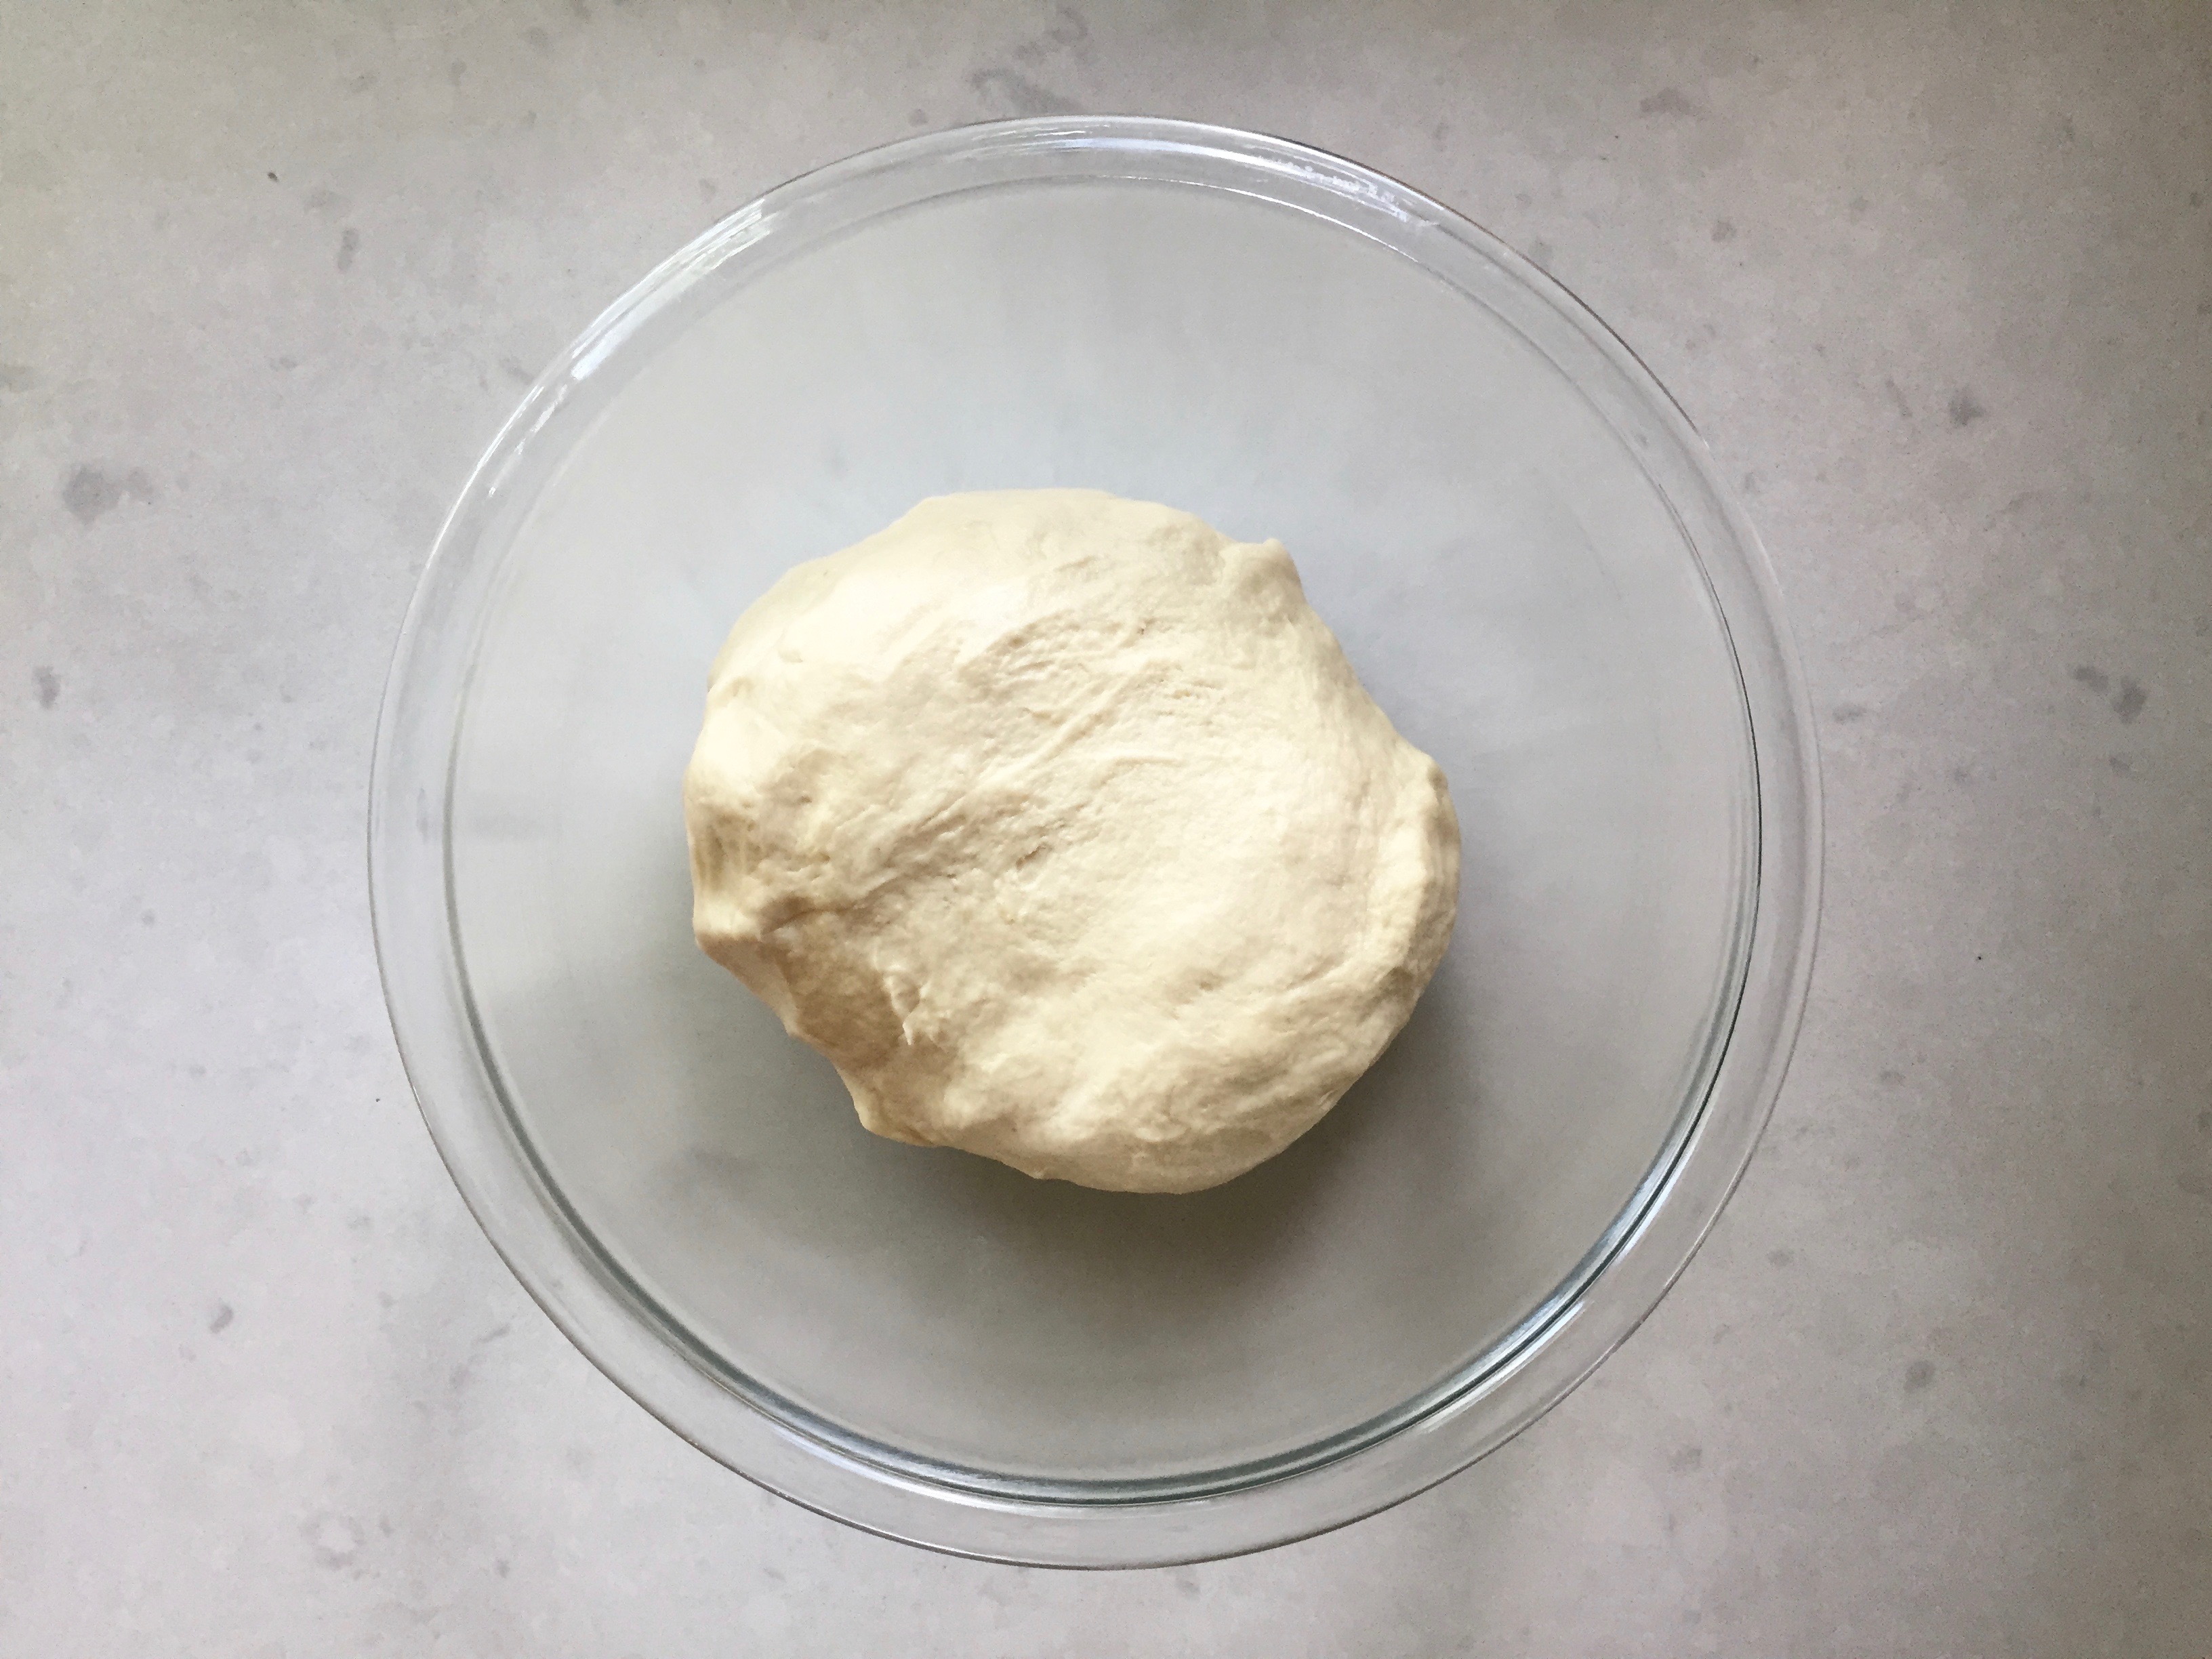
Combine all of the ingredients in the bowl of a stand mixer with the dough attachment. Add more flour if needed to reach a soft, smooth texture.

Place dough in a large greased bowl. Cover and let sit for 90 minutes at warm room temperature. Slightly grease your bread baker while the dough is rising.

Once the dough is doubled in size, divide the dough into 16 pieces on a lightly greased work surface. Shape into balls, and place them in the baker so that they are not touching one another. Cover and let rise for an additional 90 minutes. The rolls should be puffy and touching.

Place the baker in the oven and then turn the heat on to 400°F. (Note: Always place a clay baker in a cool oven to avoid cracking.) Bake for 45 minutes, and then bake for an additional five minutes without the lid on, or until golden brown. Remove and let cool on a wooden board for 15 minutes before transferring the rolls to a cooling rack. Enjoy immediately or store in beeswax bread wrap.

From Scissors & Sage

On Baking Bread

Anne and I didn’t get engaged with rings. Instead, we exchanged meaningful gifts with one another so that we could choose our rings together. I gave Anne a genealogy chart of both of our families dating back to the mid-1800s, and Anne gave me a KitchenAid stand mixer–a symbol of ingredients mixing and coming together to form something greater than themselves.

(Here’s me and “Pistachio.”)

Over the weekend, I decided to give my new dough hook a try. I’ve always wanted to bake bread from scratch, and what better time than now? The KitchenAid came with a booklet of staple recipes, this being one of them. I gathered the few ingredients and set out on a bread making quest. Our apartment smelled like a bakery, and I can officially say that I am “hooked” on baking bread. The loaves are soft and moist on the inside and crispy on the outside. Brushing the pans and top of the dough with olive oil gives the baked bread a hint of an olive taste. You might as well be sitting in a restaurant in an Italian piazza.

Rapid Mix Cool Rise White Bread (via KitchenAid)

Active time: 25 minutes | Bake time: 40 minutes | Yields: 2 loaves

Ingredients:

  • 6-7 cups all-purpose flour
  • 2 tbs sugar
  • 3 1/2 tsp salt
  • 3 packages active dry yeast
  • 1/4 cup butter, softened
  • 2 cups very warm water (120°F to 130°F)

Place 5 1/2 cups flour, sugar, salt, yeast, and butter in mixer bowl. Attach bowl and dough hook to mixer. Turn to speed 2 and mix about 20 seconds. Gradually, add warm water and mix about 1 1/2 minutes longer.

Continuing on speed 2, add remaining flour, 1/2 cup at a time, and mix until dough clings to hook and cleans sides of bowl, about 2 minutes. Knead on speed 2 about 2 minutes longer.

Cover dough with plastic wrap and a towel [or blanket]. Let rest 20 minutes.

Divide dough in half. On a lightly floured surface, use a rolling pin to roll each half into a rectangle, approximately 9 x 14 inches. Starting at a short end, roll the dough tightly. Pinch to seal the seam. Pinch the ends and turn them under. Place the dough, seam side down, in two greased loaf pans. Brush each loaf with olive oil and cover loosely with plastic wrap. Refrigerate 2 to 12 hours.

When ready to bake, uncover dough carefully. Let stand at room temperature for 10 minutes. Puncture any gas bubbles which may have formed. Bake at 400°F for 35 to 40 minutes until golden. Remove from pans immediately and cool on a wire rack.

from Scissors & Sage

(Fresh and steamy out of the oven)

These ingredients certainly did create something greater than their individual selves. They reacted to one another and the elements surrounding them, changing their chemical makeup to grow and expand into something delicious.

Moroccan Chickpea Soup

I don’t think that I’ve mentioned this on Scissors & Sage before, but beyond my work as a music therapist, I’m also part-time at a home and garden store outside of Philly called terrain. I was hired as a seasonal nursery associate, and have been really enjoying my time there.

Over the weekend, terrain had its holiday open house–a huge event that kicks of the season with festivities for all. I decided to enter myself into the employee soup competition with an original recipe for Moroccan chickpea soup. Although it didn’t win, I do think that it’s worth sharing here. Many people enjoyed it for its spicy kick and flavorful ingredients. It’s a recipe that I know I’ll come back to several times this winter.

It’s worth noting that this recipe happens to be vegetarian, vegan, and gluten free. Perfect for most any food restriction! I hope that you enjoy it, and that it warms your bones. It just got really cold in Philly.

Happy Thanksgiving!

Moroccan Chickpea Soup

Prep time: 15 minutes | Cook time: 1 hour | Yields: 4 quarts

Ingredients:

  • 4 carrots, diced
  • 2 Yukon gold potatoes, diced
  • 1 large yellow onion, diced
  • 3 cloves garlic, minced
  • 32 oz canned chickpeas, drained and rinsed
  • 3/4 cup liquid from a can of chickpeas
  • 1/2 tsp cayenne pepper
  • 1/2 tsp cinnamon
  • 1/4 tsp paprika
  • 1/4 tsp freshly ground coriander
  • 64 oz vegetable broth
  • 28 oz canned diced tomatoes
  • 1 tbs tomato paste
  • zest of 1/2 a lemon

Heat olive oil over medium heat in a large pot. Add onions and garlic, and sauté until cooked. Add spices and toast, stirring continuously. Deglaze using one cup of vegetable broth.

Add carrots and potatoes, and cook for five minutes. Add liquid from the chickpea can, and cook for five additional minutes.

Add diced tomatoes and cook for five minutes. Stir in tomato paste. Add remaining vegetable broth and bring to a boil. Reduce to a simmer, and cover for 15 minutes.

Add chickpeas and lemon zest, and simmer for a final 5-10 minutes. Enjoy immediately, or refrigerate in an airtight container for up to five days.

From Scissors & Sage 

Picking Favorites: Recipes for Summer

Γεια σας! That means “hello” in Greek, and is pronounced “yassas.” I also learned how to say “cheers,” “good morning/evening,” “yes/no,” a couple of dog commands (random, I know), and other nifty things to get around Greece. It was a funny thing, traveling around a country where the alphabet is fundamentally different from English. Anne quickly became good at deciphering words letter by letter to find our way around. We felt like detectives!

It’s hard to believe that our long-awaited trip to Greece has come to an end–but what a trip it was! I’m not even sure I know where to begin, and my thoughts on the whole thing aren’t fully formed yet. I’ll say this: It was incredible. Beautiful beyond belief, really, and the people we met were so hospitable and kind. Life in Greece has a different pace to it than in the U.S., and we quickly fell into its slower rhythm. The food is healthy and locally grown, and the hot sun and salt water–oh, the salt water!–were nourishment for the soul.

Now back in Philly, I am trying to hold on tightly to some of these ways of life. I write my to-do lists on smaller pieces of paper; I buy fruits and veggies from the local market; I take a break in the afternoons. These things, for now, are keeping me relaxed and mindful. Next week, I’d like to share a few photos and stories from our trip with you, as well as some travel tips that I jotted down along the way–helpful hints that I didn’t know going into our trip.

Two things on the forefront: 1) I’m featuring a fun giveaway at the end of next month. Stay tuned for how you can enter! 2) Anne and I are in the process of looking for a new apartment in Philly. We’ve been talking about finding a new home for a few months now, and we’ll be making the move in about a month! Fingers crossed we find just the right spot for us to continue growing.

As I catch up on Martha Stewart Living and Bon Appetit, I’ve been inspired by all kinds of summer recipes. I’m a little behind the eight ball from being away (i.e. I’m just now reading about “Ten fun ideas for the Fourth!”), but now I can dive into seasonal dishes. Below are some that I’d like to give a try. Enjoy!

Recipes for Summer

Corn and Fregula with Halloumi (Greek!) Cheese from Bon Appetit (click here for the recipe)

Grilled Chicken with Lemon and Thyme from Food & Wine (click here for the recipe)

Tomato Cucumber Avocado Salad from Green Valley Kitchen (click here for the recipe)

Grilled Beet Baba Ghanoush from Bon Appetit (click here for the recipe)

Herbed Summer Squash Pasta Bake from Smitten Kitchen (click here for the recipe)

Iron Skillet Peach Crisp from Bon Appetit (click here for the recipe)

Grapefruit-Jalepeno Margarita from Camille Styles (click here for the recipe)

Mini Caprese Frittatas

A few weeks ago, I brought these homemade mini caprese frittatas to a brunch with some coworkers. They went over so well that I thought I’d share the recipe with you here! These frittatas are perfect for this time of year, with fresh basil and cherry tomatoes quickly coming into season. They’re delicious served hot or at room temperature.

Mini Caprese Frittatas

Prep time: 15 minutes | Bake time: 22 minutes | Yields: 12 mini frittatas

Ingredients:

  • 6 eggs
  • 1/3 cup milk
  • 1/4 tsp salt
  • 1/8 tsp pepper
  • 1 tbs pesto
  • 1 1/2 cups grated mozzarella
  • 12 cherry tomatoes

Preheat oven to 350°F. Coat a standard 12-cup muffin pan with cooking spray and set aside. Cut cherry tomatoes into thin coins and set aside.

In a large mixing bowl, combine eggs, milk, salt, pepper, and pesto. Whisk until fluffy, 1-2 minutes. Pour the egg mixture into the muffin pan, filling each cup approximately 1/3 full.

Bake for 10 minutes. At the 10-minute mark, sprinkle mozzarella evenly over each muffin cup. Put back in the oven and bake for 10 more minutes.

When the frittatas have cooked for a total of 20 minutes, place cherry tomatoes on top of each frittata. (The frittatas might be puffed up, but that is okay.) Once the cherry tomatoes are added, turn the oven to broil for the remaining two minutes.

Let muffin pan cool for five minutes before transferring frittatas to a cooling rack. Eat promptly, or at room temperature. Enjoy!

From Scissors & Sage