Our First Friendsgiving

OLYMPUS DIGITAL CAMERA

Anne and I hosted our first-ever Friendsgiving this past weekend. It’s something we’ve been wanting to do for a few years, and being in Chicago and close to good friends felt like the right time to give it a try.

OLYMPUS DIGITAL CAMERA

I made a centerpiece for our table from white pumpkins and strawberry corn that we grew at the farm in Wisconsin this summer, as well as silver dollar eucalyptus I found at Trader Joe’s ($2.99 for the bunch!). Working on this arrangement had me feeling like I was back at terrain again.

OLYMPUS DIGITAL CAMERA

We squeezed 10 people around our dinner table — a very hyggeligt time.

OLYMPUS DIGITAL CAMERAOLYMPUS DIGITAL CAMERA

Everybody contributed a dish to our Friendsgiving, making for a delicious meal indeed. I made my Grandma Anne’s pecan tassies (or, as we call them, “little shits”) and my Grandpa Augie’s pumpkin pie. Anne focused on the turkey and mashed potatoes.

OLYMPUS DIGITAL CAMERA

Our meal:

  • Roast turkey breast (following this recipe loosely)
  • Mashed potatoes (following this recipe, again loosely)
  • Cranberry-citrus sauce
  • Sausage and mushroom stuffing
  • Roasted squash
  • Roasted Brussel sprouts
  • Carrots provencal
  • Rice and arugula salad (recipe from Ottolenghi’s Plenty More)
  • Pecan tassies
  • Pumpkin pie

OLYMPUS DIGITAL CAMERA

It was a beautiful time with great friends, and I can’t wait to keep making special memories like this. What are you cooking up for Thanksgiving this year?

OLYMPUS DIGITAL CAMERA

Happy Thanksgiving from us to you!

My New Recipe Box

Happy Sunday!  Are you all having nice weekends?  Yesterday, I had the pleasure of going to a 90th birthday party for my…well, I don’t know how we’re related.  That’s the thing about big Italian families.  It was a celebration for the books, though, that’s for sure!

For those of you on your computers and on my site directly, you will notice many new changes to the looks of Scissors & Sage.  For you loyal subscribers out there, visit http://www.scissorsandsage.com to see my updates!  I’ve designed a new header logo, a much-needed menu of categories up top, and new social media icons that I coded myself!  Anne snapped some pictures for the updated sidebar and “New Reader?” section.  I hope you all enjoy the new layout!

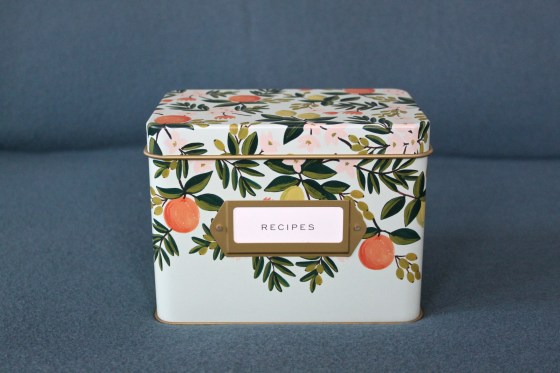
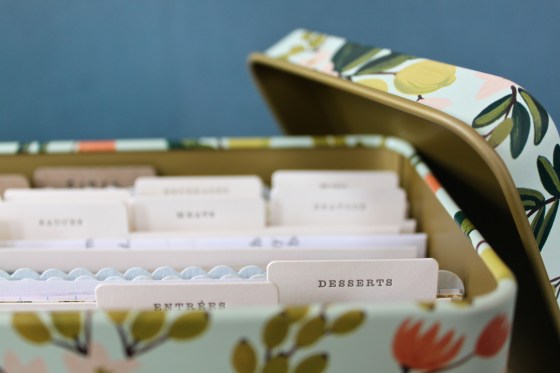
This week, I thought I’d share my latest love: my recipe box.  Anne gave it to me for my birthday in August, and it was just what I wanted!  I had been eyeballing it on the Rifle Paper Co. website for about six months.  You see, I had a pretty good system for my recipes pre-recipe box — a binder with tabs and plastic sleeves.  But this, this is just on another level.  I stared googly-eyed at it for probably three or four days before starting to transfer recipes.

Some who know me might say that I’m neat or maybe organized.  Others, like my college roommates, might call me compulsively neat AND organized.  Everyone has their way and, needless to say, I like things in their place.

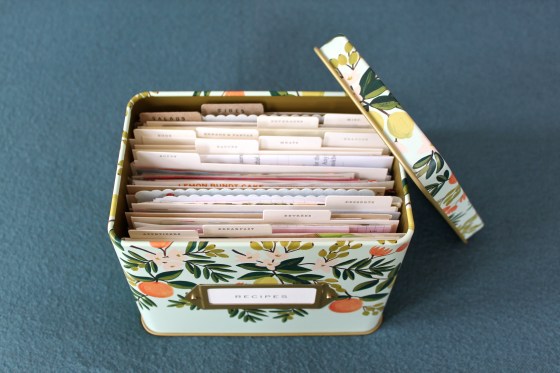
When I started my recipe transfer and looked more closely at the pre-written letterpress tabs the box came with, I started to wish that I could have decided on my own categories.  Where was the salads category?  And what about sides?  Does a quiche go under breakfast or eggs?  And why on EARTH were breads and pastas in the same category?!  As I’ve previously said, and as it’s written in my “New Reader?” section, pasta is its own food group.

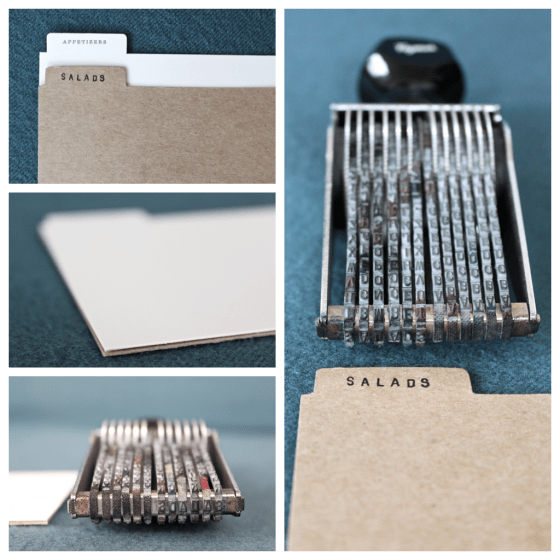
I began breathing a little bit more quickly as my eyes darted around trying to put an order to all of this chaos (note: there was literally no actual chaos to be found).  Then it hit me: I could make my own tabs to supplement what the box came with!  I had recently picked up some thin chip board from Paper Source, and it was the perfect material.  I traced an existing divider and then cut it out.  I borrowed Anne’s alphanumeral stamp (the kind that librarians use), and it was finished!

A month or so into using my recipe box, I have to say that it is quite functional.  I use some categories more than others (do you see how big desserts is?) and others not at all (seafood).  The box also came with 24 blank recipe cards that I am really excited to start using.

I am so incredibly happy with how my recipe box turned out.  There are so many family recipes, so many stories, and equally as many happy memories spent in the kitchen and at the dining table.  This is my holy text.

“Gnocch-gnocch.” “Who’s there?”

With graduate school over, and Anne off from teaching for the summer, it finally feels like we’ve got our feet back on the ground again.  It’s been a crazy few months to say the least, but we’ve taken the last two weeks to recuperate by spending time with our families and friends, going for bike rides through Philly, and cooking up one hell of a storm in our teeny weeny kitchen.  We challenged ourselves to make homemade pasta, and we decided on ricotta gnocchi.

We found a delicious and easy-to-understand recipe from Italian Food Forever.  Her recipe uses only four ingredients, and does not require any rest time or chill time.  All we added was the use of a wooden gnocchi board to make ridges in the dough.  The ridges help catch sauce and cheese — mmm!  Check out a video of our process on Instagram.

Ricotta Gnocchi (via Italian Food Forever)

Ingredients:

  • 1 lb full fat ricotta
  • 1 1/2 cups all-purpose flour
  • 1/3 cup grated parmesan cheese
  • 1 large egg

In a medium bowl, combine ricotta, parmesan, and egg with a fork until blended.  Add one cup of flour until blended.  Place the dough on a lightly floured work surface, and add any remaining flour until the dough is not too sticky.

Break off one fist-sized piece of dough at a time, and roll it into a one-inch-wide snake.  Be sure to coat your hands in flour as you work to avoid too much stickiness.  Then, with a sharp knife, cut the dough snake into 3/4-inch pieces.

If using a wooden gnocchi board, take one cut piece of dough and gently flatten it out over the board.  Then, roll the dough into a pinwheel.  (Note that this is an unconventional way to do this.  We boiled a few gnocchi as we rolled them to taste-test, and found that this method resulted in much lighter, fluffier gnocchi.)  Place the finished gnocchi on a floury cookie sheet.  Repeat this process until all of your dough is in gnocchi formation.

Put a large pot of salted water on to boil.  It’s best to give gnocchi its space — don’t cram them all into a small pot.  When the water comes to a rolling boil, gently place the gnocchi into the water.  When they float to the top, they are cooked.  Use a slotted spoon to take them out of the water as they are finished in case they are different sizes and have differing cook times.

Top the gnocchi with a sauce of your choice.  Anne and I used a tomato sauce with lots of sautéed garlic and fresh basil.  Be sure to have a glass of wine in one hand and a gnocchi-filled fork in the other, and it will surely be a successful dinner!

From Scissors & Sage

Lead chef and hand model: Anne Kenealy