Creamy Garlic Linguine

If pasta is involved, sign me up.  It doesn’t matter the size, texture, or sauce  — I will probably love it (unless it involves mushrooms).  I could eat pasta a few times a week if you really twisted my arm about it.  It’s like a blank canvas, just screaming for culinary magic to happen on it.

I was so happy when I stumbled upon this recipe by Lil’ Luna for creamy garlic (penne) pasta.  I gave it a whirl soon after discovering it, and was not disappointed.  This recipe is a fantastic twist on a classic pasta dish.  It’s subtle, but means business.

Creamy Garlic Linguine (via Lil' Luna)

Ingredients:

  • 1 lb linguine pasta
  • 3 tbs butter
  • 2 tsp fresh minced garlic
  • 3 tbs flour
  • 1 cup chicken broth
  • 1 cup milk
  • 2 tsp fresh minced parsley
  • 1/2 cup grated parmesan cheese
  • Salt and pepper to taste

To begin, cook linguine according to package instructions (or if you’ve got some Italian flare in you, don’t read the instructions and go by taste to determine done-ness).

While the pasta water is boiling and the pasta is being cooked, melt butter in a medium sauce pan (I used a wok).  Add garlic and cook for one minute.  Add flour and cook for 30 seconds, making sure to stir constantly with a whisk.  Don’t go grab that glass of wine!

Add milk and chicken broth, again stirring constantly.  Cook until sauce boils and thickens.  Add parmesan cheese, salt, and pepper.  Continue stirring until the parmesan has melted.  Have faith, it will work.

Once the linguine is cooked to al dente perfection and is strained, combine pasta and sauce in either the pasta pot or the wok (whichever one is larger).  Use a pasta scooper to blend the two together.

Serve linguine, with a garnish of fresh parsley, immediately and enjoy!

From Scissors & Sage

Tag your own culinary creations (especially if you try this one at home) with #scissorsandsage on Instagram or Twitter!

DIY Pencil Eraser Stamps & Card Crafting

I’m a sucker for all things paper crafts.  A few weeks ago, I saw a picture on Pinterest for these DIY pencil eraser stamps, and nearly fell out of my seat.  Not only because of how cute the stamps themselves are, but because I had never thought of using a pencil eraser as a stamp before.  It’s almost like your own little linocut!

One perk of dating a middle school language arts teacher is that I have endless access to no. 2 pencils.  I sent Anne on a mission to collect like-new pencils, and she didn’t have to look any further than her classroom floor in the first week of school.  Success!

I’d like to also mention that this is my first blog post with my sister’s awesome Canon DSLR, so bear with me as I learn how to use the different settings and lenses.  Here’s what you’ll need to make these DIY pencil eraser stamps:

Materials:

  • Two no. 2 pencils with unused erasers
  • Ballpoint pen
  • X-acto knife

To begin, use your pen to draw your desired design on the pencil eraser.  The triangle was the easiest for me to make, so it might be a good place to start.

Once your design is drawn, use the X-acto knife to cut along the pen line and straight down toward the pencil’s metal band.  Then, lay the pencil down and carefully cut in toward your design to break away the excess eraser, like so:

Continue this process until your entire design is cut out.  Be gentle with it, as your new stamp does not have as much structural support as it used to.  Note that I also found it helpful to rinse the stamp afterward to wash away any remaining pen ink.

Voila!

Making a stamp is fun and everything, but it gets even better once you pick out some pretty ink colors and STAMP IT!  The triangle was so easy to make, that I experimented with a plus sign stamp as well.  This design is a little more flimsy, but no less cute.  I decided to make a couple of cards with these stamps, and one is already en route to a loyal reader!  Here are some pictures of my final product:

What other stamps could you make from pencil erasers?

How To Make Pimento Cheese

When Anne and I took our Southern U.S. road trip in March, we ate a whole slew of fantastic foods.  Southern comfort seriously lived up to its name in all four of our destinations (Durham, NC; Charleston, SC; Savannah, GA; and Asheville, NC).  One of our favorite eats that kept popping up was pimento cheese.

Pimento, we learned, is a sweet, heart-shaped chili pepper.  This cheese spread is popularly known as “the caviar of the South.”  The beauty of pimento cheese is its versatility.  It can be served on crackers, with celery, deviled eggs, grits, or even hamburgers.  Mmm, hamburgers.

Last weekend, Anne and I hosted a cocktail party for some of our friends.  I decided to make pimento cheese for the occasion, and served it with honey-wheat pretzel sticks.  Boy, was it delicious!  This recipe, via Plain Chicken, was quick and simple — just what I needed during our party preparations!

Pimento Cheese (via Plain Chicken)

Prep time: 10 minutes | Chill time: 30+ minutes | Yields: 2 1/2 cups

Ingredients:

  • 1/4 cup cream cheese, room temperature
  • 1/2 cup mayonnaise
  • 1/2 cup sour cream
  • 1/4 tsp salt
  • 1/4 tsp minced dried onion
  • 2 cups shredded sharp cheddar cheese
  • 1/2 cup shredded parmesan cheese
  • 1/2 cup diced pimentos

In a medium bowl, whip cream cheese with a fork until smooth (i.e. no clumps).  Add in mayonnaise, sour cream, salt, and minced dried onion.  Whip again with a fork until smooth.  Fold in shredded cheeses and diced pimentos, and stir until fully blended in.

Transfer pimento cheese to an appropriately-sized serving bowl.  Cover and refrigerate for 30+ minutes, or until ready to serve.

It’s that simple!  And while you may seem skeptical of this odd-sounding or odd-looking cheese, you’ve got to try it before you knock it.  It might just be the wow factor you’ve been looking for!  My pimento cheese was a big success at our cocktail party.  I only wish I doubled the batch so that it didn’t vanish so quickly!

From Scissors & Sage

PS) I snapped these pictures on my phone right before our friends arrived.  Apologies for quickly taken photographs!

Scissors & Sage Turns One!

That’s right, folks! Today marks Scissors & Sage’s 1st birthday.  While I take a minute here to figure out where exactly the time has gone, I thought I’d recap all that’s happened in this little corner of the blogosphere.  Milestones are always a nice time to give thought to the previous year.

Although I had contemplated starting a craft blog for some time, I was very hesitant to actually start one.  I didn’t want this project to be something that I would forget about a few months down the road, or that I would quickly lose interest in.  I was afraid that I would disappoint myself if I couldn’t live up to what I had envisioned.

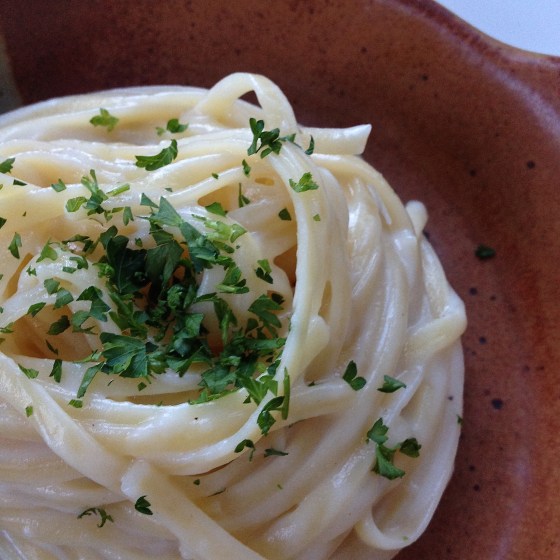
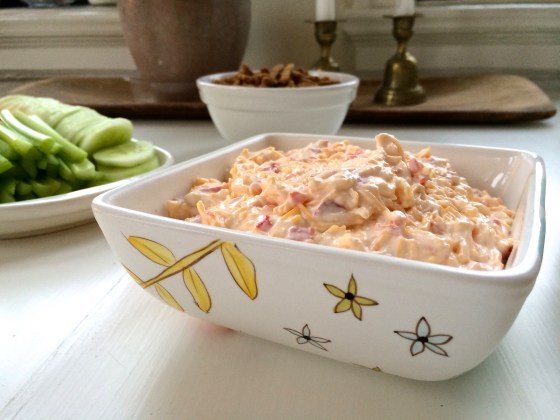
Scissors & Sage was born right before my second year of graduate school.  I was in a Master’s program learning to become a music therapist, and we were constantly slammed with this term “self-care.”  It was my hope that this blog would channel my many non-music-related creative juices.  I decided that I would post once a week about different kinds of topics that interested me: DIY-ing and crafting, knitting, cooking and baking, interior design, and traveling, among other things.

I couldn’t have imagined how important Scissors & Sage would become to me since last September.  Wouldn’t I have run out of ideas already?  Apparently not, because I have about 40 different projects/ideas waiting for me in the notes section of my iPhone.  Here are some recent statistics for you:

Scissors & Sage has…

  • 80+ subscribers
  • 5,000+ views
  • 49 posts (this is the 50th!)
  • been viewed in over 50 countries around the world

Do you know what this means? It means that I wrote a blog post almost every week this year.  I stuck to my goal!  Here’s a cool map of the many places people have been checking out the site from:

Scissors & Sage has also established a social media presence.  Here are some places to check it out:

There have been many internal changes to Scissors & Sage over the past year.  For starters, there’s no more .wordpress.com in the URL!  You can now type in www [dot] scissorsandsage [dot] com, as well as reach me via email at victoria@scissorsandsage.com.  This is big, people!  The site also has new and improved menu tabs up top, including Home, New Reader?, Archives, Contact, and Social.  Archives might be my favorite addition because it’s an easy way to see all of my past posts by category.  Finally, there is an updated sidebar to quickly display my recent posts, categories, tags, and Twitter feed.

Scissors & Sage has been recently featured in the Quail Hill Farm e-newsletter…

…as well as retweeted and favorited by Masterchef’s one and only Willie.

Scissors & Sage has received two Liebster Awards for new and upcoming blogs.

To say the least, I am incredibly proud of what this blog has become.  It helped keep me sane during a stressful final year of graduate school, and it has challenged me to think more creatively for myself and also my readers.  There are so many ways in which I can’t wait to make it even better.  For example, Scissors & Sage is awaiting its first-ever logo design.  I can’t wait to see the sketches!  I also am excited to welcome new contributors to the site (email me if you’re interested in featuring one of your latest creations!).

And lastly, I am thrilled to share that my sister has so generously let me borrow her DSLR camera.  I’m not sure if you all knew this, but the photos on my blog thus far have been taken with my iPhone.  It is my hope that this borrowed camera will help elevate Scissors & Sage in a whole new way.  So keep your eyes peeled for some nice photos in upcoming posts!

And with that, happy 1st birthday to Scissors & Sage!  Thank you all for reading this blog, commenting with your thoughts, sharing my posts, and trying my projects/recipes in your own homes.  I am truly grateful for your sustained participation in this little community.  Without it, I would have lost steam long ago.  Here’s to a successful 2nd year!

-Victoria

Mirror, Mirror: Part Two

Last year, I made my friend Caroline an apartment-warming gift for her move to The Big Apple.  It was a framed sign that read, “YOU LOOK GREAT” when read via the bathroom mirror.  When not read through the bathroom mirror, the DaVinci-style message appears to be written in reverse and with mirror-image letters.  The trick is to hang it on a wall directly opposite the mirror so that you can read it when you’re brushing your teeth or getting ready to go out.  It can be a nice way to counteract self-criticisms.

I’ve been thinking about ways to spruce up our own bathroom recently, and recalled this project.  I got to thinking that I kind of wanted one, too.  We have a wall in our bathroom about 3-4 feet from the mirror, so it was perfect for a similar sign.  I wanted it to be subtle and unique, and quickly settled on “INSIDE AND OUT.”  (As in: “You are beautiful, inside and out.”)

The steps for this project are almost identical to my first Mirror, Mirror sign.  Read up on how to make either of them here.  There are, however, two differences in this one.  First, the two frames need to be far enough apart on the wall so that your head fits between them when looking in the mirror.  They may look oddly far apart on the wall at first, but it’s worth it when you or your house guests discover the secret message!  Second, the frames need to be hung in reverse order.  When looking directly at the wall, the left frame must read “AND OUT” and the right frame must read “INSIDE.”  Capiche?

What would you write in your own secret bathroom sign?  Leave your response in the comments section below!