How To Make Envelope Liners

img_0542

Making homemade envelope liners is a really nice way to spice up a letter or a card. They’re typically decorative in nature, and aim to complement the style of the envelope/card. Snail mail feng shui, anyone? Wrapping paper, magazine pages, photographs, and art are all great examples of what you can use to make these diy liners. There are so many different ways of doing it that it’s one craft that will never get old for me.

Below I’ll teach you how to make an envelope liner template and also how to adhere the envelope liner to the envelope. It’s fun and simple, and only takes a few minutes once you get the hang of it.

DIY Envelope Liners

Materials:

  • Envelope
  • Liner paper
  • Computer paper
  • Cardboard
  • Pencil
  • Scissors
  • Double-sided tape

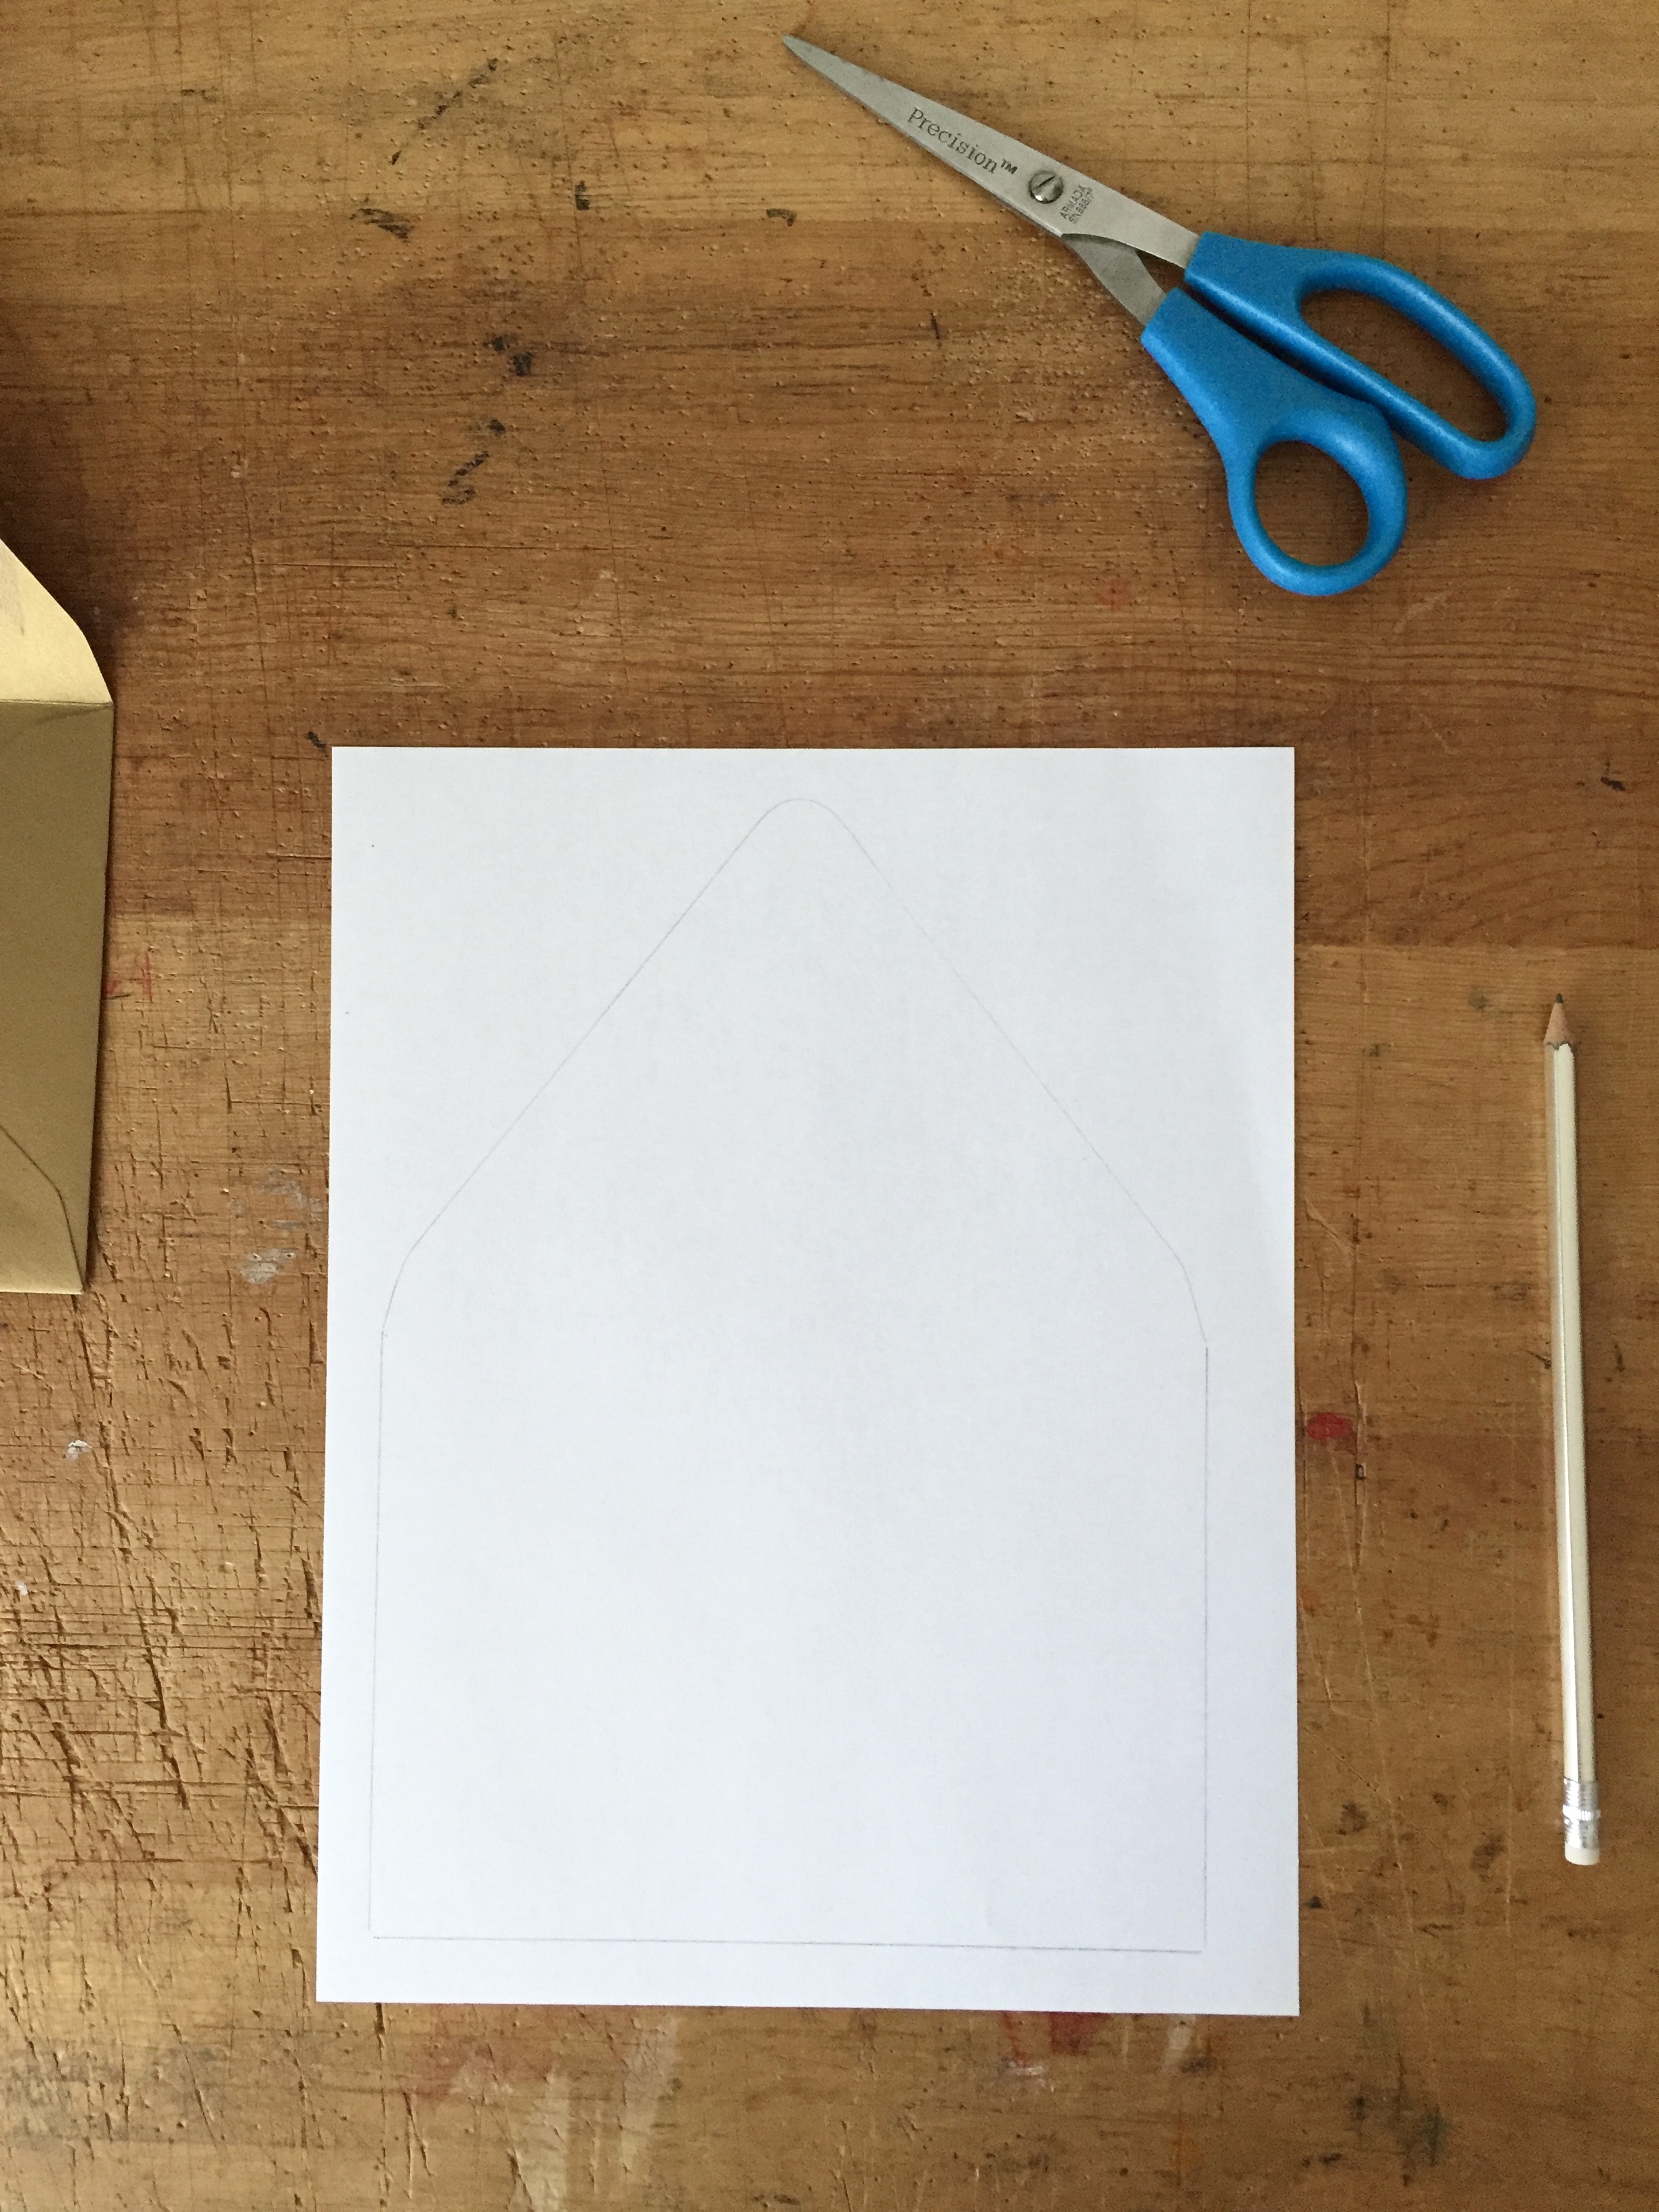
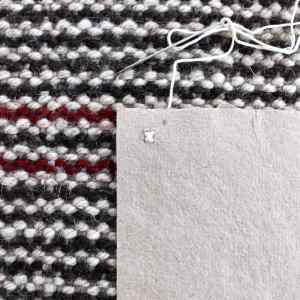
Step 1: Open the envelope and trace its shape onto computer paper with a pencil. Cut it out using scissors and then cut an additional one inch off of the bottom.

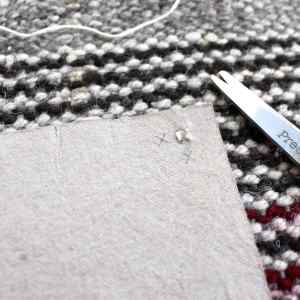
Step 2: Slide the computer paper cut-out into the envelope. You might have to shave off an eighth of an inch on the left and right sides of the cut-out in order for it to fit. Does everything look right? Do all of the lines match up? If so, trace your cut-out onto a piece of cardboard to create a template. (Cereal box cardboard works really well!)

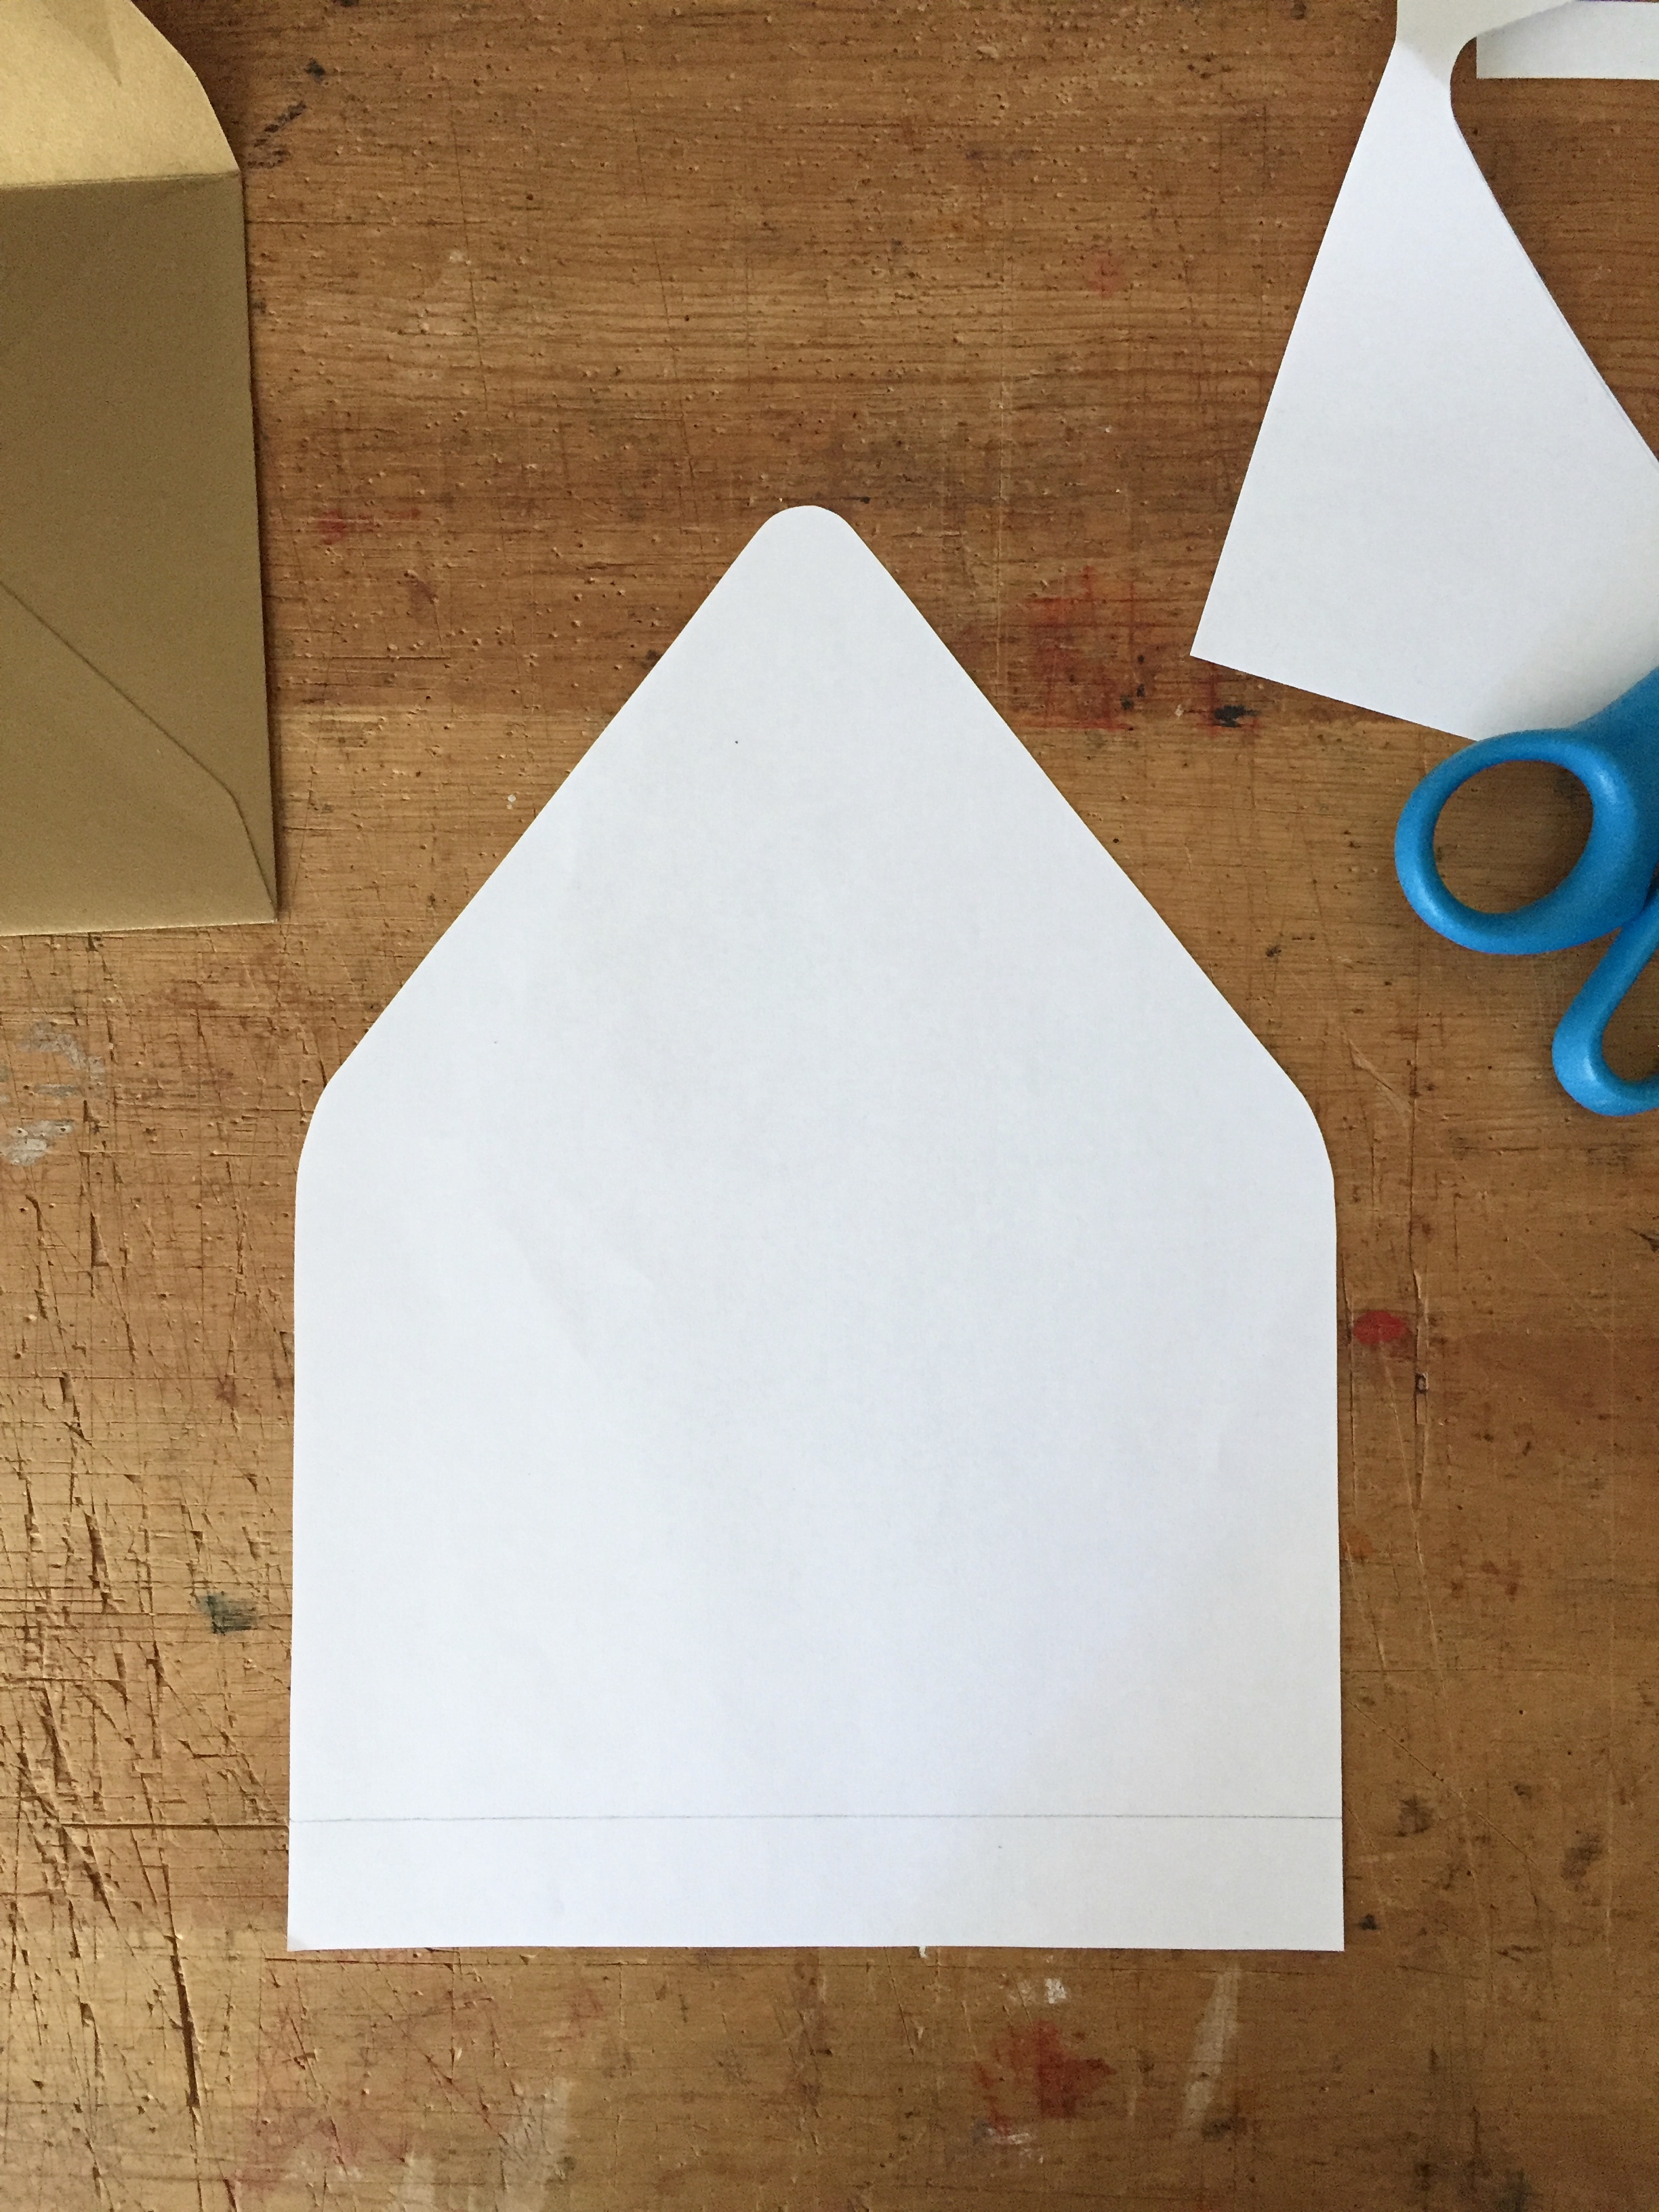
Step 3: Use the cardboard template to trace the envelope liner paper. Cut it out and slide it into the envelope.

Step 4: Read this carefully. Next, use one hand to hold the liner paper and envelope firmly in place. Use your other hand to fold down the envelope flap. Crease the envelope and liner together, and slide your finger across the seam to create a fold in the decorative paper, making sure that the envelope liner does not move in the process.

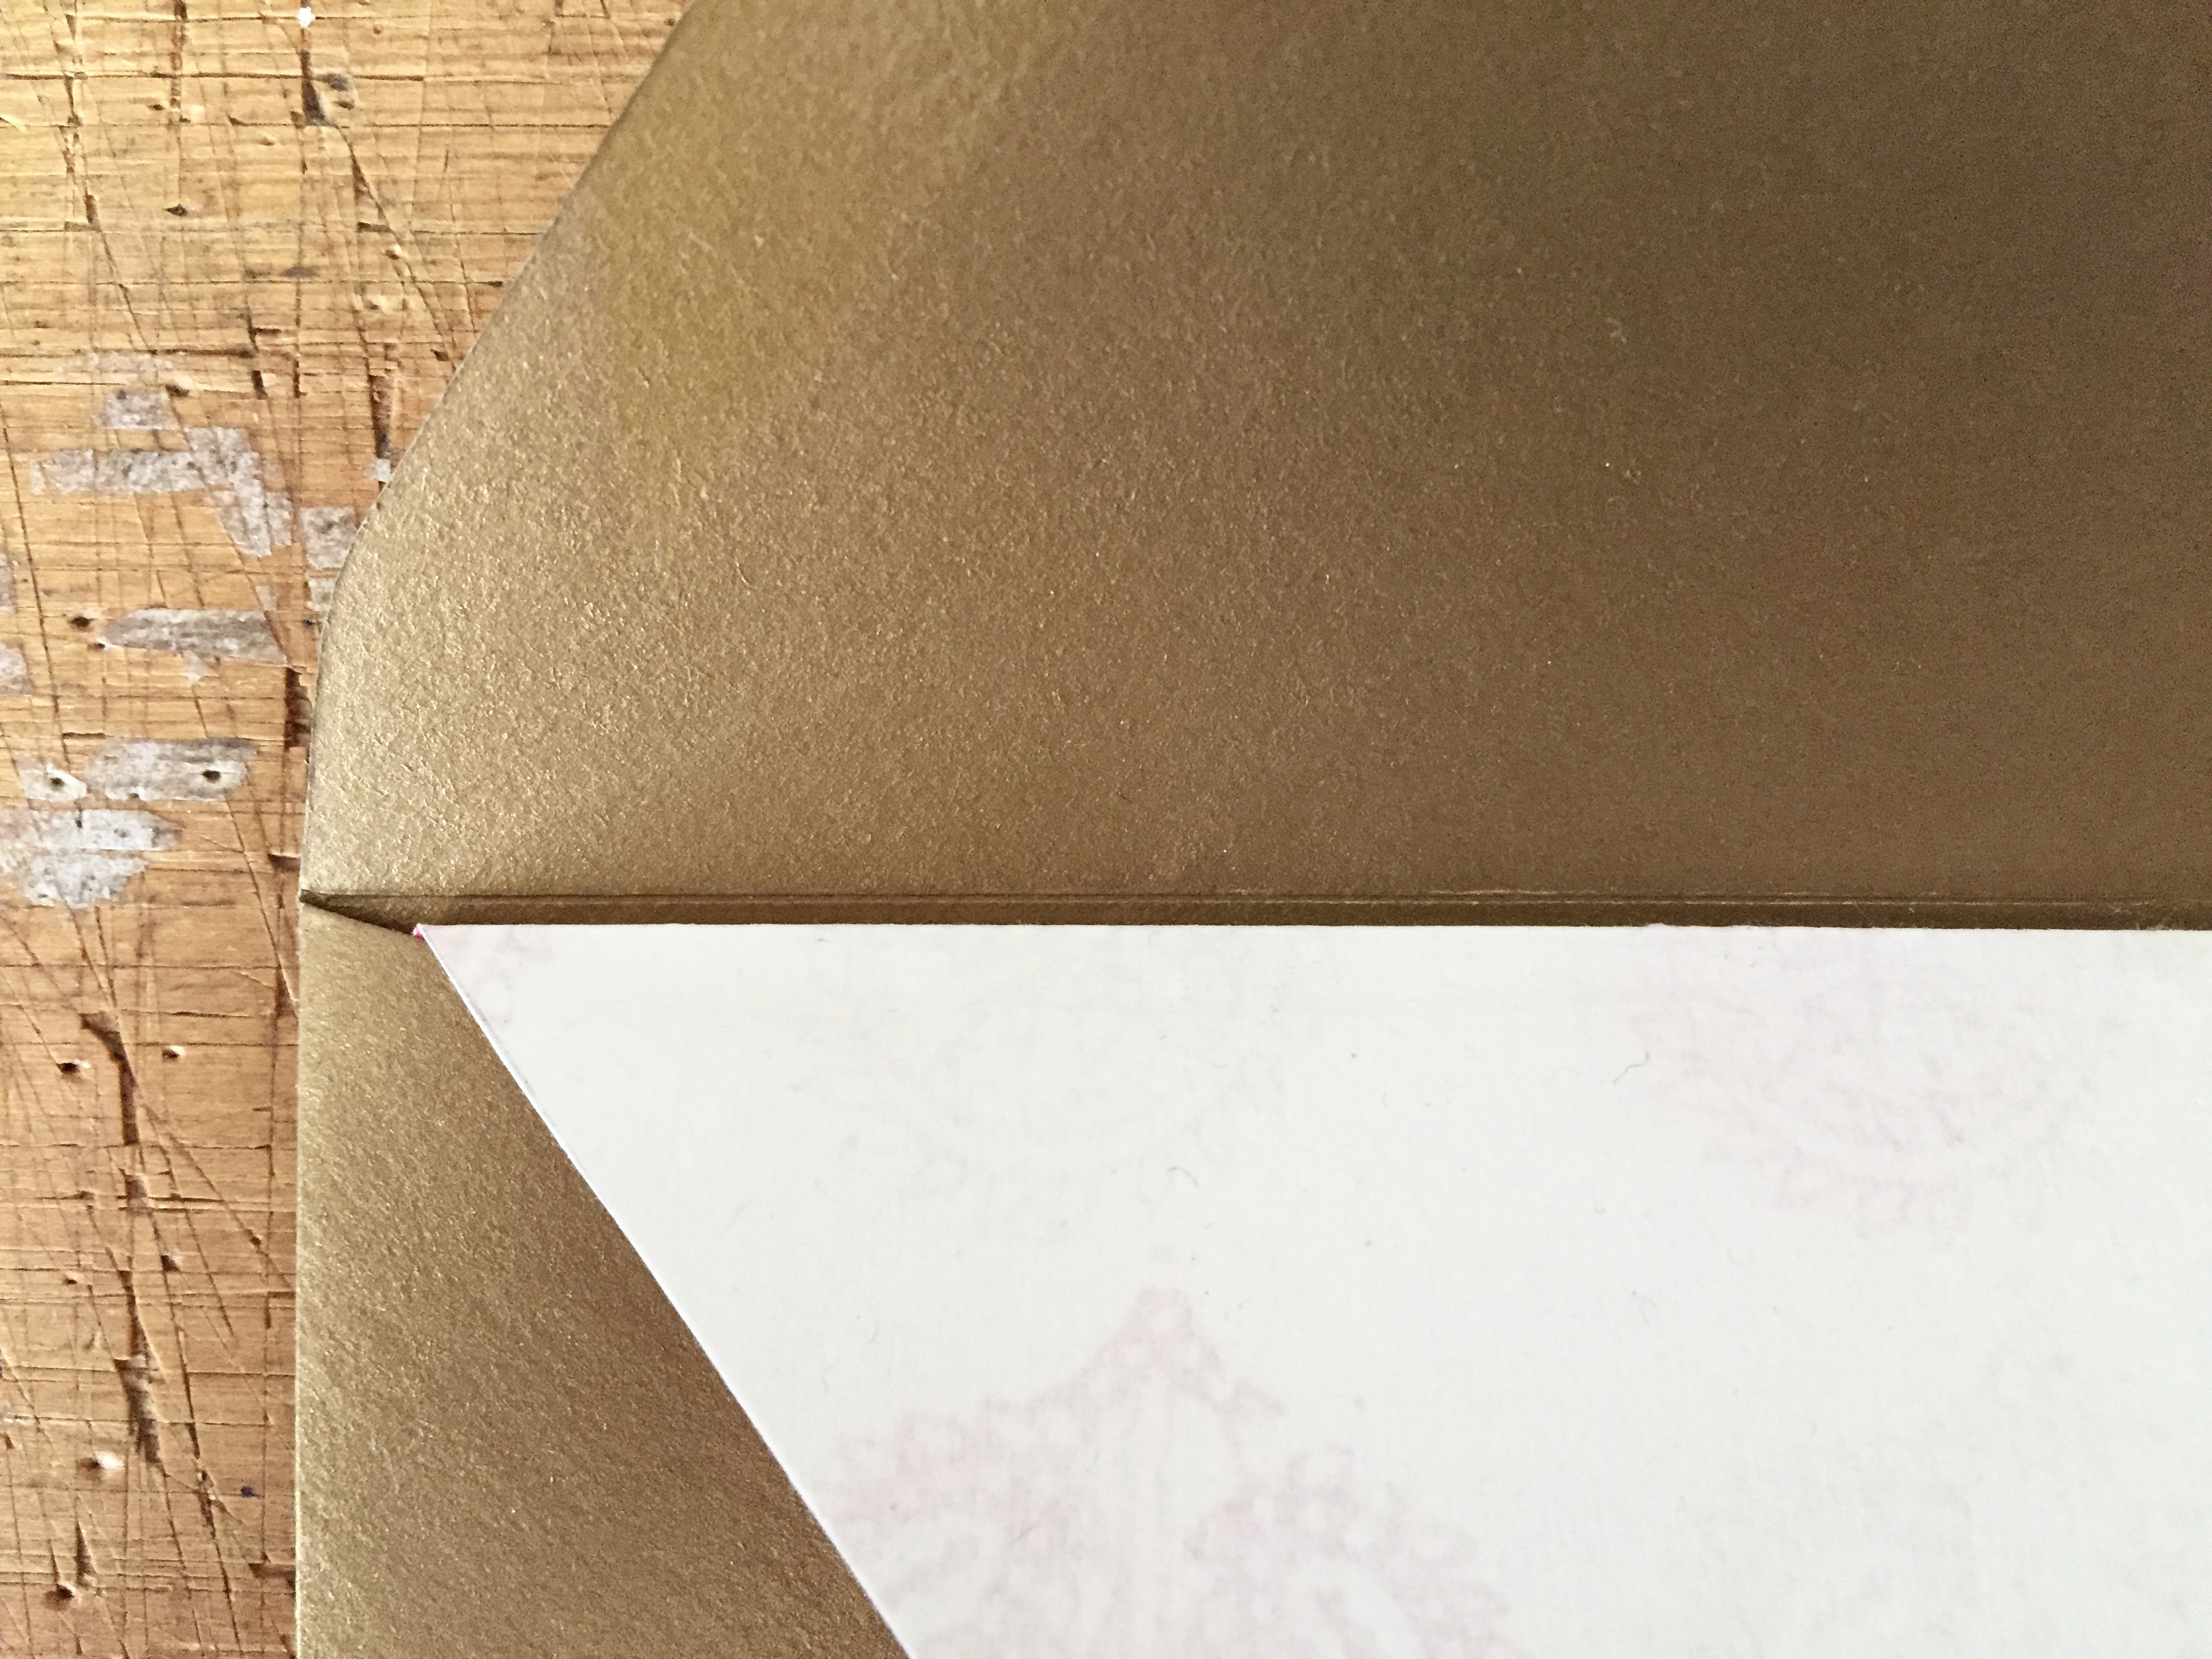
Step 5: Lift up only the envelope flap and you’ll notice that the liner paper sits an eighth of an inch below the envelope seam. Push up the liner paper so that the two seams sit right next to each other (see below).

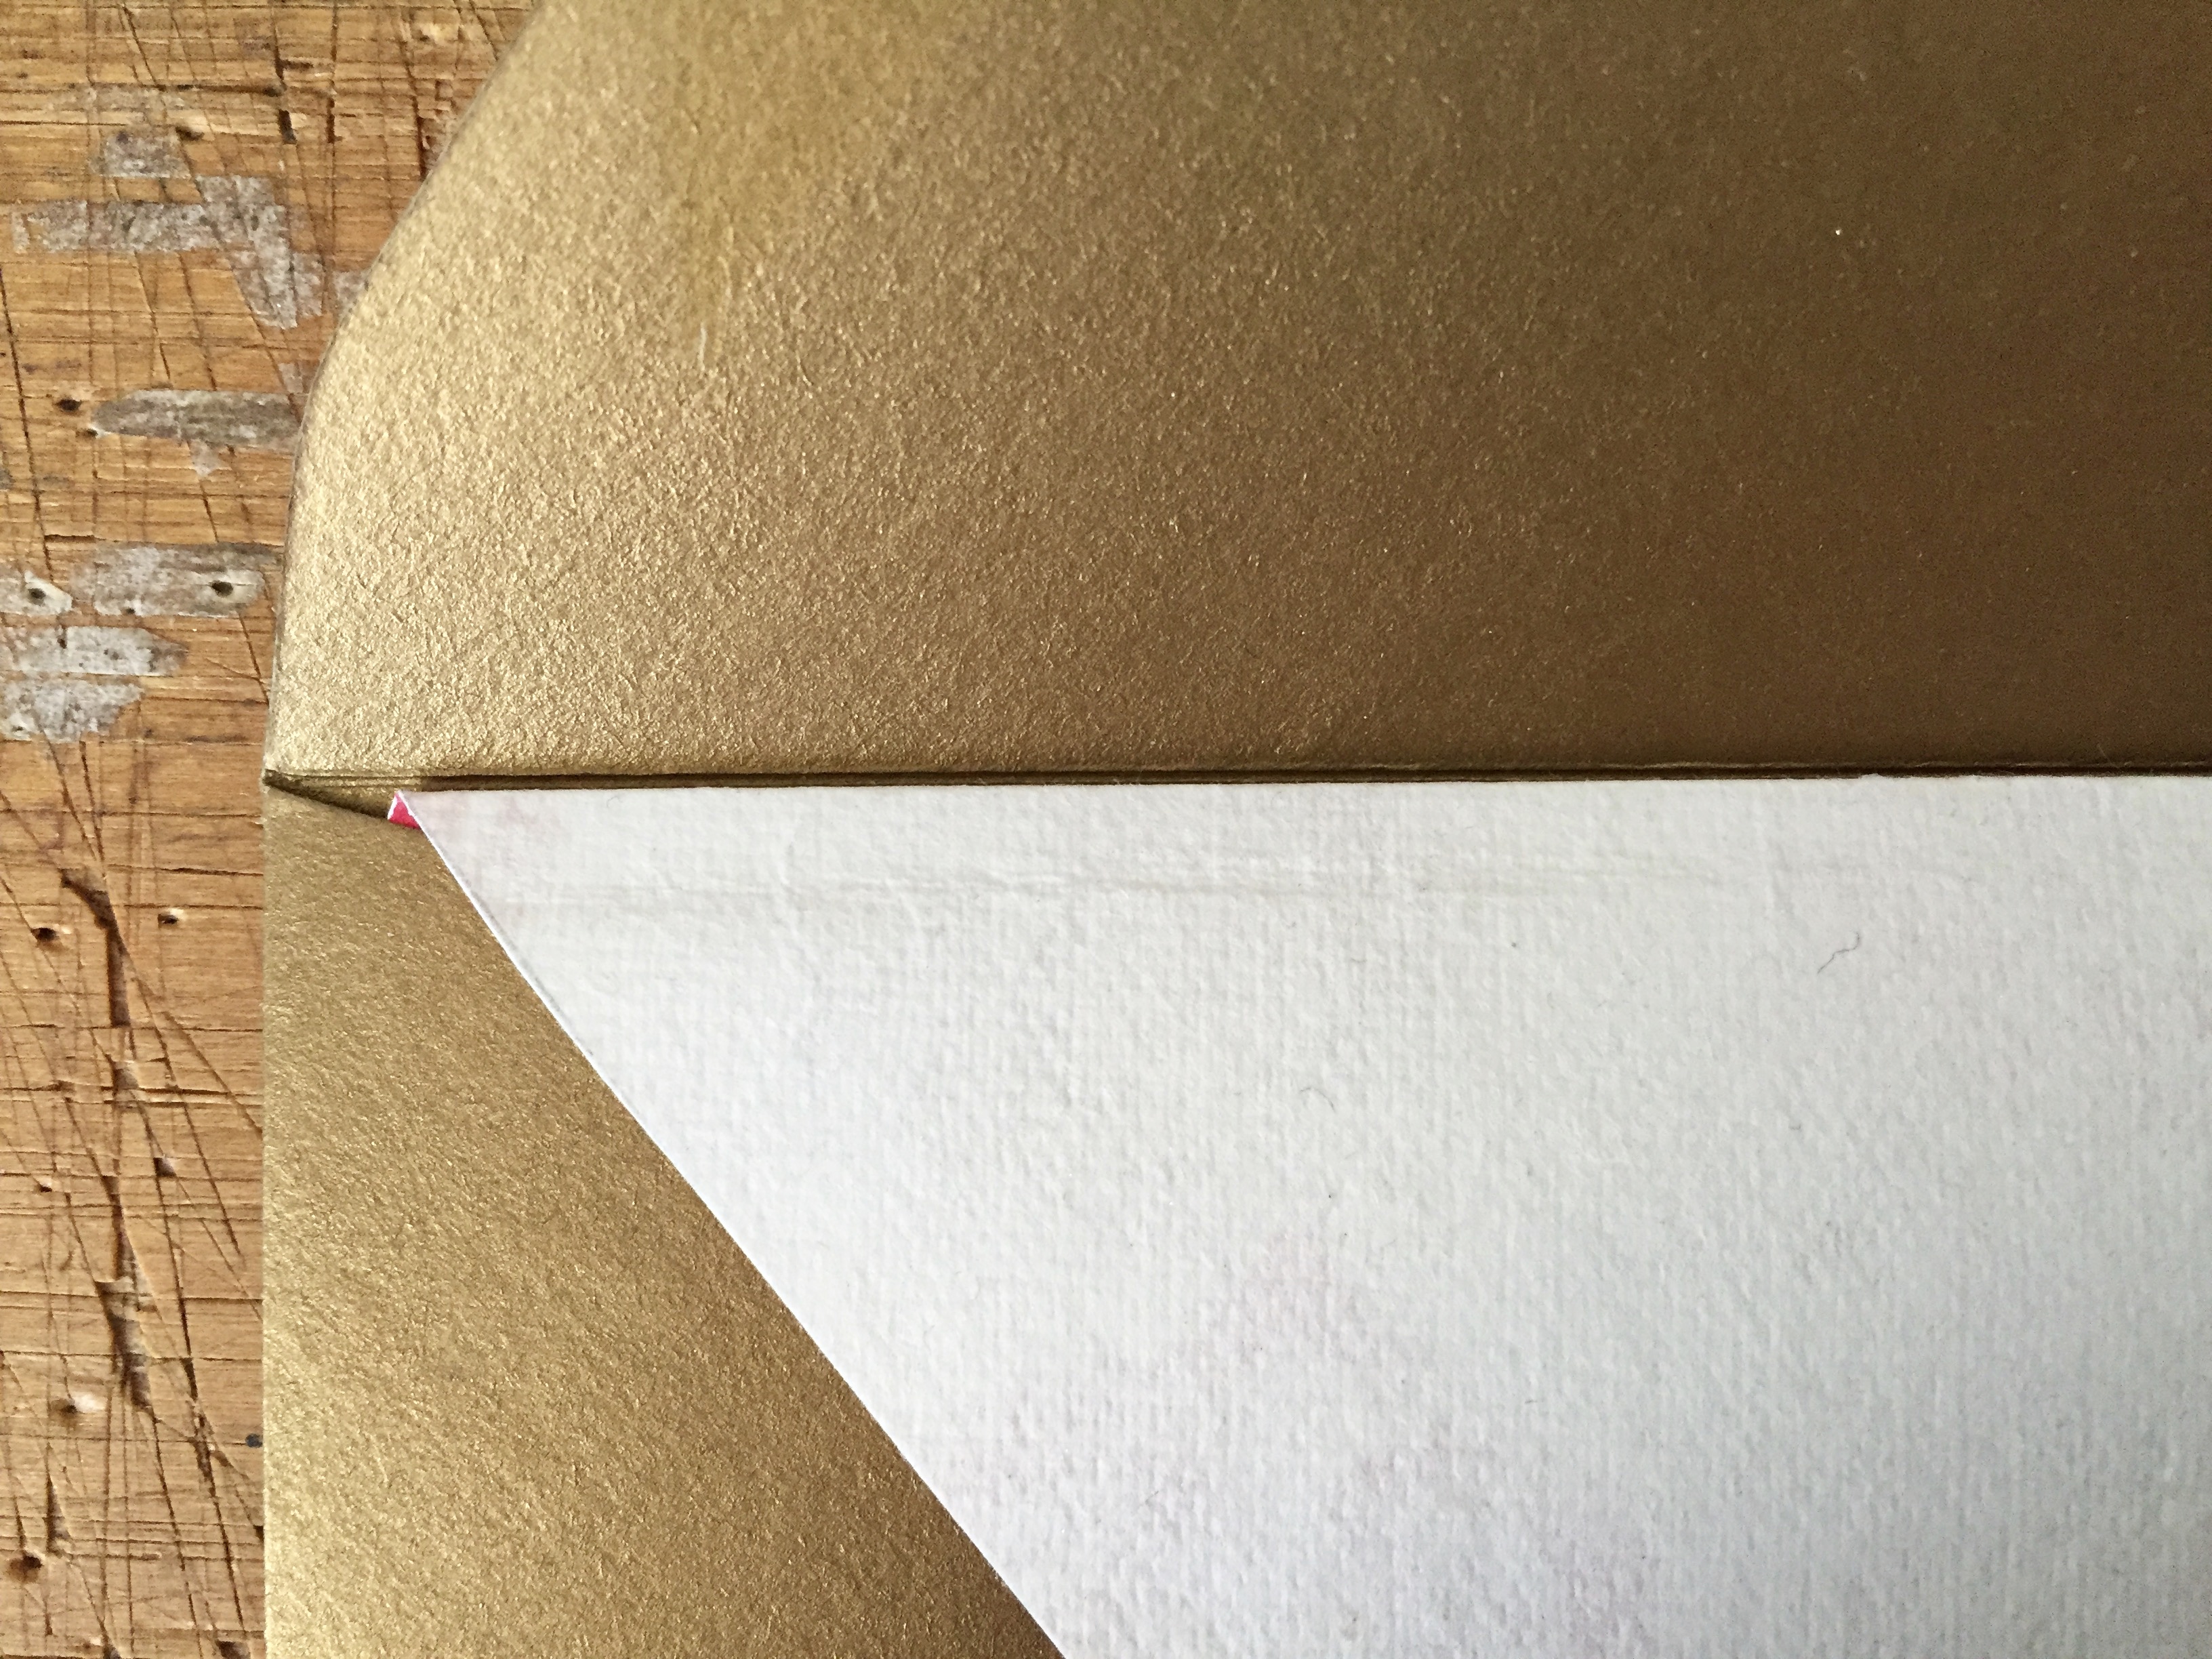
Step 6: Place double-sided tape as close to the edges of the liner paper as possible. Holding the paper in place, fold down the envelope flap once more. Press firmly to secure the tape. Lift up, and the envelope liner will be adhered!

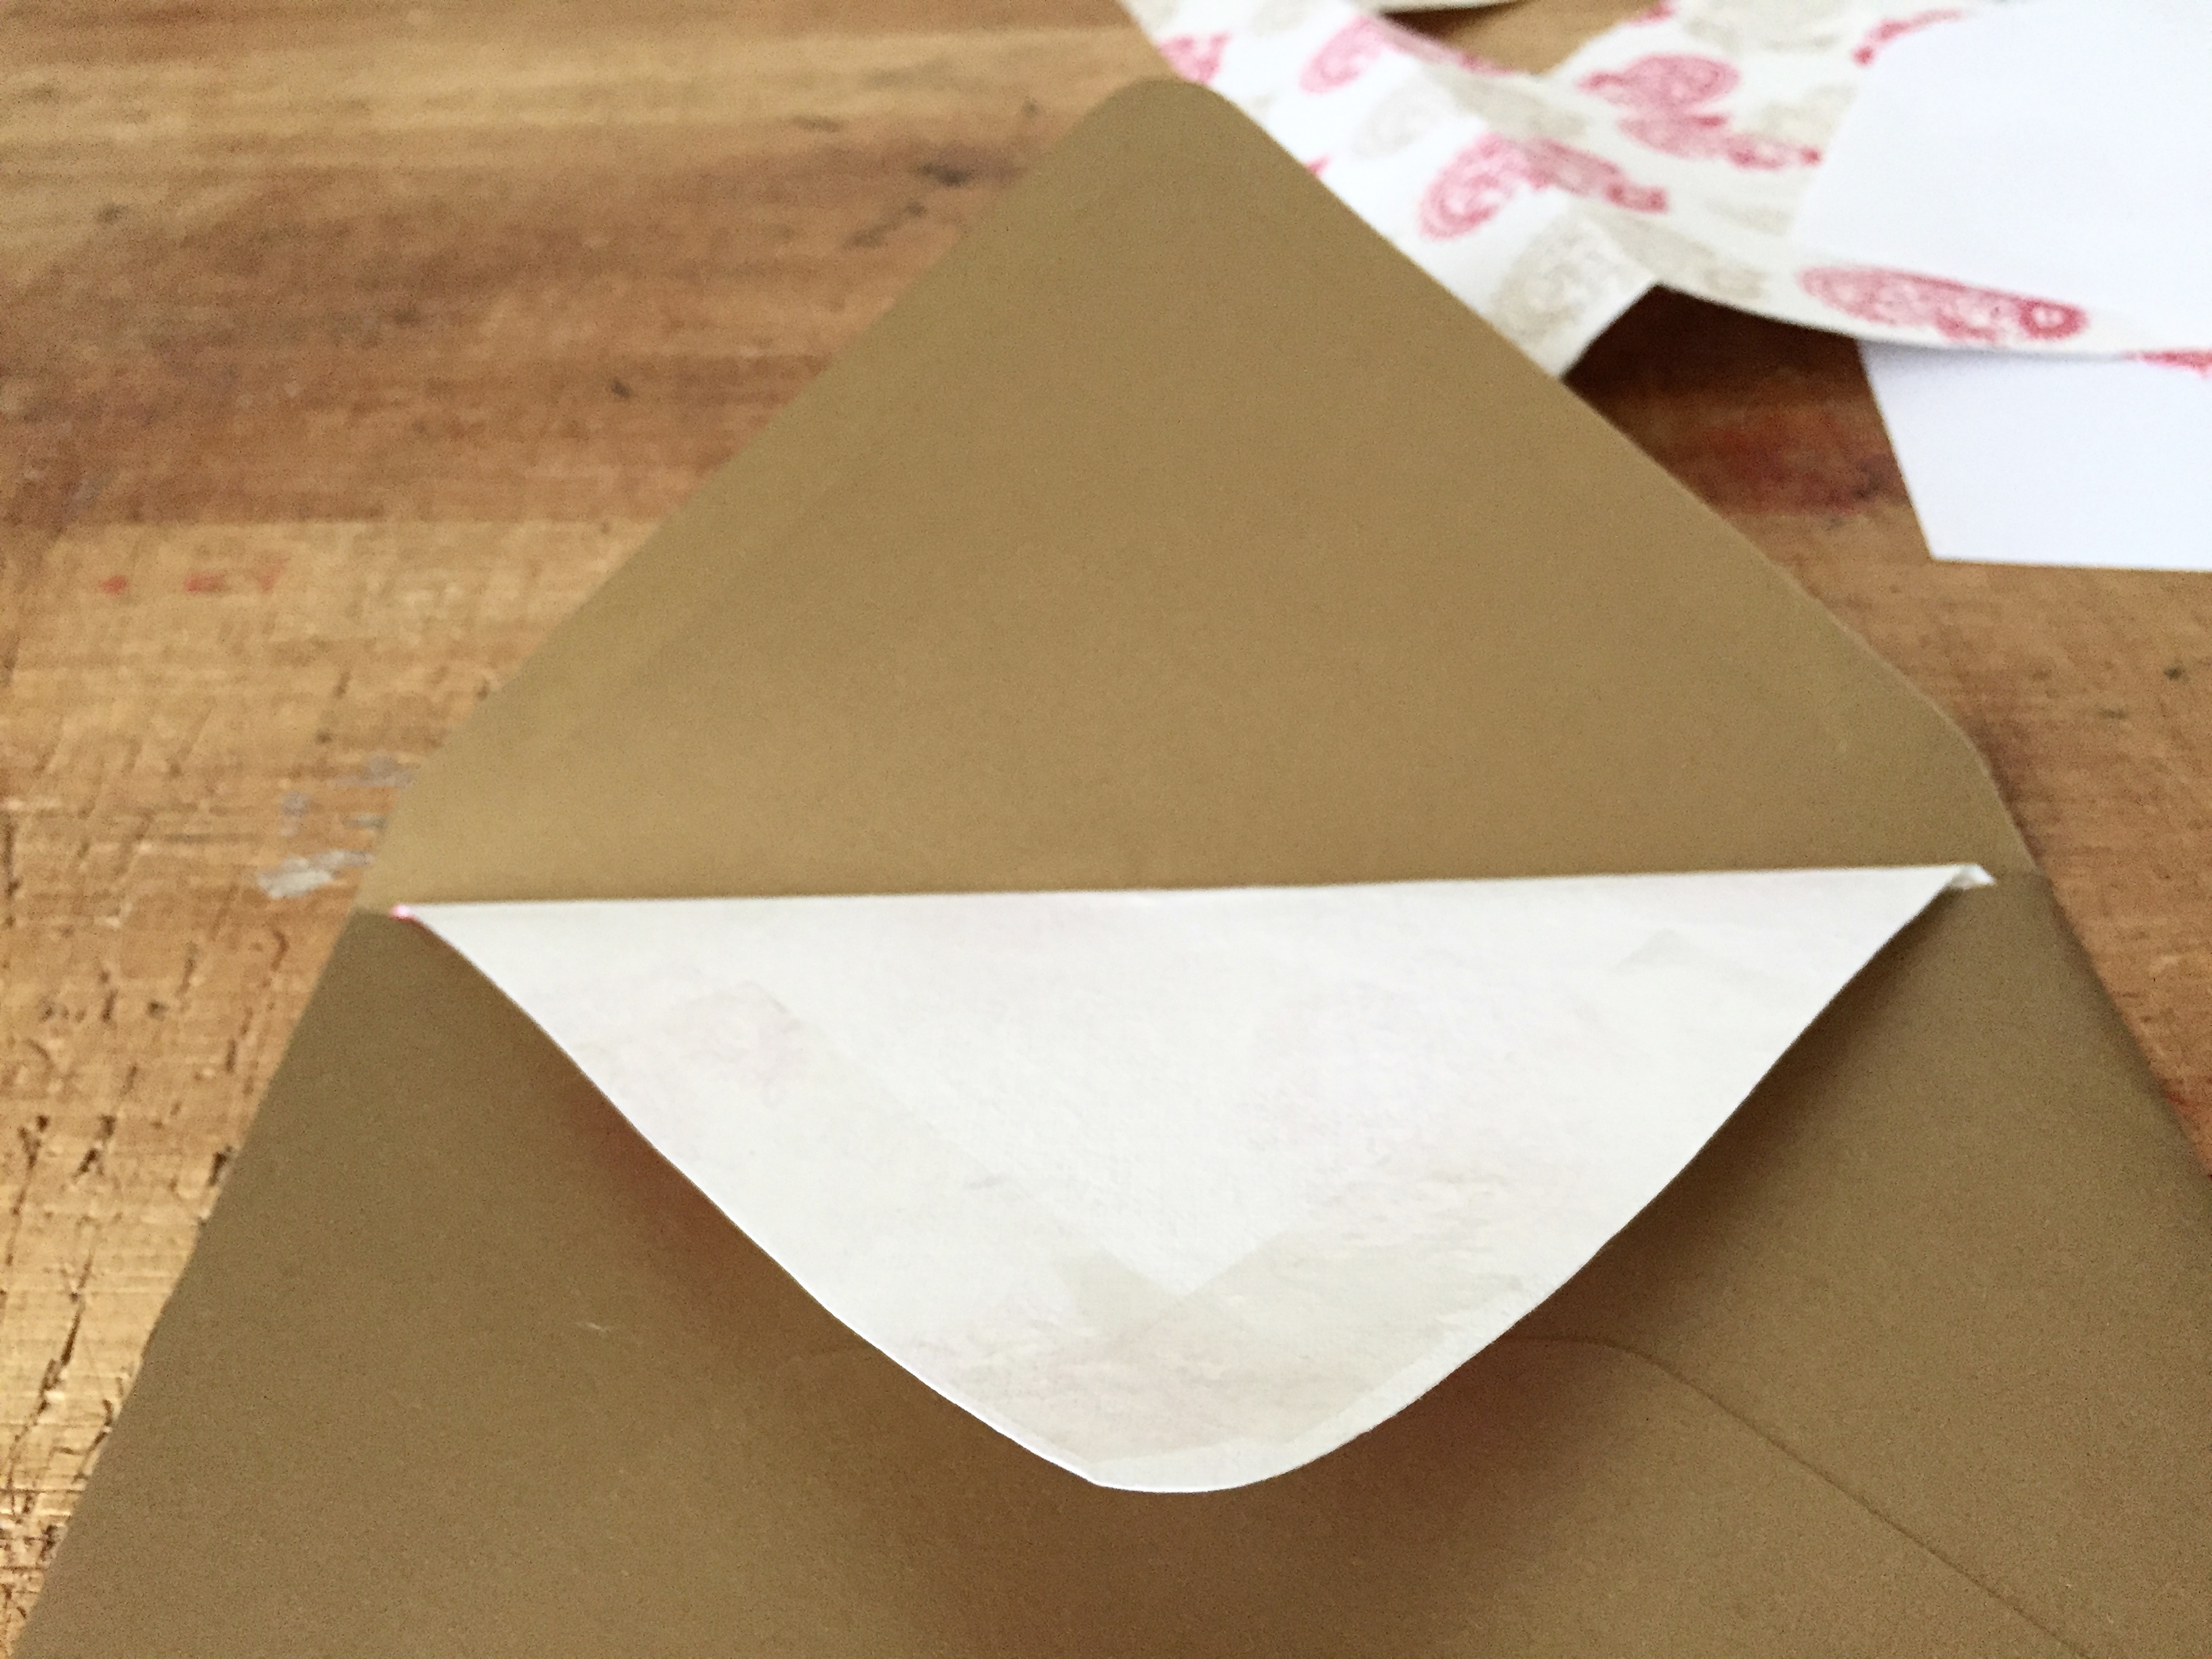
It is a good sign if the bottom of your envelope liner slides up and down when you open and close the envelope. It moves to accommodate the changing angles of the envelope flap!

Practice makes perfect with envelope liners. Don’t give up if it doesn’t look right the first few times. You’ll get the hang of it soon enough, and will be churning them out just in time for the holidays.

img_0558

Print Your Own Recipe Cards

This week I decided to try something new and make my very own recipe cards! I’m the recent owner of a beautiful recipe box, so these cards are a natural accompaniment. While the process was painstaking at times, I am so happy with the end result. I used Microsoft Word to create my template, and I customized the nine colors you see above. I wanted to create a clean, distraction-free design for ease of writing. It’s up to you to add your own flare, whether it’s an artsy doodle of a delicious pie, or your own elegant hand lettering.

Let’s talk logistics. This recipe template is 4″ x 6″. (You can, of course, print it smaller or larger using the scale option when printing.) It’s best to print the cards on either text weight or cover weight paper. To print the card double-sided, first print page 1 of 1 only. Then, feed the same paper back into the printer and only print page 2 of 2. Once your recipe cards are printed, cut them, leaving a 2/8″ border on the left and right, and a 3/8″ border on the top and bottom. This will create an exact 4″ x 6″ recipe card.

These recipe cards are meant to be versatile. Print all one color, or print one of each! Use them for your own recipe collection, or give a whole blank set as a gift. The options are limitless!

Now, I want to see how you use your printed recipe cards! How will you fill them in? What are you cooking and baking this season? Share your cards on Instagram using #scissorsandsage and I’ll repost them!

Cantaloupe

Here is what the back of each recipe card looks like:

Click here to download and print Cantaloupe.

Honeydew

Click here to download and print Honeydew.

Strawberry

Click here to download and print Strawberry.

Sky

Click here to download and print Sky.

Licorice

Click here to download and print Licorice.

Blueberry

Click here to download and print Blueberry.

Lavender

Click here to download and print Lavender.

Salmon

Click here to download and print Salmon.

Asparagus

Click here to download and print Asparagus.

Don’t forget to share your recipe cards! I’d love to see how you fill yours in. Tag them with #scissorsandsage and I’ll repost them!

Embroidered Valentine’s Card Crafting

Last weekend, Anne and I set up shop during the Super Bowl to make a whole bunch of valentines. Granted we like the experience of the Super Bowl (the food is clearly the best part), it’s the last thing either of us knows anything about. So we got out some of our crafting materials, splayed them out over our dining table, and had a blast together!

This embroidered valentine is actually one I made the following day. I knew I wanted to photograph it, and nighttime lighting wouldn’t do. Let me say this: I have never embroidered before. I would consider this DIY to be in the “easy” category, and so should you! This is a great way to dip a toe in if you’ve been thinking about trying embroidery. The supplies needed are few, so let’s go ahead and get started!

Materials:

  • Thick paper
  • Pencil
  • Sewing needle
  • White embroidery thread (about 18 inches)
  • Red embroidery thread (about 24 inches)
  • Scissors
  • Sharpie for writing your message

Step 1: Turn over the paper, and with a pencil mark three little Xs in each corner of the card. This simple border will ensure first-time embroidery success!

Step 2: Thread the sewing needle with white embroidery thread. Tie one small knot right near the end of the thread.

Step 3: Insert the sewing needle into the backside of the paper at one corner of an X. Pull thread all the way through until you reach the knot. Re-insert the needle into the frontside of the paper at the opposite corner of that X. From the back, sew into a third corner of the X. Finally, push the needle through the fourth and final corner of the X. Make sure the thread is taut but not too taut, as this could rip the paper. Tie another small knot on the back of the paper. Cut thread.


Step 4: Tie a new knot at the end of the white thread. Continue onto the next white X and repeat step 3. (My Xs got better as I continued to make them. You’ll have the art perfected by the time you finish all twelve!)

Step 5: When you have finished making the white Xs, switch to the red thread and continue until all of the Xs have been sewn. Note that I chose to take a shortcut here. Instead of making individual thread cuts for each red X, I made only one thread cut for each corner of the paper. Meaning, I sewed two red Xs together in each corner. By combining two Xs together, I saved myself both time and fuss.

Step 6: Write your message! No matter who it’s for, the recipient is going to love this handmade card. Mine is more of a postcard-style, but you could easily add some fun paper to the other side to cover the back end of the stitches. I personally like the rustic, homemade feel of it!

Some other notes:

  • My particular card isn’t going in the mail. If yours is, you can easily make your own matching envelope using this technique.
  • The paper I used was a perfect thickness. Anne actually made this paper a few years ago! I found that the closer I got to the edge of the paper, the more I needed to support it with my hands. That way, I could ensure the paper didn’t rip or tear.
  • Have fun with it! Since you’re making the same X shape over and over again, you will soon get good and move pretty quickly. This card took me about 30 minutes.

Share your own Valentine’s cards using #scissorsandsage. I may feature some of your projects on Instagram! And just because succulents photograph so well…

Project Roundup: Holiday Inspiration!

I have to confess that I did not pre-plan a blog post for today.  I practically forgot that today is Monday.  Anne and I had a wonderful weekend together, as we celebrated our 6-year anniversary! We purchased our very first Christmas tree — a little guy, about 2.5 feet tall — that fits perfectly in our apartment, and enjoyed a delicious dinner at probably our favorite restaurant in Philly.

In conclusion: I didn’t write a blog post.  So, today I have for you a nice roundup of a few giftable projects I’ve created here on Scissors & Sage.  I hope that they inspire you to make something special for a loved one this holiday season.  And if they don’t inspire you — well, let me make it for you!

EDIBLE

These Perfect Peanut Butter Cookies really are perfect.  If you don’t believe me, make them yourself and find out!

Make Quick & Simple Fudge for your holiday hosts, family members, or friends.  It makes a big batch that can be distributed among many.

These Chewy Chocolate Jumbles are delicious, and can be customized with all kinds of added ingredients like nuts or dried fruit.

NON-EDIBLE

Make someone happy with this Honey Citrus Hand Scrub.  It smells incredible, and leaves your hands feeling very soft.  Easily gift it in a small jar.

This DIY Stencil Pillow is a labor of love.  There’s still plenty of time to begin working on lengthy DIY holiday gifts!  (This was also, believe it or not, the first project I ever posted on Scissors & Sage!)

Learn to make these Mirror, Mirror bathroom signs that are only readable when viewed through the mirror.  Check out the first installment of Mirror, Mirror here, too!

Feel like knitting?  This Cowl Me Crazy project has you covered.

These DIY Pencil Eraser Stamps require few materials and yield great results.  Use these stamps to create a matching set of custom stationery for a friend or loved one.  Need envelope inspiration?  Look here, and be sure to use old December issues.

Do you know someone who loves cooking or baking?  Give them the gift of a curated recipe box.  First, find a beautiful recipe box.  Second, learn to create custom dividers (see link).  Third, add recipes you think your gift recipient will enjoy — perhaps recipes that are important to you!

These DIY Dragonfly Earrings are cute and simple for the nature lovers in your life.

Make a statement with this Oscar Wilde Stencil Art.  It’s easily customizable if you know your gift recipient loves a specific quote.

I hope you enjoyed this roundup.  Be sure to let me know if you make any of these projects!  Share your creations using #scissorsandsage on Instagram and Twitter.

DIY Pencil Eraser Stamps & Card Crafting

I’m a sucker for all things paper crafts.  A few weeks ago, I saw a picture on Pinterest for these DIY pencil eraser stamps, and nearly fell out of my seat.  Not only because of how cute the stamps themselves are, but because I had never thought of using a pencil eraser as a stamp before.  It’s almost like your own little linocut!

One perk of dating a middle school language arts teacher is that I have endless access to no. 2 pencils.  I sent Anne on a mission to collect like-new pencils, and she didn’t have to look any further than her classroom floor in the first week of school.  Success!

I’d like to also mention that this is my first blog post with my sister’s awesome Canon DSLR, so bear with me as I learn how to use the different settings and lenses.  Here’s what you’ll need to make these DIY pencil eraser stamps:

Materials:

  • Two no. 2 pencils with unused erasers
  • Ballpoint pen
  • X-acto knife

To begin, use your pen to draw your desired design on the pencil eraser.  The triangle was the easiest for me to make, so it might be a good place to start.

Once your design is drawn, use the X-acto knife to cut along the pen line and straight down toward the pencil’s metal band.  Then, lay the pencil down and carefully cut in toward your design to break away the excess eraser, like so:

Continue this process until your entire design is cut out.  Be gentle with it, as your new stamp does not have as much structural support as it used to.  Note that I also found it helpful to rinse the stamp afterward to wash away any remaining pen ink.

Voila!

Making a stamp is fun and everything, but it gets even better once you pick out some pretty ink colors and STAMP IT!  The triangle was so easy to make, that I experimented with a plus sign stamp as well.  This design is a little more flimsy, but no less cute.  I decided to make a couple of cards with these stamps, and one is already en route to a loyal reader!  Here are some pictures of my final product:

What other stamps could you make from pencil erasers?