Protein Bites

IMG_9950

Last week, Anne and I went on a road trip to The South.  Stops included: Durham, Charleston, Savannah, and Asheville (city guides to come!).  Now, I love road trips.  I would probably choose them over flying.  I love them for the playlists, the beautiful scenery, the license plate game, the old-timey feel, and the snacks.  For this trip, I decided to make a healthy snack option for the car ride.  These little fellows are tasty and chock full of good-for-you ingredients, and they will fill you until your next meal.  Protein bites are a no-bake snack that could even work at home.  Just keep them in the fridge (up to two weeks), and enjoy one during that dangerous pre-dinnertime window.
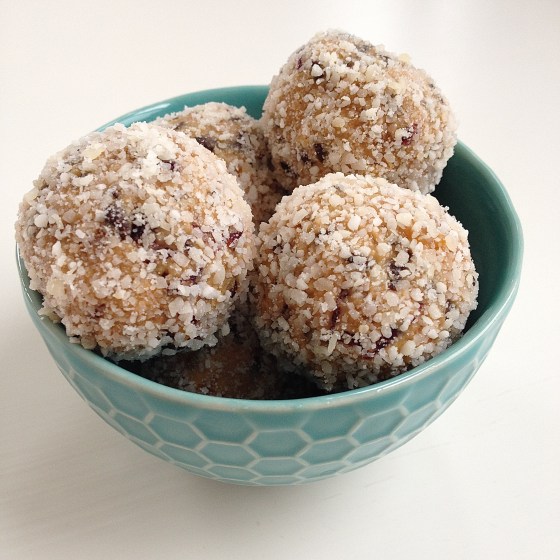
Protein Bites

Prep time: 15 minutes | Inactive time: 30 minutes | Yields: 15 bites

Ingredients:

  • 1/4 cup whole almonds
  • 1/2 cup quick oats
  • 1/2 cup dried cranberries
  • 5 dried apricots
  • 1 tbs honey
  • 1/2 cup peanut butter
  • 1/4 cup mini chocolate chips
  • 1 cup shredded coconut

In a food processor, grind the shredded coconut until powdery.  Set aside in a small bowl.  Grind almonds in the food processor.  Add in the oats and pulse together.  Then, add cranberries and apricots.  Grind these ingredients together and transfer to a medium bowl.

In the same medium bowl, add in honey, peanut butter, and chocolate chips.  Combine these ingredients by hand until blended.

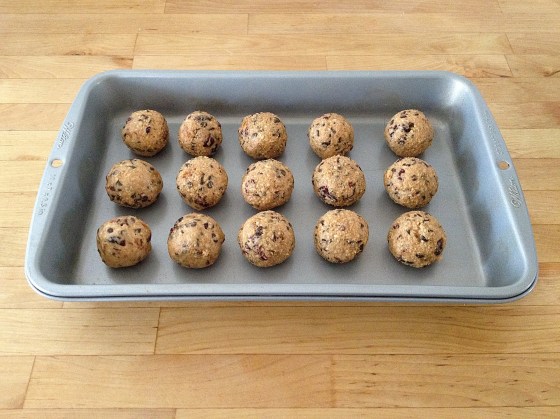
Roll the dough into bite-sized balls and place on a cookie sheet.  Transfer into the freezer for 30 minutes.

Remove bites from the freezer and roll balls in  the powdered coconut until covered.  Place protein bites in a plastic container, separating them from one another with paper muffin cups.  Keep refrigerated while home, or in a cooler bag while on the road.

*These ingredients can be altered for dietary restrictions or personal taste.  Some examples: different types of dried fruit, almond butter, whey protein powder, etc.  They will be delicious regardless!  Enjoy!

From Scissors & Sage

IMG_9922 IMG_9928 IMG_9933 IMG_0027

Lemon Ricotta Cookies

Last month, Scissors & Sage hosted its very first comment contest.  I am happy to announce that the winner of this Valentine’s themed mystery treat was Theresa of TheresaBuoy!  This experience gave me an opportunity to meet a new blog friend across the country, and to expand my blogging horizons (literally).  Thank you to all who participated.  I look forward to future contests on this blog!

The mystery treat I baked for Theresa was a batch of lemon ricotta cookies.  Perhaps you have never heard of these – I hadn’t until about a month ago.  I was in Isgro Pasticceria with my family when I saw these little fellows in the display case.  Now, I am Italian.  Like Brooklyn Italian.  But I had never heard of lemon ricotta cookies!  I was embarrassed.  I was confused.  I knew I had to try and make these myself, so my uncle helped me track down Giada De Laurentiis’s well-regarded recipe.

Lemon Ricotta Cookies (adapted from Giada De Laurentiis)

Prep time: 15 minutes | Cook time: 15 minutes | Yields: 52 cookies

Cookies:

  • 2 1/2 cups all-purpose flour
  • 1 1/2 tsp baking powder
  • 1 tsp salt
  • 1 stick unsalted butter, softened
  • 2 cups sugar
  • 2 eggs
  • 15 oz whole milk ricotta cheese
  • 3 tbs lemon juice
  • 1 lemon, zested
  • Sprinkles (optional)

Glaze:

  • 1 1/2 cups powdered sugar
  • 3 tbs lemon juice
  • 1 lemon, zested

Preheat oven to 375 °F.  In a medium bowl, combine the flour, baking powder, and salt.  In a large bowl, combine the butter and sugar using an electric mixer until fluffy (3-4 minutes).  Add the eggs and beat until fully incorporated.  Add the ricotta cheese, lemon juice, and lemon zest.  Beat to combine.  Stir in the dry ingredients.

Line two cookie sheets with parchment paper.  Scoop 1 tbs of batter per cookie.  Bake for 15 minutes or until slightly golden brown along the edges.  Remove from oven.  Transfer cookies to a cooling rack and let stand for 20 minutes.

Combine the powdered sugar, lemon juice, and lemon zest in a small bowl.  Stir until smooth.  Spoon the glaze onto each cooled cookie.  Add sprinkles if desired.  Let the glaze harden for 2+ hours.  Package the cookies for up to two weeks.

From Scissors & Sage

I packaged these cookies up for Theresa in a decorative paper loaf pan.  These cookies are the perfect springtime cookie.  They are light and citrusy, and can be enjoyed in combination with this warming weather!

Mouth-Watering Chocolate Mousse

Let’s be honest here for a minute.  Chocolate mousse is the sexy lingerie of desserts.  Its smooth, light texture only leaves you wanting more.  Its simplicity is mind-blowing.  One taste and you’re hooked!  This Valentine’s Day, Anne and I decided to forego a dinner reservation in favor of a home-cooked meal.  I knew I wanted to make a special dessert to complement our dinner menu, so I decided to seize the moment and learn how to make this celestial delicacy.

Up until a few weeks ago, I had never baked with a mixer.  What did I do when a recipe called for one?  I bulked up my arm muscles and it usually turned out the same as if I had used a mixer.  I’d give myself a pat on the back and move forward.  Recently, something in me changed, and I realized that there were just some things I couldn’t make without a mixer–chocolate mousse certainly being one.  Now I am the proud owner of a hand-mixer! Anne and I are mixing this and mixing that, happy as clams.  (See: egg whites below.)

After scouring the Internet for the perfect mousse, I decided on a recipe from Bobby Flay.  Its minimal ingredients and rave reviews had me sold.  I adapted a few ingredients and steps, so I present to you my official recipe below.

Mouth-Watering Chocolate Mousse (adapted from Bobby Flay)

Prep time: 20 minutes | Fridge time: 1+ hour | Yields: 4-6 servings

Ingredients:

  • 6 oz semi-sweet chocolate
  • 14 oz cold heavy cream
  • 3 large egg whites
  • 2 tbs sugar
  • Sweetened whipped cream (for garnish, optional)
  • Shaved chocolate (for garnish, optional)

Place a large mixing bowl and beaters in the freezer for 5-10 minutes.  While they are chilling, melt the chocolate in a double boiler at a low simmer.  Remove from heat and let stand.

Take the mixing bowl and beaters out of the freezer, and beat the cold heavy cream until it forms soft peaks.  Set aside at room temperature.

With a very clean large mixing bowl and cleaned beaters,  whip the egg whites until soft peaks form.  Add the sugar gradually, and continue whipping until the mixture becomes firm.

Using a spatula, add the cooled melted chocolate to the egg whites and sugar.  Then use a whisk to combine these ingredients gently.  Add in the whipped cream until uniform.  Place the chocolate mousse in decorative glasses, and cover with plastic wrap.  Refrigerate for 1+ hour, and serve chilled.  Top the mousse with sweetened whipped cream and shaved chocolate for an optional garnish.

From Scissors & Sage

If you’re looking for a last minute dessert or a surprise treat for a loved one, this chocolate mousse doesn’t require too much time or elbow grease.  It is sure, however, to impress.  Here’s to a lovely Valentine’s Day!

Lemon-Blueberry Yogurt Cake

This cake is a miracle cake.  It simultaneously satisfies many cravings: citrus, berry, and creamy-rich-moist goodness.  It can be served for breakfast with coffee or tea, as a mid-afternoon snack, or as an after dinner dessert when paired with vanilla ice cream.  Brilliant!  This recipe comes from good old Smitten Kitchen (who adapted it from Ina Garten).  This cake can be whipped up for yourself, a loved one, or may act as a nice contribution for a dinner party or potluck.  And the best part?  The blueberries can easily be replaced with any other small fruit like cut strawberries or raspberries.

Lemon-Blueberry Yogurt Cake (via Smitten Kitchen)

Prep time: 15 minutes | Bake time: 50 minutes | Yields: 1 cake

Cake ingredients:

  • 1 1/2 cups and 1 tbs flour
  • 2 tsp baking powder
  • 1/2 teaspoon salt
  • 1 cup plain whole milk yogurt
  • 1 cup sugar
  • 3 extra large eggs
  • 2 tsp grated lemon zest
  • 1/2 tsp vanilla extract
  • 1/2 cup vegetable oil
  • 1 1/2 cups blueberries

Glaze ingredients:

  • 1/3 cup fresh lemon juice
  • 1 tbs sugar

Preheat oven to 350°F.  Grease and flour a loaf pan.  In a medium bowl, sift 1 1/2 cups flour, baking powder, and salt.  In a large bowl, whisk yogurt, 1 cup sugar, eggs, lemon zest, vanilla, and oil.  Slowly whisk the dry ingredients into the wet ingredients.  Toss the blueberries and 1 tbs of flour in a small bowl.  Mix those into the batter carefully.  Pour the batter into the loaf pan and bake for 50 minutes, or until a toothpick comes out clean from the center.

While the cake is in the oven, combine the lemon juice and 1 tbs sugar in a saucepan over low heat.  Set the mixture aside once the sugar dissolves and appears clear.

When the cake is done, let it cool for 10 minutes.  Then transfer it to a cooling rack.  Place the cooling rack inside a cookie sheet pan.  Gently drizzle the glaze over the cake while the cake is still warm.  (Making tiny toothpick holes in the top of the cake first will allow the glaze to seep into the cake slightly.)  Let the cake cool and enjoy!

From Scissors & Sage

Note: Photos by Anne Kenealy.

Quick & Simple Fudge

If you’re searching for a little something festive to whip up for your family and friends this holiday season, look no further!  This fudge is fun and very easy to make, and it is sure to please the masses.  The recipe comes from the back of a good old Domino Sugar box, and Anne has been making it for years.  The texture is smooth and silky, and each square practically melts in your mouth.

Quick & Simple Fudge (via Domino Sugar)

Ingredients:

  • 1 package of Domino confectioners’ sugar
  • 1/2 cup unsweetened cocoa powder
  • 6 tablespoons butter
  • 1/4 cup milk
  • 1 teaspoon vanilla
  • 1/4 teaspoon salt
  • (optional: 1 cup chopped walnuts or pecans)

Instructions:

  1. Grease 1 cookie sheet and set aside.
  2. In a large saucepan, add all ingredients except the nuts.
  3. Stir the mixture constantly over a simmer until it is well-combined and uniform.
  4. Remove from heat and add nuts, if desired.
  5. Spread the mixture quickly into the cookie sheet, smoothing it with a spatula.
  6. Refrigerate for 2+ hours and cut into squares.

Makes approximately two dozen bite-sized pieces.  (We tripled the recipe for holiday gifts.)

From Scissors & Sage

Packaging the fudge: here’s where hoarding comes in handy!  In the photo above, the fudge has been packaged to share in a repurposed stationery box.  Use waxed paper to line the box and you’ll be good to go!  This box’s clear plastic lid displays the cool geometrical pattern of the folded wax paper.

In the below photo, blocks of fudge have been individually wrapped and packaged in berry cartons (thanks for collecting them, Mom!).  Wrap each block in waxed paper and secure with a knot of baker’s twine.

In order to cut even blocks, some edges needed to be trimmed.  Keep the scraps in a Ziploc bag in the freezer, and take them out as an ice cream topping or to whip up a batch of fudge chunk cookies.

Happy baking!