Drafting Table Tour

After the December holidays pass and I set off into the new year, I often make time to reorganize things a little bit.  It’s time to check off long overdue to-do items.  There’s something, too, about putting all of the Christmas decorations away that feels weirdly good–like a needed fresh start.  You could say that I get a borderline-sick pleasure out of how uncluttered and spacious things feel around the apartment post-holidays.

Once the Christmas tree, stockings, and other decorations are away, it’s time to clear up everything else.  Have you been meaning to do some post-holiday tidying, but haven’t gotten to it yet?  Dreading going through that stack of papers piling up?  I hope this post acts as inspiration for you!

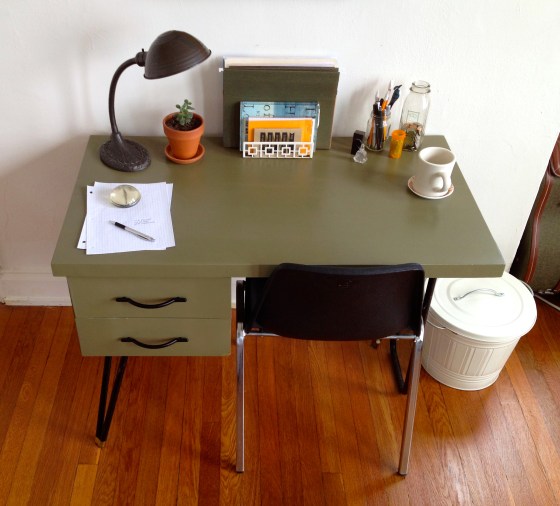
I’m here today to share with you my drafting table/crafting space.  It’s where I do 99% of my work.  I’ve “crafted” this corner of our apartment meticulously so that it fits my needs exactly.  This drafting table acts as my desk, hangout spot, and crafting corner.  I love it, and I hope you do, too!

Oh!  Now seems as good a time as any to mention that our apartment was recently featured on a NYC-based digital magazine, William & Park.  If you like what you see below, head on over to take a look at the rest of our apartment and to read our story!

My dad found this drafting table at a garage sale eons ago.  I came across it in our basement a few years back, and have taken the liberty of looking after it ever since.  My dad also found this metal set of drawers at a garage sale, which I believe originated from IKEA once upon a time.  These two go together like peanut butter and jelly.  The drafting table (which does indeed tilt and adjust height) doesn’t have any storage, so these drawers are invaluable.

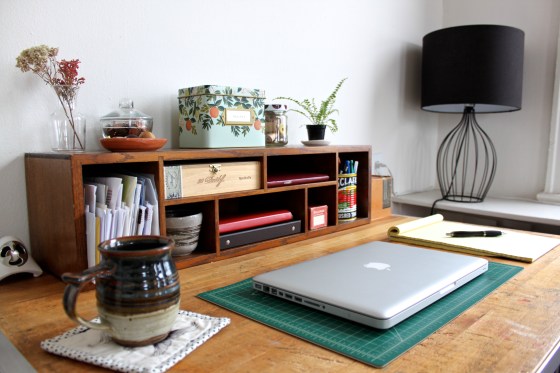
The solid oak desk organizer sitting on the table was Anne’s find at the Brown Elephant in Oak Park, IL.  The drafting table is so deep that the shelves don’t take up any significant amount of workspace.

Anne and I live on the 20th floor of our Philly apartment, so natural light is always guaranteed.  (We also don’t have curtains because 1. it’s really expensive to cover 11 windows, and 2. we’re so high up that privacy is not an issue.)  I almost always use the windowsill as a second workspace, as it transforms my table into an “L”-shaped desk.

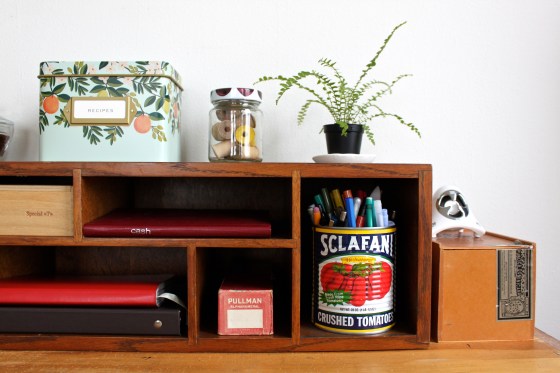
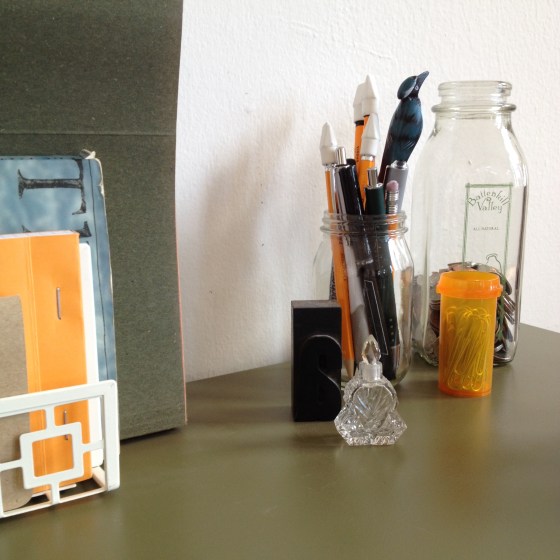
Above is a close up of the oak desk organizer.  I use it for all kinds of crafting and desk supplies.  Cigar boxes hold extra pens, markers, and cords.  I often keep my eyes peeled for ways to reuse items in a fresh way, and the Sclafani tin can is a perfect example of that.  Also pictured above is my recipe box.  I wrote a post on that box in October–check it out here!  It means the world to me.

Has anyone noticed my fern yet?  I may or may not have named it Dr. Fernie Spleenwort.  I bought it at terrain a few weeks ago.  If you are a garden expert, or know anything about ferns, don’t worry: I only placed Fernie here for pictures (isn’t it so photogenic?).  It usually resides in our sunny bathroom where it’s nice and humid.

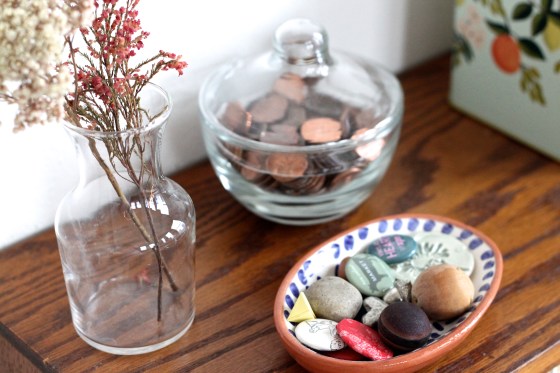
Over the past few years, I’ve collected lucky pennies that are heads up.  I send someone I know positive intentions whenever I add the lucky penny to the bowl.  I have over 250 of them.  Also shown here is a little dish of Tiny Things.  I’ll let you be the judge of whether I’m a hoarder or not.

Isn’t this coaster cute?  Anne’s mom, Janet, made two of these for us last Christmas.  The front has mustaches, and the back is a perfect yellow and white polka dotted fabric.  It has quilt batting in the middle to give it some structure.

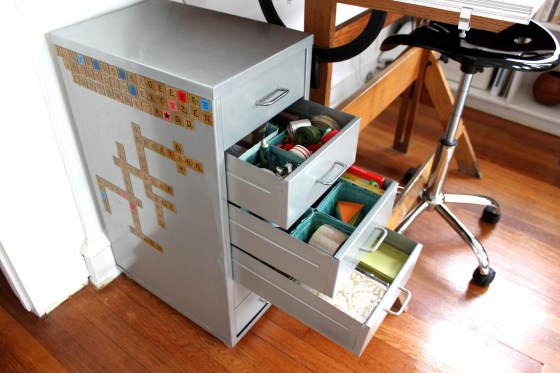
(We like Scrabble–learn to make a DIY Scrabble game here!)

Here’s a close-up of my metal drawers.  I recently reorganized these drawers, and decided to use old berry cartons for storage.  I love how it turned out!  I have so many odds and ends in these drawers, including salvaged pieces of ribbon from presents past.  (Again, I’ll let you be the judge of whether I’m a hoarder.)

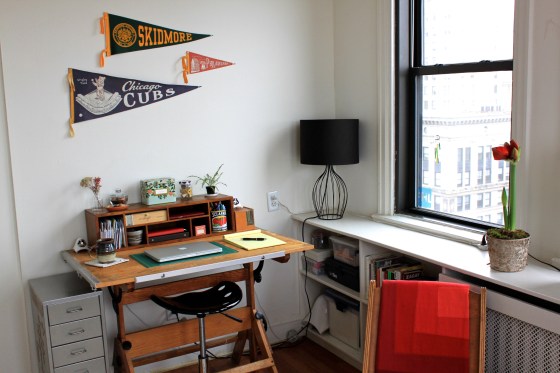
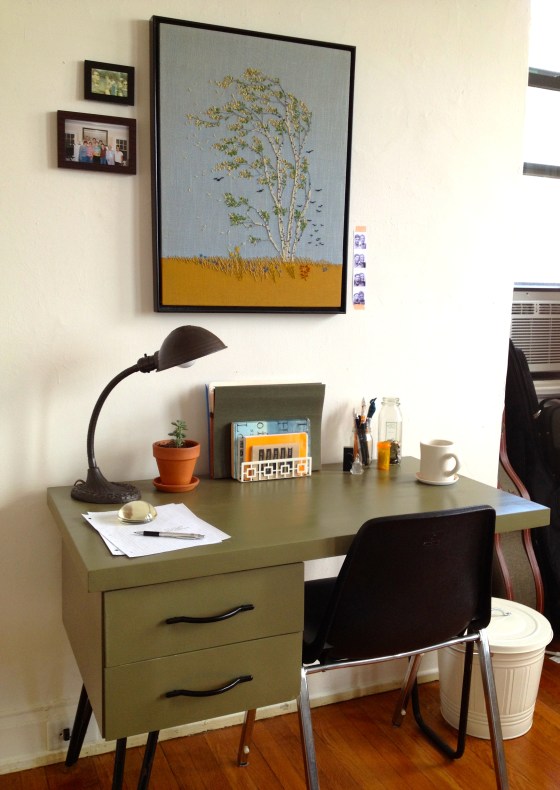
The picture above gives you a better sense of the whole area.  Those four built-in bookshelves play a crucial role in storing crafting supplies, books, and old school papers.

I suppose the last item to note here is my drafting stool.  I searched long and hard for something that was both comfortable and tall enough for the drafting table (a desk chair is too short).  I decided on this stool from Amazon, and the tractor seat is incredibly comfortable.  It rolls right under the drafting table and out of the way!

What do you do to organize your workspace?  Is there anything shown above that you want to find out more about?  Leave a comment in the comment section below and I’ll gladly get back to you!  Here’s to an organized and craft-filled 2015!

PRODUCTS & MATERIALS FROM: Paper Source, Blick, Jo-Ann Fabric, IKEA, Target, terrain, and the Brown Elephant


Wooden Crates Three Ways

It’s been almost two years since Anne and I moved to Center City, Philadelphia, and as any well-seasoned renter knows, your apartment wish-list must be quite flexible when searching for a place to call home.  Maybe it’s that you find a great apartment, but it isn’t in an ideal neighborhood.  Or maybe there isn’t a whole lot of natural light, but the location is prime.  When it comes time to decide, something must (usually) be cut from the wish-list.  What are you willing to cut in order to find a home you love?  For us, it was our kitchen.

When Anne and I laid eyes on our apartment for the first time, two things sealed the deal: the natural light and our 20th floor views of City Hall and the Delaware River.  We were less then excited about our tissue box for a kitchen, but we agreed that we could make it work.  As we settled into our new kitchen, we tried out different set-ups and cabinet organization in order to maximize our limited space.  (Keep in mind that our countertops consist of about two square feet, kid you not.)

Enter wooden crates inherited from my parents and found in a thrift store.  These crates have been pretty important in our ongoing kitchen debacle.  We have used them in very different ways to maximize kitchen storage.  Here’s how we’ve used them:

Wooden Crate #1: Spice Rack

We hung this spice rack on the wall next to our stove for easy access when cooking and baking.  It holds everything from salt and pepper to DIY tea bags I made for Anne one Valentine’s Day.  Because we use our spice rack so often, I’ve found it important to reorganize it every few months or so.  It can start to look a bit jumbled from all its use!

Wooden Crate #2: Food Storage Organizer

Since our kitchen is so small, every inch counts here.  I wasn’t about to overlook our above-fridge space, so we found ways to work with the area between the fridge and the cabinets.  Next to our two OXO containers (holding granola bars and tea varieties) is our second wooden crate.  It holds our Ziploc bags, aluminum foil, wax paper, and saran wrap all in one place.  It’s easy to either slide it out or pull it down to see what’s inside.

Wooden Crate #3: Kitchen Linens Holder

One reason why Anne and I accepted our small kitchen for what it was is because the receded wall in the hallway allows space for a butcher’s block.  We inherited this from my sister, and I am eternally grateful.  The butcher’s block allows us to extend the kitchen into our hallway, which is great for entertaining.  We store larger items on its shelves like our toaster, ice cream maker, and colander.  The last wooden crate is used here to hold our kitchen linens.  It holds items such as our extra dish towels, linen napkins, and aprons.

These three crates have helped us overcome some serious frustrations with our kitchen.  When you have limited cabinet space, little to no countertops, and no pantry, it becomes time to think creatively!

Do you have a small kitchen in your home?  How have you overcome its quirks and difficulties?  Please share!

Thrifting With: Anne Kenealy

Victoria and I spend a lot of time in thrift stores. There’s nothing quite like that rare delight of finding the perfect kitchen chair or end table for only a few dollars. Far more often, though, I find myself wading through piles of legless tabletops and stained armchairs, wondering if I have the time, elbow grease, and expertise needed to transform a long-unloved piece of furniture into something beautiful and useful.

A few summers ago, I was wandering through a thrift shop in Platteville, Wisconsin, where my family keeps a hobby farm. In the rural Midwest, folks tend to hang on to their belongings for a long time, resulting in a local thrift shop filled with decades-old treasures. I happened upon this desk:

It was covered in chipped faux-bois veneer and the drawers didn’t close just right. However, I had borrowed the pickup truck, I had a spot to stow the desk until I could get around to working on it, and it was only $3. Perhaps most importantly, it was summer, so I had time to kill and an apartment to fill when Victoria and I moved to Philadelphia a few months later.

With my wise father and Google as dual advisors, Victoria and I set to work painting and restoring The Desk. Because its veneer is plastic, getting a few even, thorough coats of paint took some ingenuity, but a project similar to this one is easily doable in a few hours over a couple of days.

Materials:

If you’re a furniture-refurbishing wizard, you already know: clean, sand, clean, prime, clean, paint. However, if, like me, you run with the Design*Sponge-ogling common folk and the list of materials above was enough to make you decide against this project, don’t turn away just yet. This project is simple and yields great results.

  1. You’ll first want to clean the piece thoroughly with TSP. Because TSP is such a powerful cleaning agent, it is recommended that you wear rubber gloves and work in a well-ventilated space. We used the great outdoors. (It is also recommended that you don’t walk into a home improvement store asking for “trisodium phosphate” like we did. No one seems to refer to TSP by its full chemical name, and our clerk looked at us like we were Walter and Jesse back for a re-up.)
  2. Using fine sandpaper, rough up every surface you intend to paint. With a plastic veneer, this step might be the most painstaking of the entire project, but it pays to sand well. The better you sand a surface, the more likely the spray paint is to stick.
  3. After sanding, clean the piece once more with TSP, then run a tack cloth over the whole thing to remove any grit or dust. If you intend to prime later, wipe the piece down with a tack cloth once more just prior to priming. It really pays off.
  4. If you want the legs or drawer pulls of your piece to remain untouched by spray paint, remove them or cover with painter’s tape. Then spray an even coat of primer over every surface you intend to paint. Attaining the “even coat” was a process, so it helped me to practice on a sheet of newspaper first. Let dry for a few hours or overnight.
  5. Once the primer has dried, run a tack cloth over the piece again. Spray a thin, even coat of paint, taking care not to linger too long in any given spot. With each coat, it is better to apply too little paint than too much. Let dry for a few hours or overnight.
  6. If you have overapplied paint anywhere, you can sand down the pools or bubbles that may have formed and then clean any dust away with a tack cloth. Then apply a second coat of paint, attending to the bottom of any overhangs and the edges of drawers.
  7. Once dry, make sure the richness of the color is consistent and that the satin shine is even across the piece. If you feel you need a third coat of paint, feel free to apply. (This may require a second can of paint, depending on the size of your piece.)

Ta-da!

To add a nice finishing touch to this desk, we asked my dad to polish the tips of the legs with Brasso and some fancy buffer tool that I don’t pretend to know how to use. The most exciting part of this project was finding drawer pulls that suited the style of the desk; we discovered  Menards had a nice selection.

The chair isn’t a perfect fit for the desk, but it was $5 at Uhuru, a thrift shop around the corner from our apartment. Victoria and I found the birch tree needlepoint at the Platteville Thrift Shop on a later trip, and spray painted the frame a glossy black. The antique desk lamp has a cast iron base and is on loan from my dear old ma.

A refurbishing project like this one may seem labor-intensive, but the payoff is great. Here’s to more lonely thrift store cast-offs receiving similar treatment!

-Anne