Carving Buttons With: Sal Vitale

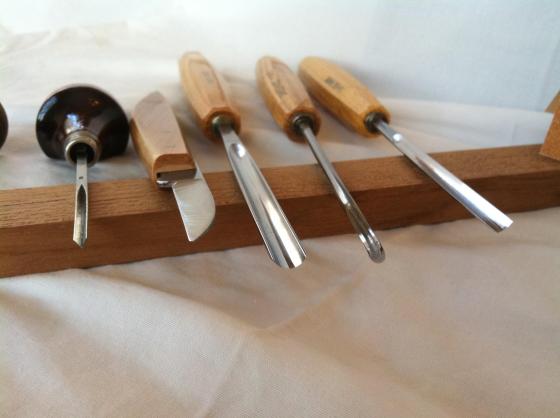
A few months ago, I saw some beautiful wood-carved buttons in a local yarn shop in Philly.  Their simple and rustic appearance caught my eye, and I thought that my dad, who is an expert woodworker, could recreate these with his own flare.  I sent him an email with some pictures to see if he’d be interested in this project, and he quickly set to work.

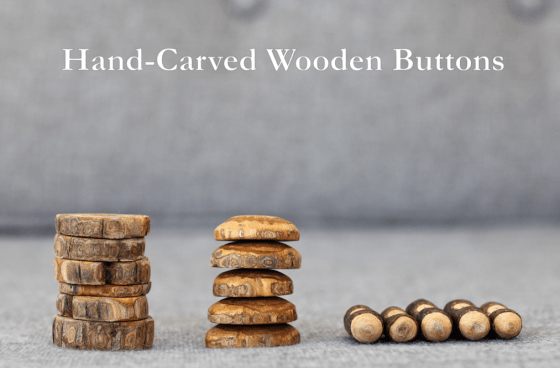
My dad sent me picture updates of his many buttons over the next few weeks.  (Each one took a couple of hours, and he often whittled as he watched a favorite television show.)  I was blown away by his designs and execution.  He began by finding very dry wood, and ultimately decided to use one of my Grandma Elisabeth’s unfinished pine walking sticks from many years ago.  The pine wood in our yard was too wet and sappy, but the maple wood for the oblong buttons worked just fine.

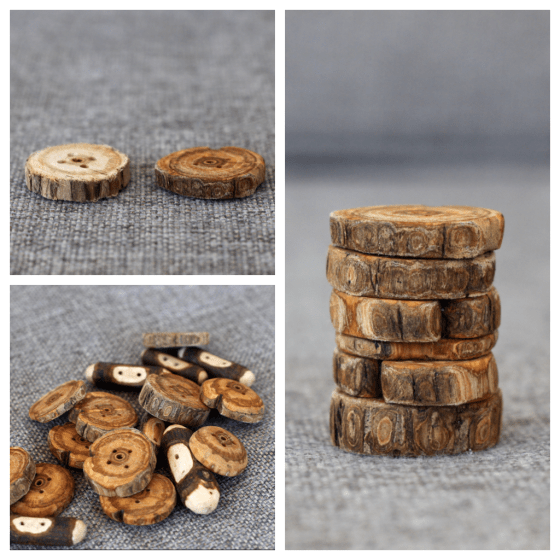
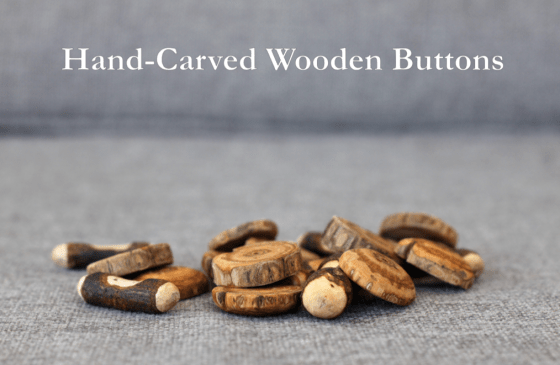
To create the flat pine buttons, my dad used a hand saw to cut the wood about 1/4″ thick.  I love that each button has its own unique shape and thickness — I wouldn’t change it for anything!  He then drilled four holes into the coins to create the buttons.  That fifth hole in the center of each button is actually a natural hole where water once traveled up the tree.

My dad whittled some of the pine coins to create rounded tops.  He cut the maple sticks longways and scooped out part of the center.  These oblong designs revealed two-tone wood when carved away, creating such beautiful buttons!

To finish off his project, my dad sanded the entire surface of each button, as I didn’t want any of the wood to catch on yarn for future projects.  He was sure to use a very light sand paper so that the natural beauty of the wood remained.  Finally, he used wood oil to complete his buttons, which gave them a finished, professional look.

I am so excited about these buttons and the story behind them.  I used one of them last week to finish a scarf I knit.  I’ll be sharing that project next week so that you can see these buttons in action!  I am so happy to have these as part of my knitting collection.  There is so much potential with hand-carved buttons in knitting — shapes, sizes, styles, etc.  What would your ideal button look like?

Wooden Crates Three Ways

It’s been almost two years since Anne and I moved to Center City, Philadelphia, and as any well-seasoned renter knows, your apartment wish-list must be quite flexible when searching for a place to call home.  Maybe it’s that you find a great apartment, but it isn’t in an ideal neighborhood.  Or maybe there isn’t a whole lot of natural light, but the location is prime.  When it comes time to decide, something must (usually) be cut from the wish-list.  What are you willing to cut in order to find a home you love?  For us, it was our kitchen.

When Anne and I laid eyes on our apartment for the first time, two things sealed the deal: the natural light and our 20th floor views of City Hall and the Delaware River.  We were less then excited about our tissue box for a kitchen, but we agreed that we could make it work.  As we settled into our new kitchen, we tried out different set-ups and cabinet organization in order to maximize our limited space.  (Keep in mind that our countertops consist of about two square feet, kid you not.)

Enter wooden crates inherited from my parents and found in a thrift store.  These crates have been pretty important in our ongoing kitchen debacle.  We have used them in very different ways to maximize kitchen storage.  Here’s how we’ve used them:

Wooden Crate #1: Spice Rack

We hung this spice rack on the wall next to our stove for easy access when cooking and baking.  It holds everything from salt and pepper to DIY tea bags I made for Anne one Valentine’s Day.  Because we use our spice rack so often, I’ve found it important to reorganize it every few months or so.  It can start to look a bit jumbled from all its use!

Wooden Crate #2: Food Storage Organizer

Since our kitchen is so small, every inch counts here.  I wasn’t about to overlook our above-fridge space, so we found ways to work with the area between the fridge and the cabinets.  Next to our two OXO containers (holding granola bars and tea varieties) is our second wooden crate.  It holds our Ziploc bags, aluminum foil, wax paper, and saran wrap all in one place.  It’s easy to either slide it out or pull it down to see what’s inside.

Wooden Crate #3: Kitchen Linens Holder

One reason why Anne and I accepted our small kitchen for what it was is because the receded wall in the hallway allows space for a butcher’s block.  We inherited this from my sister, and I am eternally grateful.  The butcher’s block allows us to extend the kitchen into our hallway, which is great for entertaining.  We store larger items on its shelves like our toaster, ice cream maker, and colander.  The last wooden crate is used here to hold our kitchen linens.  It holds items such as our extra dish towels, linen napkins, and aprons.

These three crates have helped us overcome some serious frustrations with our kitchen.  When you have limited cabinet space, little to no countertops, and no pantry, it becomes time to think creatively!

Do you have a small kitchen in your home?  How have you overcome its quirks and difficulties?  Please share!

Christmas Wood Carvings

One of my favorite things about the holiday season is the traditions, both old and new, that come along with it.  This week’s post features the handiwork of my dad, Sal.  Every year, he embarks on a new wood carving project, either making a Christmas gift for a loved one, or simply adding to his own ornament collection.

There he is every year, whittling away after breakfast or while watching a television show.  He says it is therapeutic, and I can understand why.  His wood blocks turn into santas, snowmen, North Pole people, and others of the like.  Some carvings become ornaments, and others are stand-alone decorative pieces.

The type of wood that he uses is a hard wood called basswood.  His tool collection consists of chisels, gougers, and scoopers of many shapes and sizes (i.e. “v” shape, regular blade, curved scooper, etc).  Most importantly, he shared, his tools are very sharp.

                                  Before carving, he makes a pencil sketch on the block of basswood.  As he whittles away, he continuously re-sketches in order to keep the image on the wood.  Carving away from a block of wood proves challenging in that it is not possible to put back any wood: work slowly and diligently, and take off small amounts at a time.  After he finishes carving, he uses fine grit sandpaper (around 400) to take off any rough edges on the face, cheeks, or hat.  The final step is to use blends of acrylic paints to bring the piece to life.For pieces that become ornaments, he screws an eye hook into its top and uses thread to hang it on the Christmas tree.  These wood carvings are true works of art, and I look forward to seeing his toolbox come out every holiday season.  His creativity broadens each year (see the violin snowman below), and it is always a surprise as to what he will make next!
                                   Note: All photographs taken by Sal.