I am of a certain belief that hoarding, to some extent, can be a good thing. More times that not I find myself saying, “Wow, I am so glad I kept that!” for whatever it is I am working on. Today’s project uses materials I already had, so once again, my pack rat tendencies have paid off!
Last week I decided to take the plunge and upgrade my cell phone from an iPhone 4S to an iPhone 6. While I’ve had my 4S for several years and it was almost as good as new, I ultimately decided to recycle it with Apple for a faster and larger phone. Anne and I are traveling to Greece this summer (!!!!!!!), and I wanted to have a more reliable phone that takes great pictures for our journey.
To complement my new cell phone I decided, of course, that it needed a cute home. I didn’t want to go the route of a case, and thought a sleeve might be a nice alternative. Plan A was to visit the local art supply store and pick up a swatch or two of felt, but when they didn’t have any nice color options, I didn’t know what to do. I didn’t have a Plan B. I sat on my couch when I got home and brainstormed how else I could make a cell phone sleeve. I didn’t have any other materials on hand that would work for this project.
And then it hit me! (Enter: hoarder.) I keep a whole drawer of gift wrapping materials by my drafting table for this very reason. I had the PERFECT item to reuse and repurpose: a felt pouch from Madewell! My aunt gave me a bracelet in it for Christmas once.
I should again stress that I really do not sew. I did, once upon a time in 6th grade, join sewing club, but that was eons ago. I can sew on buttons, and recently embroidered a card, but my sewing knowledge really stops there. That being said, I think that any crafter can make this cell phone sleeve. I’ll walk you through it!
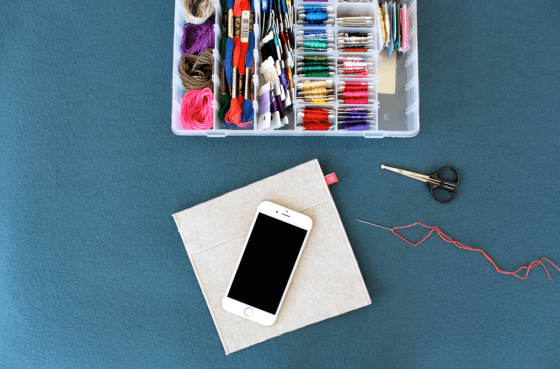
DIY Felt iPhone 6 Sleeve
Materials:
- Felt (one or two colors)
- Embroidery thread
- Sewing needle
- Scissors
Step 1: My step 1 might look different from your step 1 because I was working with an item I needed to deconstruct before I could re-construct it. I began by carefully taking out the stitches in the felt pouch and lying it flat. I laid my phone down over the felt to eyeball where I needed to cut. For an iPhone 6, measure your swatch to be 3 1/2 inches x 11 5/8 inches. (Note: This pattern can easily be adjusted to fit any cell phone, tablet, or personal device.)

Step 2: If you want to make a secondary pocket, cut another felt swatch of identical measurements. This could be the same color or a complementary color. Then, fold this swatch in half short ways and cut a diagonal line through both halves of the felt. (Since I didn’t choose the color of my felt, I decided to spruce things up a bit with fun coral-colored embroidery thread!)


Step 3: Place the diagonally cut felt over the rectangular felt and carefully line up the edges. If anything does not line up correctly, this is the time to fix it. Thread the sewing needle with embroidery thread and begin sewing up the first side of the sleeve. You can use any stitch for this, or even a sewing machine if you know how to use one! I decided to stick to the basics: in one side, out the other, etc.
I used an invisible stitch to begin and end the two sides so that there wouldn’t be any visible knots or loose string (this sleeve is two-sided, after all!). When beginning, I entered through the inside of the sleeve, and at the end, I tied a knot between the two pieces of felt. These are very much “Victoria stitches,” as I truly had no idea what I was doing and made it up as I went. Much to my surprise, these stitches seem sturdy!


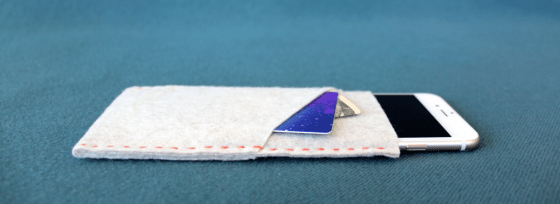
Step 4: Make sure that everything fits nicely in your new felt sleeve! I wanted my phone to fit snugly in the pouch so that it doesn’t fall out if held upside-down. The beauty of not having a top closure is that you can charge your phone and/or listen to music with headphones while it is in the sleeve! It will make the perfect companion for your jacket pocket, bag, or purse.


The best part about this project? It cost me $0. All because I saved that felt pouch from Madewell. Here’s to hoarding crafting supplies forever… and ever.
Be sure to tag your own DIY projects with #scissorsandsage!
Design inspiration for this project came from Poppytalk.


