Cozy Fall Favorites

I’ve always said that fall is my favorite season, but it wasn’t until this past week that I pinpointed exactly why it’s my favorite season. For starters, I love the transition from long, hot summer days to slightly shorter, crisper fall days. Trees begin to change, and these vibrant colors are some of the best out there.

Fall is the season where we start our migration back into our homes after going out and being explorers for the summer–explorers in our gardens, towns, cities. We quiet ourselves as we embrace this change, and learn from nature just how beautiful a time of transition can really be. We indulge in simple pleasures, and refocus on what’s important. It’s our chance to turn over a new leaf.

When I write posts like this one, I tend to look outward for inspiration. This week, I thought I’d look inward. Scissors & Sage is two years old now, and I have a lot of really fun blog posts to show for my time here! Below, you’ll find a few of my favorite projects and recipes that embrace fall in all its cozy glory.

Nothing says fall like this trio: hot tea, ceramic mug, and knit coaster. Coziness is just oozing out of this picture! Learn to knit this coaster here. It’d make a beautiful gift set.

Looking to knit something wearable, instead? This cowl is a quick project with big results–perfect for fall layering.

It’s now okay to turn the oven back on. Wahoo! These mile-high coffee cake muffins are a real crowd-pleaser, and will provide a nice transition back into baking again.

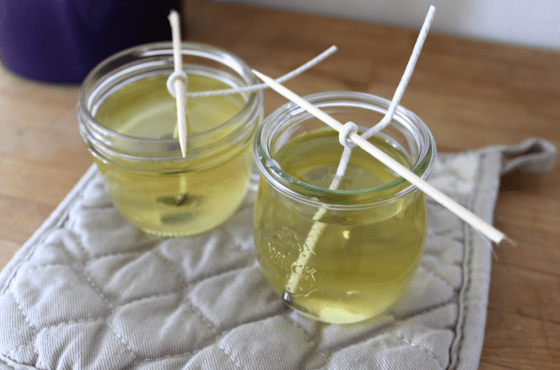
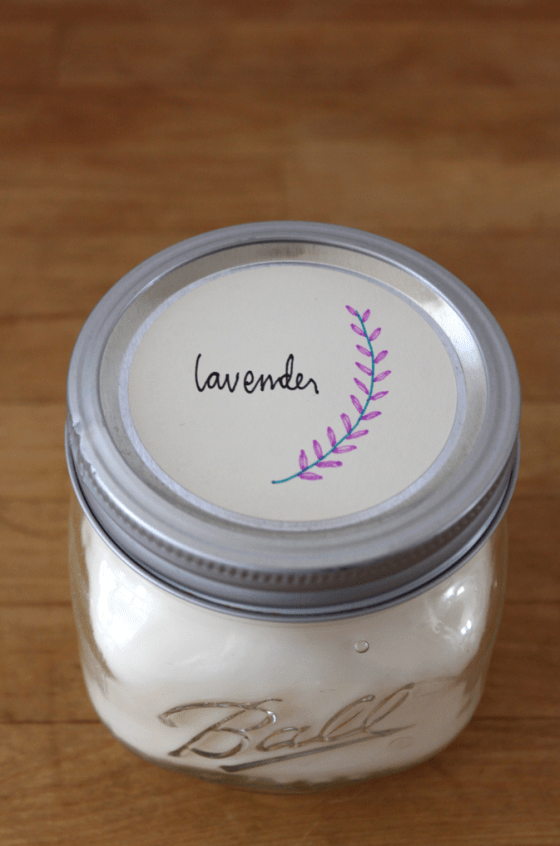
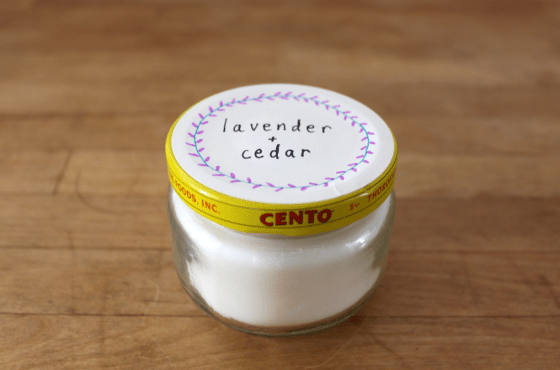
Snuggle up with one of these homemade soy wax candles. They’re perfect for any room of your home.

Believe it or not, Halloween season is almost upon us. These spooky chocolate cake doughnuts are festive and pretty tasty.

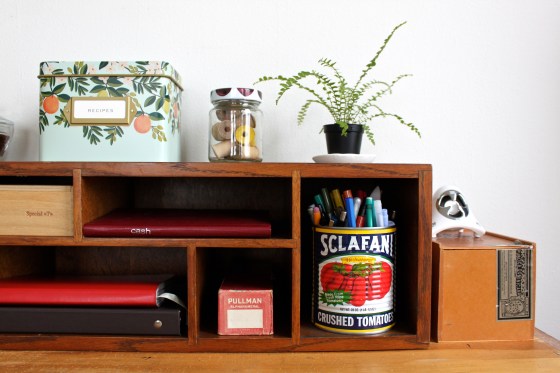
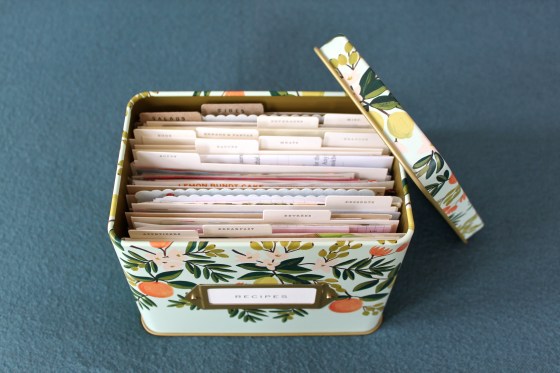
It’s a perfect time to check-in with your recipe box. Mine, from Rifle Paper Co., fills me with a lot of joy. Start simmering those stews, people!

Let fall colors guide your crafting this season. These DIY leaf flowers make a beautiful centerpiece, and are a definite conversation-starter.

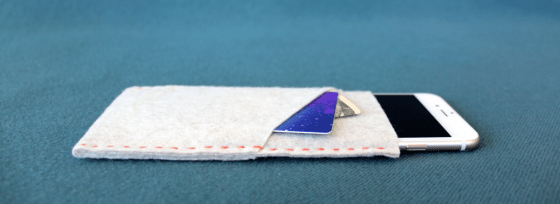
Felt is a great crafting material for cooler months. I made this two-pocket cell phone sleeve using gift packaging from Madewell!

There are a few more things on my mind this week:

  1. I recently discovered a company called Parachute. Have you heard of them? Their website and blog focuses on all-things sleeping. From selling luxurious bedding hand-crafted in Italy, to blogging about how to choose the right pillow, they’ve got it covered. And they cover it well.
  2. It’s time to try something new. I’ve got a few new crafting techniques and projects I’m interested in testing out soon, and I’m really excited about them. Our new apartment is the perfect blank canvas! Are you hoping to start a certain project soon?
  3. I don’t usually drink caffeine, but settling into a good book or knitting project with a chai tea latte sounds pretty excellent right about now. My favorite is Oregon Chai’s powdered mix.

What are you doing to get ready for fall? Are you excited, or are you already missing summer?

DIY Travel Backgammon & Checkers

As Anne and I get ready to leave for Greece (8 days!), I’ve decided that our packing list should include games we can play on our trip. Playing cards are a no-brainer, but I was curious how I might go about creating a travel-friendly backgammon and checkers board. Backgammon is widely popular in Greece, so learning to play is something I’ve been very interested in. Checkers I already have down pat.

After scouring the Internet and a local art supply store to get ideas on how to make this vision a reality, I ultimately settled on a design that is freakishly easy. So easy that creating a blog post tutorial on it is almost cheating. I wanted to use materials I already owned, though, so creating two board games for $0 is a win in my book! The supplies are few, and the steps quite easy.

This board game takes up virtually no room in your travel bag, and is sure to be fun no matter where you are: a local taverna, the beach, your room, a long plane ride, etc.

DIY Travel Backgammon

Materials:

  • 8.5″ x 11″ chipboard (I purchased mine here)
  • Pencil
  • Sharpie marker
  • Ruler
  • 30 buttons, 15 each in two colors (or any other checker-type object)
  • 2-4 dice, depending on what style backgammon you are playing (or download this dice app if you’ll have wifi on your trip)

Step 1: Using a pencil and then a Sharpie, draw a thick line down the short side of the chipboard at 5 1/2″. To make this as accurate as possible, make a tick mark at 5 1/2″ on either long edge of the board. Then, connect the dots.

Step 2: Working outward from either side of the thick line, use a pencil to make six tick marks every 7/8″. There should be 24 tick marks in total.

Step 3: Use the ruler and Sharpie to begin creating the backgammon points (or triangles). Place the board in landscape position. The long edge closest to you I will call Side 1, and the farther long edge will be called Side 2. Connect the farthest left tick mark on Side 1 to the second most left tick mark on Side 2. This should create a diagonal line. Continue this across the board to create 12 parallel lines. Next, go back and create 12 more parallel lines going in the opposite direction (i.e. connect the second most left tick mark on Side 1 to the farthest left tick mark on Side 2).

Step 4: Create the two-toned backgammon board by filling in every other point with stripes. The points facing each other should be opposite colors.

DIY Travel Checkers

Materials:

  • See above! This board requires the same materials as backgammon, except only 12 checkers each.

Step 1: Turn over your brand-new backgammon board to the blank side of the chipboard. Create an 8″ x 8″ square using the ruler, pencil, and Sharpie.

Step 2: Make tick marks every 1″ along all four sides of the square. Create smaller squares by connecting all opposing tick marks. There will be 64 squares total.

Step 3: Create the two-toned checkers board by filling in every other square with stripes. No striped square should be touching another striped square.

P.S. Have you seen my DIY Scrabble game? It was the subject of an early blog post on Scissors & Sage, but it might be one of my favorite projects ever.

Homemade Soy Wax Candles

Candle-making is a craft that I have wanted to try for a few years now. Anne gave me candle-making supplies for Valentine’s Day this year, and we spent an afternoon making a whole batch together. It was a lot of fun, and produced some seriously pretty candles!

Are you in need of a Mother’s Day gift? It’s not too late to give this a whirl. The instructions below are adapted from Martha Stewart.

Homemade Soy Wax Candles

Materials:

  • Wicks with a metal bottom
  • Chopsticks or skewers
  • Glass jars
  • Soy wax
  • Double boiler
  • Meat or candy thermometer
  • Oil-based essence of your choice (i.e. lavender)
  • Scissors

Step 1: Clean and dry all glass jars. Use chopsticks to rest one wick in each jar. To do this, wrap the wick around the chopstick as to hold the wick in place. It’s important that the wick is centered in the jar.

Step 2: Set up the double boiler and melt the wax to 135°F.

Step 3: Remove the melted wax from the heat, and stir in 80-100 drops of essential oil, or to your desired amount. (Note: 80 drops gives off a light aromatic scent, while closer to 100+ drops will smell more like a commercial candle.)

Step 5: Carefully pour wax into jars, and place them in a cold water bath in the sink. (You may need to hold the wicks in place for a few minutes.) As the wax cools, it may begin to sink. Add melted wax as needed, and re-cool. Remove chopsticks and trim wicks with scissors.

Especially if you’re considering giving your candles as gifts, consider making labels for each of them. Use stickers, washi tape, or Sharpie markers to describe the scent you’ve used.

Are you making anything homemade this Mother’s Day? If so, share in the comments! I’ll send the mother of one lucky commenter a surprise care package. (Continental US moms only!)

DIY Felt iPhone 6 Sleeve

I am of a certain belief that hoarding, to some extent, can be a good thing. More times that not I find myself saying, “Wow, I am so glad I kept that!” for whatever it is I am working on. Today’s project uses materials I already had, so once again, my pack rat tendencies have paid off!

Last week I decided to take the plunge and upgrade my cell phone from an iPhone 4S to an iPhone 6. While I’ve had my 4S for several years and it was almost as good as new, I ultimately decided to recycle it with Apple for a faster and larger phone. Anne and I are traveling to Greece this summer (!!!!!!!), and I wanted to have a more reliable phone that takes great pictures for our journey.

To complement my new cell phone I decided, of course, that it needed a cute home. I didn’t want to go the route of a case, and thought a sleeve might be a nice alternative. Plan A was to visit the local art supply store and pick up a swatch or two of felt, but when they didn’t have any nice color options, I didn’t know what to do. I didn’t have a Plan B. I sat on my couch when I got home and brainstormed how else I could make a cell phone sleeve. I didn’t have any other materials on hand that would work for this project.

And then it hit me! (Enter: hoarder.) I keep a whole drawer of gift wrapping materials by my drafting table for this very reason. I had the PERFECT item to reuse and repurpose: a felt pouch from Madewell! My aunt gave me a bracelet in it for Christmas once.

I should again stress that I really do not sew. I did, once upon a time in 6th grade, join sewing club, but that was eons ago. I can sew on buttons, and recently embroidered a card, but my sewing knowledge really stops there. That being said, I think that any crafter can make this cell phone sleeve. I’ll walk you through it!

DIY Felt iPhone 6 Sleeve

Materials:

  • Felt (one or two colors)
  • Embroidery thread
  • Sewing needle
  • Scissors

Step 1: My step 1 might look different from your step 1 because I was working with an item I needed to deconstruct before I could re-construct it. I began by carefully taking out the stitches in the felt pouch and lying it flat. I laid my phone down over the felt to eyeball where I needed to cut. For an iPhone 6, measure your swatch to be 3 1/2 inches x 11 5/8 inches. (Note: This pattern can easily be adjusted to fit any cell phone, tablet, or personal device.)

Step 2: If you want to make a secondary pocket, cut another felt swatch of identical measurements. This could be the same color or a complementary color. Then, fold this swatch in half short ways and cut a diagonal line through both halves of the felt. (Since I didn’t choose the color of my felt, I decided to spruce things up a bit with fun coral-colored embroidery thread!)

Step 3: Place the diagonally cut felt over the rectangular felt and carefully line up the edges. If anything does not line up correctly, this is the time to fix it. Thread the sewing needle with embroidery thread and begin sewing up the first side of the sleeve. You can use any stitch for this, or even a sewing machine if you know how to use one! I decided to stick to the basics: in one side, out the other, etc.

I used an invisible stitch to begin and end the two sides so that there wouldn’t be any visible knots or loose string (this sleeve is two-sided, after all!). When beginning, I entered through the inside of the sleeve, and at the end, I tied a knot between the two pieces of felt. These are very much “Victoria stitches,” as I truly had no idea what I was doing and made it up as I went. Much to my surprise, these stitches seem sturdy!

Step 4: Make sure that everything fits nicely in your new felt sleeve! I wanted my phone to fit snugly in the pouch so that it doesn’t fall out if held upside-down. The beauty of not having a top closure is that you can charge your phone and/or listen to music with headphones while it is in the sleeve! It will make the perfect companion for your jacket pocket, bag, or purse.

The best part about this project? It cost me $0. All because I saved that felt pouch from Madewell. Here’s to hoarding crafting supplies forever… and ever.

Be sure to tag your own DIY projects with #scissorsandsage!

Design inspiration for this project came from Poppytalk.

Drafting Table Tour

After the December holidays pass and I set off into the new year, I often make time to reorganize things a little bit.  It’s time to check off long overdue to-do items.  There’s something, too, about putting all of the Christmas decorations away that feels weirdly good–like a needed fresh start.  You could say that I get a borderline-sick pleasure out of how uncluttered and spacious things feel around the apartment post-holidays.

Once the Christmas tree, stockings, and other decorations are away, it’s time to clear up everything else.  Have you been meaning to do some post-holiday tidying, but haven’t gotten to it yet?  Dreading going through that stack of papers piling up?  I hope this post acts as inspiration for you!

I’m here today to share with you my drafting table/crafting space.  It’s where I do 99% of my work.  I’ve “crafted” this corner of our apartment meticulously so that it fits my needs exactly.  This drafting table acts as my desk, hangout spot, and crafting corner.  I love it, and I hope you do, too!

Oh!  Now seems as good a time as any to mention that our apartment was recently featured on a NYC-based digital magazine, William & Park.  If you like what you see below, head on over to take a look at the rest of our apartment and to read our story!

My dad found this drafting table at a garage sale eons ago.  I came across it in our basement a few years back, and have taken the liberty of looking after it ever since.  My dad also found this metal set of drawers at a garage sale, which I believe originated from IKEA once upon a time.  These two go together like peanut butter and jelly.  The drafting table (which does indeed tilt and adjust height) doesn’t have any storage, so these drawers are invaluable.

The solid oak desk organizer sitting on the table was Anne’s find at the Brown Elephant in Oak Park, IL.  The drafting table is so deep that the shelves don’t take up any significant amount of workspace.

Anne and I live on the 20th floor of our Philly apartment, so natural light is always guaranteed.  (We also don’t have curtains because 1. it’s really expensive to cover 11 windows, and 2. we’re so high up that privacy is not an issue.)  I almost always use the windowsill as a second workspace, as it transforms my table into an “L”-shaped desk.

Above is a close up of the oak desk organizer.  I use it for all kinds of crafting and desk supplies.  Cigar boxes hold extra pens, markers, and cords.  I often keep my eyes peeled for ways to reuse items in a fresh way, and the Sclafani tin can is a perfect example of that.  Also pictured above is my recipe box.  I wrote a post on that box in October–check it out here!  It means the world to me.

Has anyone noticed my fern yet?  I may or may not have named it Dr. Fernie Spleenwort.  I bought it at terrain a few weeks ago.  If you are a garden expert, or know anything about ferns, don’t worry: I only placed Fernie here for pictures (isn’t it so photogenic?).  It usually resides in our sunny bathroom where it’s nice and humid.

Over the past few years, I’ve collected lucky pennies that are heads up.  I send someone I know positive intentions whenever I add the lucky penny to the bowl.  I have over 250 of them.  Also shown here is a little dish of Tiny Things.  I’ll let you be the judge of whether I’m a hoarder or not.

Isn’t this coaster cute?  Anne’s mom, Janet, made two of these for us last Christmas.  The front has mustaches, and the back is a perfect yellow and white polka dotted fabric.  It has quilt batting in the middle to give it some structure.

(We like Scrabble–learn to make a DIY Scrabble game here!)

Here’s a close-up of my metal drawers.  I recently reorganized these drawers, and decided to use old berry cartons for storage.  I love how it turned out!  I have so many odds and ends in these drawers, including salvaged pieces of ribbon from presents past.  (Again, I’ll let you be the judge of whether I’m a hoarder.)

The picture above gives you a better sense of the whole area.  Those four built-in bookshelves play a crucial role in storing crafting supplies, books, and old school papers.

I suppose the last item to note here is my drafting stool.  I searched long and hard for something that was both comfortable and tall enough for the drafting table (a desk chair is too short).  I decided on this stool from Amazon, and the tractor seat is incredibly comfortable.  It rolls right under the drafting table and out of the way!

What do you do to organize your workspace?  Is there anything shown above that you want to find out more about?  Leave a comment in the comment section below and I’ll gladly get back to you!  Here’s to an organized and craft-filled 2015!

PRODUCTS & MATERIALS FROM: Paper Source, Blick, Jo-Ann Fabric, IKEA, Target, terrain, and the Brown Elephant