Sharpie Easter Eggs

IMG_3577.JPG

This Easter crafting project is one that requires two things: eggs and Sharpie markers.  While dyeing eggs may be the more traditional Easter activity, sometimes there just isn’t the time.  Let’s face it that holidays require so much preparation.  Between the cooking, the baking, the cleaning, and the entertaining, things fall to the wayside.  But with this easy craft project, designing Easter eggs does not have to be one of them!  It’s a project that is great for any age, and yields some pretty neat results.

To get started, hard boil your eggs.  Once the eggs have cooled to room temperature, gather any/all of your Sharpie markers and begin designing!  You can check Pinterest or Google Images for inspiration.  These eggs would look great with seasonal words drawn on them, or they could even act as place card alternatives for your Easter dinner table.

IMG_3558_2

Which came first, the chick(en) or the egg?


Oscar Wilde Stencil Art

IMG_9779

One of my first-ever blog posts on Scissors & Sage was a stencil pillow I made.  It was my first time using a stencil for a crafting project, and I couldn’t believe what a fun and relatively simple process it was!  Months later, I made another stencil project, Mirror, Mirror, as an apartment-warming gift for my friend, Caroline.  I’ve started using stencils to craft homemade cards, too, and it works quite well!  Today, I present a project I recently finished for my uncle’s birthday.  I knew it was a quotation that he really liked, so I thought I’d give him something that he could put up in his home.  Making this stencil art is not difficult; it only requires some layout planning and a good eye!

IMG_9753

Materials:

  • Stencil pack
  • Black marker, thin enough to fit in the stencils
  • Colored paper
  • Computer paper
  • Ruler
  • Scissors
  • Pencil
  • Eraser

The first step is to choose a quotation.  Then, use computer paper to sketch out the individual words and design you want.  This took some trial and error, as I wasn’t sure how I wanted the words to fit together.  I decided to cut up the computer paper so I could move the words around individually.  Once you have the layout you want, get the colored paper ready and place the rough draft above it, like this:

IMG_9757

That way, there will be a guide to show you where to place each letter.  (I really don’t like it when things aren’t centered, so this helps to avoid that!)  Continue stenciling each word.  When you finish, fill in the stencil gaps in letters like “B” and “U” by hand.

IMG_9763IMG_9782

The project is complete!  Finish it off with a frame or tack it to a cork board.  My project is happily framed at my uncle’s house.  What are some other ways to use stenciling?  Happy crafting!

March is National Craft Month!

Did you know that crafting gets an entire national month to itself?  I didn’t.  According to the Craft & Hobby Association (which I also didn’t know existed), March is National Craft Month. This was the best news I heard all week!  The CHA has a very handy downloadable  calendar and tips sheet with ideas on how to participate in a creative month of crafting.  Be sure to also check out the Do It Yourself section of Scissors & Sage!

Cre8time.org and #cre8time are ways in which you can become involved in National Craft Month.  As stated in their slogan, “Reclaim your creativity,” #cre8time is all about taking time to work on projects that might be living at the bottom of every to-do list that you write.  Maybe this means you will #cre8time for cooking more often, or hand-writing a letter to a friend.  It could even mean taking time to grow a few indoor plants with the changing season.

For this project, I enlisted the help of fellow Creative Arts Therapy friends.  As graduate students, we easily lose sight of the beauty in our artistic mediums (art, music, and dance/movement).  My hope for this project was to spread awareness about the importance of establishing time for crafting and creating, especially for those who greatly value this practice.  Exercising our creativity juices is what keeps our batteries (mostly) charged!

What will you #cre8time for this month?

Note: Click images to view in slideshow.

Valentine’s Card Crafting

If you should know one thing about me, it is that I love a good Valentine’s Day.  Perhaps it’s the sweet treats and baked goods, or perhaps it’s the fond memories of crafting shoebox mailboxes for collecting Valentine’s cards in elementary school.  Or perhaps it’s the many flowers.  Whatever it is, I certainly have a spring in my step come February 14th.  Now, I fully understand that Valentine’s Day is not for everyone (for some unknown reason).  If you are one of those people, it is my hope that I will help you enjoy, or at least tolerate, Valentine’s Day a little bit extra this year.

I recently had a few friends (and fellow creative arts therapy folk) over to my apartment for an afternoon of crafting and relaxing – two things that go very well together.  Our main project of the day was making Valentine’s and birthday cards for loved ones.  I really enjoy making cards for a few reasons.  First, it is a relatively easy crafting project that does not require much prep or clean up.  Second, making homemade cards is way more fun than paying $4.95 for a card at a store.  My trick is to peruse Paper Source every few months and take pictures of cards that I like.  Then I go home and make them myself!

Below are the cards I worked on for Valentine’s Day.  I decided to use the February 2013 issue of Better Homes and Gardens as my envelope material, and then cut colored note paper to match.  (I stopped subscribing to BHG; however, any craft magazine’s February issue would be appropriately themed, regardless of the year).  Here are step-by-step photos of my envelope-making process.  These can be cranked out rapid-fire once you get the hang of it!

Making an envelope:

  1. Choose a preexisting envelope and take it apart at the seams.
  2. Find an image from a magazine or newspaper that fits the unfolded envelope.
  3. Use a marker to draw a line around the unfolded envelope on the page.
  4. Cut around that edge.
  5. Use a bonefold to fold the image into an envelope shape.
  6. Tape the envelope sides shut using double-sided tape.

This heart stamp was created using a wine cork and an Xacto knife.  The key to a successful wine cork stamp is to make sure the design surface is flat.  Otherwise, the entire image will not transfer.  Leave a comment with any questions or suggestions for other crafty card designs.  These only skim the surface!

Thrifting With: Anne Kenealy

Victoria and I spend a lot of time in thrift stores. There’s nothing quite like that rare delight of finding the perfect kitchen chair or end table for only a few dollars. Far more often, though, I find myself wading through piles of legless tabletops and stained armchairs, wondering if I have the time, elbow grease, and expertise needed to transform a long-unloved piece of furniture into something beautiful and useful.

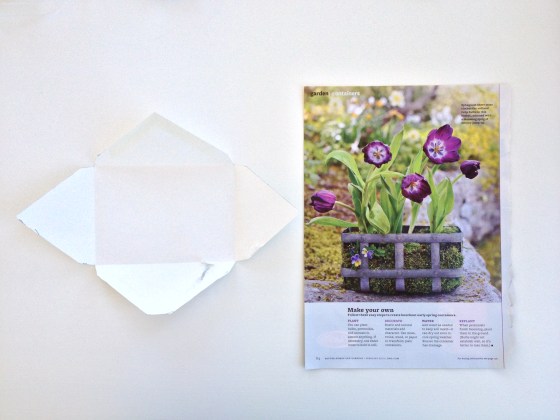
A few summers ago, I was wandering through a thrift shop in Platteville, Wisconsin, where my family keeps a hobby farm. In the rural Midwest, folks tend to hang on to their belongings for a long time, resulting in a local thrift shop filled with decades-old treasures. I happened upon this desk:

It was covered in chipped faux-bois veneer and the drawers didn’t close just right. However, I had borrowed the pickup truck, I had a spot to stow the desk until I could get around to working on it, and it was only $3. Perhaps most importantly, it was summer, so I had time to kill and an apartment to fill when Victoria and I moved to Philadelphia a few months later.

With my wise father and Google as dual advisors, Victoria and I set to work painting and restoring The Desk. Because its veneer is plastic, getting a few even, thorough coats of paint took some ingenuity, but a project similar to this one is easily doable in a few hours over a couple of days.

Materials:

If you’re a furniture-refurbishing wizard, you already know: clean, sand, clean, prime, clean, paint. However, if, like me, you run with the Design*Sponge-ogling common folk and the list of materials above was enough to make you decide against this project, don’t turn away just yet. This project is simple and yields great results.

  1. You’ll first want to clean the piece thoroughly with TSP. Because TSP is such a powerful cleaning agent, it is recommended that you wear rubber gloves and work in a well-ventilated space. We used the great outdoors. (It is also recommended that you don’t walk into a home improvement store asking for “trisodium phosphate” like we did. No one seems to refer to TSP by its full chemical name, and our clerk looked at us like we were Walter and Jesse back for a re-up.)
  2. Using fine sandpaper, rough up every surface you intend to paint. With a plastic veneer, this step might be the most painstaking of the entire project, but it pays to sand well. The better you sand a surface, the more likely the spray paint is to stick.
  3. After sanding, clean the piece once more with TSP, then run a tack cloth over the whole thing to remove any grit or dust. If you intend to prime later, wipe the piece down with a tack cloth once more just prior to priming. It really pays off.
  4. If you want the legs or drawer pulls of your piece to remain untouched by spray paint, remove them or cover with painter’s tape. Then spray an even coat of primer over every surface you intend to paint. Attaining the “even coat” was a process, so it helped me to practice on a sheet of newspaper first. Let dry for a few hours or overnight.
  5. Once the primer has dried, run a tack cloth over the piece again. Spray a thin, even coat of paint, taking care not to linger too long in any given spot. With each coat, it is better to apply too little paint than too much. Let dry for a few hours or overnight.
  6. If you have overapplied paint anywhere, you can sand down the pools or bubbles that may have formed and then clean any dust away with a tack cloth. Then apply a second coat of paint, attending to the bottom of any overhangs and the edges of drawers.
  7. Once dry, make sure the richness of the color is consistent and that the satin shine is even across the piece. If you feel you need a third coat of paint, feel free to apply. (This may require a second can of paint, depending on the size of your piece.)

Ta-da!

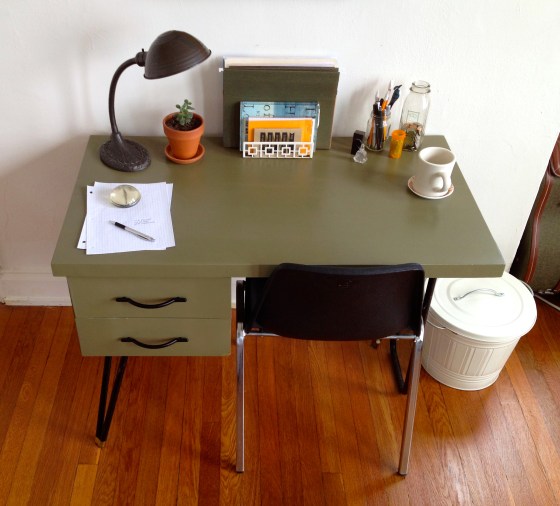
To add a nice finishing touch to this desk, we asked my dad to polish the tips of the legs with Brasso and some fancy buffer tool that I don’t pretend to know how to use. The most exciting part of this project was finding drawer pulls that suited the style of the desk; we discovered  Menards had a nice selection.

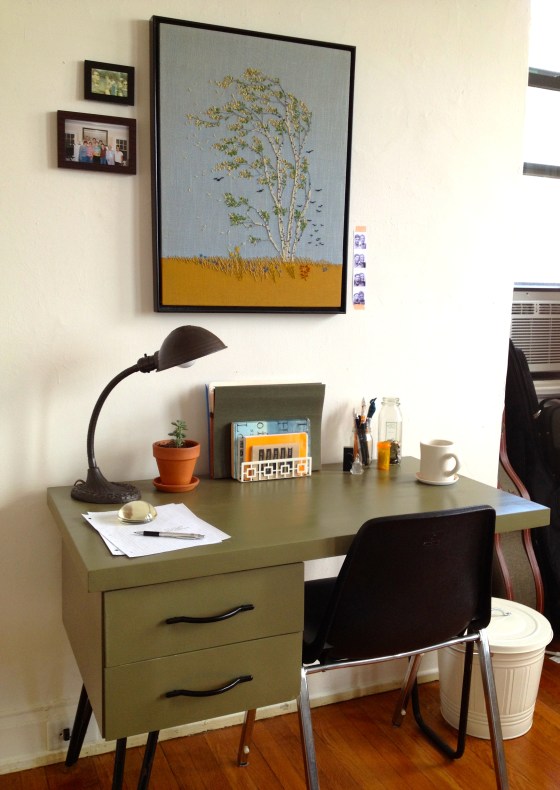
The chair isn’t a perfect fit for the desk, but it was $5 at Uhuru, a thrift shop around the corner from our apartment. Victoria and I found the birch tree needlepoint at the Platteville Thrift Shop on a later trip, and spray painted the frame a glossy black. The antique desk lamp has a cast iron base and is on loan from my dear old ma.

A refurbishing project like this one may seem labor-intensive, but the payoff is great. Here’s to more lonely thrift store cast-offs receiving similar treatment!

-Anne