Adventures in Greece & 10 Greek Tips

Good news: We found our next home! Phew. I am so excited to get to know a new neighborhood (East Passyunk!) and rearrange furniture to my heart’s content. It’s larger than our current apartment by about double, and it offers amenities we’ve never had before: Central air! Washer and dryer in unit! Second bedroom! DISHWASHER!

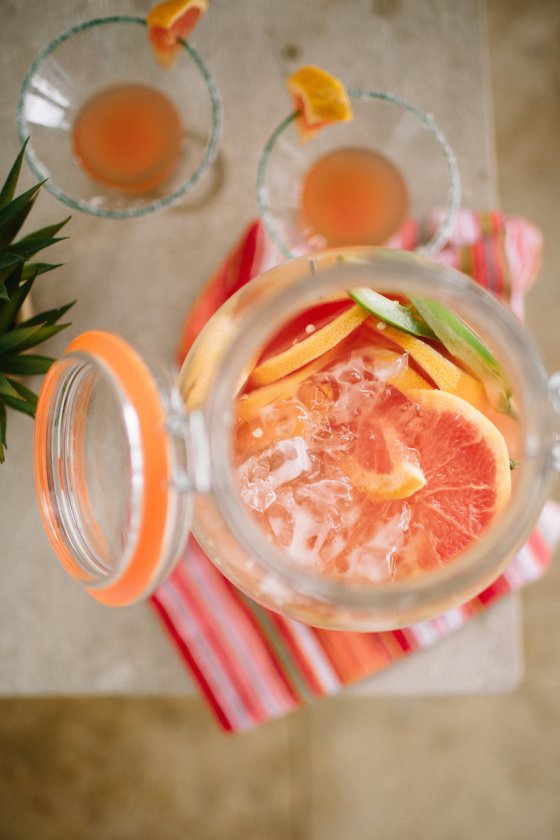
Until then, you can find me on the living room floor, purging old papers and slimming down craft supplies such as scrap paper and saved ribbons from gifts past. (It’s official. I’m a crafting hoarder.) Organizing my embroidery thread box was nearly the death of me, but now it looks GOOD. We’re also going to visit Anne’s family in Chicago for the next week! I think a Cubs game and a trip to the family farmhouse in Wisconsin will do us some good.

While we were in Greece, we took a lot of pictures, and below are some of my favorites. I hope that they give you a little flavor of our three weeks away. Our destinations included Athens and six Greek islands: Paros, Antiparos, Naxos, Koufonisi, Santorini, and Crete. If you have any questions at all about my pictures (like where exactly they were taken), please leave a comment below! I’d be more than happy to give you specific details.

Also below you will find my “10 Tips for Traveling Greece.” I did a lot of research before leaving Philly about all kinds of Greek things. These ten tips are ones that I did not find elsewhere. If you are planning a trip to Greece (which you should REALLY do), I hope these recommendations help!

  1. Bring a sturdy pair of sunglasses. Athens and the Greek islands are incredibly bright–both from the intense sun and the white, reflective architecture.
  2. Pack shoes with traction. Many streets in Greece are made of marble, which is surprisingly slippery.
  3. The metro system in Athens is the most efficient I have ever experienced. Taking it to and from the airport, or to and from Piraeus (the main port in Athens) is very easy.
  4. It might be wise to book ferries for late morning/early afternoon. Early morning ferries require a very early start time, while ferries too late in the day will require you to navigate your next destination in the dark.
  5. The smaller the Euro bills, the better. Paying with bills over 10€ can be tricky at times. If you have 50s on you, break them in places like supermarkets or museums.
  6. Tipping about 8% in restaurants is normal and expected.
  7. Bring your own water bottle when eating out. It is much cheaper to purchase it from a corner store or supermarket than it is to purchase it at the restaurant.
  8. Bread is often an added expense at restaurants (0.50-2€/person). If you do not want/need bread, leave it on the table untouched and it shouldn’t be added to the bill. If you are gluten free/allergic, ask for them to not bring the bread as the host is seating you.
  9. That being said, dips do not come with bread/pita. So if you plan on ordering a dip, hold onto your bread because you will want every last piece of it. (The dips and hummus in Greece are unbelievably tasty.)
  10. Know that everything will work out. Prepare yourself, be organized, and pack as little as humanly possible. The less you need to lug up and down cobblestone streets the better. Bring Woolite to hand wash clothes, or find a local laundromat for a few Euros. Less luggage = happier traveler!

Have a great week!

Picking Favorites: Recipes for Summer

Γεια σας! That means “hello” in Greek, and is pronounced “yassas.” I also learned how to say “cheers,” “good morning/evening,” “yes/no,” a couple of dog commands (random, I know), and other nifty things to get around Greece. It was a funny thing, traveling around a country where the alphabet is fundamentally different from English. Anne quickly became good at deciphering words letter by letter to find our way around. We felt like detectives!

It’s hard to believe that our long-awaited trip to Greece has come to an end–but what a trip it was! I’m not even sure I know where to begin, and my thoughts on the whole thing aren’t fully formed yet. I’ll say this: It was incredible. Beautiful beyond belief, really, and the people we met were so hospitable and kind. Life in Greece has a different pace to it than in the U.S., and we quickly fell into its slower rhythm. The food is healthy and locally grown, and the hot sun and salt water–oh, the salt water!–were nourishment for the soul.

Now back in Philly, I am trying to hold on tightly to some of these ways of life. I write my to-do lists on smaller pieces of paper; I buy fruits and veggies from the local market; I take a break in the afternoons. These things, for now, are keeping me relaxed and mindful. Next week, I’d like to share a few photos and stories from our trip with you, as well as some travel tips that I jotted down along the way–helpful hints that I didn’t know going into our trip.

Two things on the forefront: 1) I’m featuring a fun giveaway at the end of next month. Stay tuned for how you can enter! 2) Anne and I are in the process of looking for a new apartment in Philly. We’ve been talking about finding a new home for a few months now, and we’ll be making the move in about a month! Fingers crossed we find just the right spot for us to continue growing.

As I catch up on Martha Stewart Living and Bon Appetit, I’ve been inspired by all kinds of summer recipes. I’m a little behind the eight ball from being away (i.e. I’m just now reading about “Ten fun ideas for the Fourth!”), but now I can dive into seasonal dishes. Below are some that I’d like to give a try. Enjoy!

Recipes for Summer

Corn and Fregula with Halloumi (Greek!) Cheese from Bon Appetit (click here for the recipe)

Grilled Chicken with Lemon and Thyme from Food & Wine (click here for the recipe)

Tomato Cucumber Avocado Salad from Green Valley Kitchen (click here for the recipe)

Grilled Beet Baba Ghanoush from Bon Appetit (click here for the recipe)

Herbed Summer Squash Pasta Bake from Smitten Kitchen (click here for the recipe)

Iron Skillet Peach Crisp from Bon Appetit (click here for the recipe)

Grapefruit-Jalepeno Margarita from Camille Styles (click here for the recipe)

DIY Gardening: Starting Seeds in Recycled Egg Cartons

Good news: Ellen Drews is joining us for another gardening tutorial! Last spring, Ellen shared her DIY container gardening technique (pictured below). Today, she’s going to teach us how to start our own seeds in egg cartons! Have you ever done something like this before? I can’t wait to give it a try!

Before we get to her wonderful post, I did want to take a second to let you all know that Anne and I leave for Greece tomorrow! (Follow me on Instagram to see some pictures of our trip.) We will be home in three weeks, and I’ll be back to blogging in late July with more projects, recipes, and some pictures from our trip. I’ve got an exciting collaboration and giveaway coming your way later this summer!

Without further ado, Ellen:

As a backyard vegetable gardener in Somerville, Massachusetts, I am always cooking up ways to feed my gardening addiction on a tight budget. I love finding ways to use recycled materials to grow my vegetables safely in the city. This year in my container garden, I decided to see the process from start to finish. I was going to start my own seeds in my own DIY greenhouses: egg cartons!

Starting seeds indoors is an important concept for vegetable gardening. There are some vegetables that prefer to grow right where they’re planted (i.e. cold-tolerant plants like spinach, or delicate root-crops like carrots). For these crops, I put seeds directly into my container garden as soon as the soil has thawed.

Other plants must be started indoors and then transplanted to the outdoor garden as seedlings, such as tomatoes, peppers, eggplant, and basil. These warm-season crops evolved in hot climates with longer growing seasons and so they have a long, leisurely lifespan. Where I live in New England, we can have frosts as late as Memorial Day, which would most likely kill a seedling before it had a chance to bear any fruit—the ultimate prize of the tomato plant. Starting tomato seedlings indoors as early as April allows you to get your plants going so they will reach fruiting maturity by midsummer.

Seedlings are available for purchase at farmers’ markets, grocery and hardware stores, and big-box stores like K-Mart. However, there are awesome benefits to starting from seeds:

  • Choose varieties! There are thousands of beautiful heirloom seeds out there and many cool ones are available through seed companies with the mission of saving these varieties (Seed Savers Exchange, Hudson Valley Seed Library, High Mowing Organic Seeds, and Baker Creek Heirloom Seeds are some of my favorites).
  • Save money on fancy organic seedlings and use the seeds you already have. I’m still using seeds that I bought or traded two years ago (with proper storage, seeds can last up to 5 years).
  • Avoid the pitfalls of buying cheaper, mass-distributed seedlings at stores like Home Depot and K-Mart. Devastating diseases can spread across the country via these discount seedlings. For example, in 2009, late blight on tomatoes spread across the east coast because many people bought tomato seedlings from K-Mart, Walmart, and Lowe’s—all of which carried a fungus originating in a handful of greenhouses in Alabama. (Read one article about it here.)

So, now that you’re convinced that starting your own seedlings at home is a good idea, I’ll show you how I started mine this year!

Starting Seeds in Recycled Egg Cartons

Materials:

  • Plastic or cardboard egg cartons, empty (avoid Styrofoam or heavily inked cartons)
  • Nail or awl
  • Organic potting soil or mix (Look for varieties that contain compost. You want your seeds to access as many nutrients in their little cells as possible.)
  • Seeds!
  • Spray bottle or watering can with a gentle sprinkle

Step 1: Using the nail or awl, punch three holes in the bottom of each egg cell to allow excess water to drain.

Step 2: Fill the egg carton cells with the potting soil. Use your fingers to gently press divots into each cell and re-fill the divots with more potting soil. You want to give your seeds as much material in each cell as possible without compacting the soil. For many weeks, the nutrients in the soil will be all they will get so you’ll want to fill ‘em up!

Step 3: Put 1-2 seeds in each cell, following the directions on the seed packet for how deep to put them (it will be under “seed depth”). Cover with a light topping of potting soil.

Step 4: Soak the cells with water using a spray bottle or a gentle sprinkle of water. You want water to drip out of the holes at the bottom of the egg carton to ensure that you have really soaked all the soil. BUT you also want to be careful that you don’t dislodge the seeds or compact the soil so it’s important to be gentle when watering!

Step 5: Place egg carton seed-trays indoors in a sunny window or under grow lights. Seeds should germinate in about a week! I also got fancy and used the lid of the egg carton to create a greenhouse effect over my seeds. The plastic roof kept moisture in and trapped some heat from the sun. I also punched holes in this “greenhouse” roof to keep things from getting way too humid in there.

Here’s what my tomatoes and tomatillos looked like after they grew up a bit! Now that it’s June, it’s a bit late for starting tomatoes, peppers, and eggplant like I did here, but it is a great time to start seeds for fall crops such as broccoli, cabbage, collard greens, chard, fennel and kale.

And here’s what my garden looks like today!

Leave a comment if you’ve found other ways to use recycled materials in your garden!

Note: All photos were taken by Ellen Drews.

DIY Travel Backgammon & Checkers

As Anne and I get ready to leave for Greece (8 days!), I’ve decided that our packing list should include games we can play on our trip. Playing cards are a no-brainer, but I was curious how I might go about creating a travel-friendly backgammon and checkers board. Backgammon is widely popular in Greece, so learning to play is something I’ve been very interested in. Checkers I already have down pat.

After scouring the Internet and a local art supply store to get ideas on how to make this vision a reality, I ultimately settled on a design that is freakishly easy. So easy that creating a blog post tutorial on it is almost cheating. I wanted to use materials I already owned, though, so creating two board games for $0 is a win in my book! The supplies are few, and the steps quite easy.

This board game takes up virtually no room in your travel bag, and is sure to be fun no matter where you are: a local taverna, the beach, your room, a long plane ride, etc.

DIY Travel Backgammon

Materials:

  • 8.5″ x 11″ chipboard (I purchased mine here)
  • Pencil
  • Sharpie marker
  • Ruler
  • 30 buttons, 15 each in two colors (or any other checker-type object)
  • 2-4 dice, depending on what style backgammon you are playing (or download this dice app if you’ll have wifi on your trip)

Step 1: Using a pencil and then a Sharpie, draw a thick line down the short side of the chipboard at 5 1/2″. To make this as accurate as possible, make a tick mark at 5 1/2″ on either long edge of the board. Then, connect the dots.

Step 2: Working outward from either side of the thick line, use a pencil to make six tick marks every 7/8″. There should be 24 tick marks in total.

Step 3: Use the ruler and Sharpie to begin creating the backgammon points (or triangles). Place the board in landscape position. The long edge closest to you I will call Side 1, and the farther long edge will be called Side 2. Connect the farthest left tick mark on Side 1 to the second most left tick mark on Side 2. This should create a diagonal line. Continue this across the board to create 12 parallel lines. Next, go back and create 12 more parallel lines going in the opposite direction (i.e. connect the second most left tick mark on Side 1 to the farthest left tick mark on Side 2).

Step 4: Create the two-toned backgammon board by filling in every other point with stripes. The points facing each other should be opposite colors.

DIY Travel Checkers

Materials:

  • See above! This board requires the same materials as backgammon, except only 12 checkers each.

Step 1: Turn over your brand-new backgammon board to the blank side of the chipboard. Create an 8″ x 8″ square using the ruler, pencil, and Sharpie.

Step 2: Make tick marks every 1″ along all four sides of the square. Create smaller squares by connecting all opposing tick marks. There will be 64 squares total.

Step 3: Create the two-toned checkers board by filling in every other square with stripes. No striped square should be touching another striped square.

P.S. Have you seen my DIY Scrabble game? It was the subject of an early blog post on Scissors & Sage, but it might be one of my favorite projects ever.

Print Your Own Recipe Cards

This week I decided to try something new and make my very own recipe cards! I’m the recent owner of a beautiful recipe box, so these cards are a natural accompaniment. While the process was painstaking at times, I am so happy with the end result. I used Microsoft Word to create my template, and I customized the nine colors you see above. I wanted to create a clean, distraction-free design for ease of writing. It’s up to you to add your own flare, whether it’s an artsy doodle of a delicious pie, or your own elegant hand lettering.

Let’s talk logistics. This recipe template is 4″ x 6″. (You can, of course, print it smaller or larger using the scale option when printing.) It’s best to print the cards on either text weight or cover weight paper. To print the card double-sided, first print page 1 of 1 only. Then, feed the same paper back into the printer and only print page 2 of 2. Once your recipe cards are printed, cut them, leaving a 2/8″ border on the left and right, and a 3/8″ border on the top and bottom. This will create an exact 4″ x 6″ recipe card.

These recipe cards are meant to be versatile. Print all one color, or print one of each! Use them for your own recipe collection, or give a whole blank set as a gift. The options are limitless!

Now, I want to see how you use your printed recipe cards! How will you fill them in? What are you cooking and baking this season? Share your cards on Instagram using #scissorsandsage and I’ll repost them!

Cantaloupe

Here is what the back of each recipe card looks like:

Click here to download and print Cantaloupe.

Honeydew

Click here to download and print Honeydew.

Strawberry

Click here to download and print Strawberry.

Sky

Click here to download and print Sky.

Licorice

Click here to download and print Licorice.

Blueberry

Click here to download and print Blueberry.

Lavender

Click here to download and print Lavender.

Salmon

Click here to download and print Salmon.

Asparagus

Click here to download and print Asparagus.

Don’t forget to share your recipe cards! I’d love to see how you fill yours in. Tag them with #scissorsandsage and I’ll repost them!